Jacksonville Guide to Aluminum Wiring in House Risks
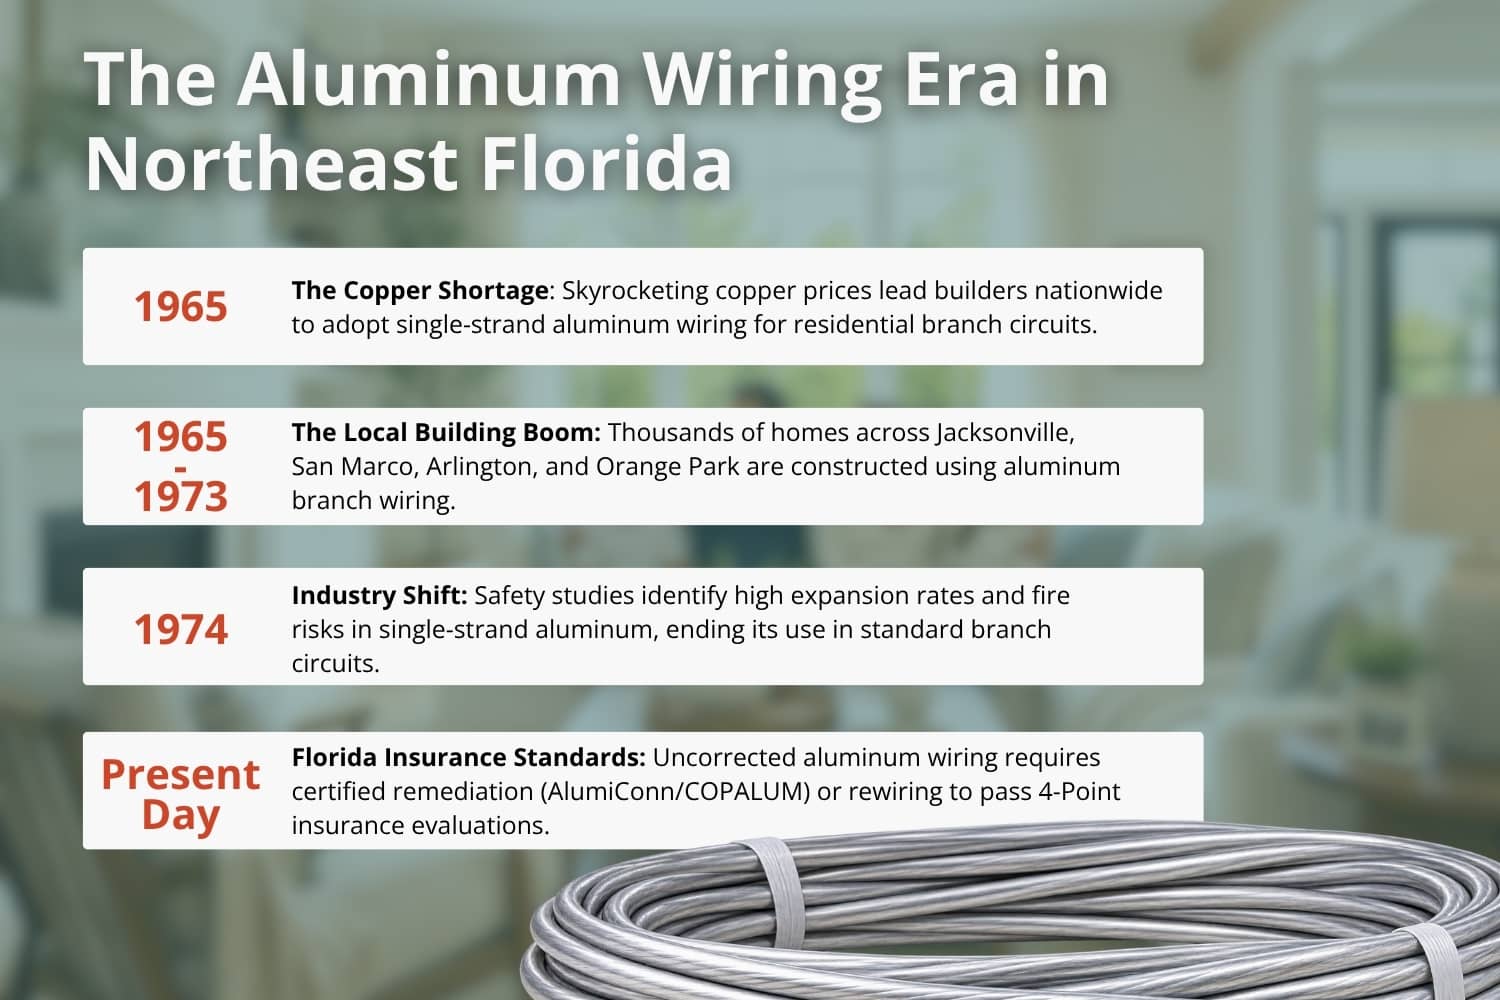
Buying or owning a home in Northeast Florida comes with a lot of excitement. From enjoying coastal breezes to settling into established neighborhoods, there is plenty to love. However, if your home was built between 1965 and 1973, you may face a hidden safety concern. Having aluminum wiring in house systems during this era was common across Jacksonville, Orange Park, and surrounding areas.
While aluminum carries electricity just like copper, single-strand aluminum wiring creates distinct safety hazards over time. As this wiring ages, it increases the risk of electrical fires and creates challenges for home insurance. Understanding how single-strand aluminum wiring works, why it causes problems, and what steps you can take will help keep your Northeast Florida home safe and insurable.
What Is Single-Strand Aluminum Wiring?
Single-strand aluminum wiring is a type of branch circuit wiring used in residential homes during the mid-1960s to the early 1970s. Builders used it as a low-cost alternative to copper during a time when copper prices soared. Branch circuits feed electricity directly to standard wall outlets, light switches, and light fixtures.
In Jacksonville neighborhoods established during that building boom, such as Arlington, San Marco, and parts of Westside, thousands of homes were wired using single-strand aluminum. While the metal conducts electricity well enough, it reacts very differently to heat and pressure compared to copper.
It is important to note that multi-strand aluminum wiring is still used safely today for main power feed lines and heavy appliance circuits. The primary safety concern centers entirely on single-strand branch wiring connected to everyday switches and outlets.
Why Having Single-Strand Aluminum Wiring in House Systems Creates Safety Risks
Single-strand aluminum wiring causes safety problems because of how the metal behaves inside electrical boxes over time. Unlike copper, aluminum expands and contracts rapidly when electric current flows through it.
Here are the main reasons why single-strand aluminum wiring creates hazards in homes:
High Thermal Expansion: Aluminum expands much more than copper when heated. Every time you turn on a light or plug in a vacuum, the wire warms up and expands. When turned off, it cools down and shrinks. This constant movement causes connections at switch terminals and outlet screws to loosen over time.
Oxidation and Rust: When aluminum meets oxygen, it forms aluminum oxide. Unlike copper oxide, which still conducts electricity, aluminum oxide acts as an insulator. This buildup creates electrical resistance, which generates excess heat inside wall boxes.
Metal Creep: Aluminum is a softer metal than copper. Under the constant pressure of a screw terminal inside an outlet, the wire gradually reshapes and flattens out. This process, known as creep, leads to loose electrical connections.
Electrical Arcing: Loose wires combined with high resistance cause electricity to jump across gaps. This jump is called an arc. Arcing creates extreme temperatures that easily melt plastic outlets, ignite wall insulation, or cause hidden fires behind drywall.
Over time, these combined issues turn simple everyday electrical use into a serious fire hazard hidden behind your walls.
How Aluminum Wiring Compares to Copper Wiring
To see why single-strand aluminum needs extra attention, it helps to compare its physical traits directly with copper wiring.
Up to 55 times more likely to reach fire conditions
Insurance Status
Accepted by all insurance carriers
Requires special inspections or approved repairs
These stark differences explain why insurance companies treat single-strand aluminum as a high safety risk and why proper evaluation is essential for your home.
Signs You May Have Aluminum Wiring in House Installations
You cannot always see the wires behind your walls, but several signs suggest your home might have single-strand aluminum wiring.
First, check the age of your house. If your Jacksonville home was constructed between 1965 and 1973, there is a strong chance aluminum branch wiring was used. Second, check for these warning signs around your home:
Wall switch plates or outlet covers that feel warm or hot to the touch.
A strange burning plastic smell near light switches or wall plugs.
Lights that flicker or dim randomly when small appliances turn on.
Outlets or switches that stop working for no obvious reason.
A soft buzzing or sizzle sound coming from inside switch boxes.
Static or interference on audio equipment and televisions.
If you open your main electrical panel or look at exposed wiring in the attic, you may see stamped markings on the plastic wire jacket. Look for letters such as AL, ALUM, or ALUMINUM stamped every few feet along the outer sheath.
Florida Home Insurance Challenges with Aluminum Wiring
Securing home insurance in Florida requires extra effort, and having aluminum wiring in house circuits makes it even more challenging. Insurance companies across Duval County, St. Johns County, and Clay County closely review electrical systems before issuing policies.
Most Florida home insurance carriers require a specialized 4-Point Inspection for homes older than 20 years. During this 4-Point inspection, the inspector examines four critical systems: the roof, plumbing, HVAC, and electrical wiring.
If single-strand aluminum wiring is present, many insurance carriers will refuse coverage until the system is evaluated by a licensed professional or repaired using approved remediation methods. Insurance companies view uncorrected aluminum wiring as a high risk for electrical fires. Leaving it unaddressed can result in policy denial, non-renewal, or significantly higher premium rates.
How Home Inspectors Find Aluminum Wiring Risks
A standard visual home inspection offers a great start, but thorough property inspectors use advanced technology to spot hidden electrical hazards without damaging your walls.
During a professional inspection, your inspector will remove panel covers, inspect branch wiring connections, and look for signs of overheating. They will also verify whether any past repairs were done using proper, safety-tested methods or dangerous DIY fixes.
Using a Thermography Inspection (thermal imaging) adds an extra layer of protection. Infrared cameras detect hidden temperature differences behind walls, inside switch boxes, and across breaker panels. Because loose aluminum connections generate heat long before they smoke or spark, thermal imaging spots hot spots invisible to the human eye. This gives you clear answers about your electrical safety before a small issue turns into a real emergency.
Safe Fixes for Aluminum Wiring in House Systems
If your home has aluminum branch wiring, you do not always need to tear down your drywall to replace every single line. Modern engineering provides safe, approved solutions that bring your home up to safety standards without a total teardown.
Here are the primary ways to address single-strand aluminum wiring safely:
1. Complete Home Rewiring
Replacing all single-strand aluminum branch wiring with modern copper wire is the permanent solution. While this is the most costly and invasive option, it eliminates the risk and provides total peace of mind. It also makes getting home insurance fast and straightforward.
2. COPALUM Crimp Connectors
The COPALUM connector method uses a special crimping tool to attach a short piece of copper wire (a pigtail) to the end of the aluminum wire. The copper tail then connects safely to standard wall outlets and switches. This system creates a cold-weld connection that prevents oxidation and loosening. It requires an electrician certified specifically for this specialized system.
3. AlumiConn Connectors
AlumiConn lug connectors offer another widely approved method for pigtailing. Each wire enters its own separate port with a mechanical screw coated in a special antioxidant gel. This prevents the aluminum and copper wires from touching directly, stopping galvanic corrosion and keeping connections secure.
4. CO/ALR Devices
In smaller projects, replacing outlets and switches with devices specifically labeled CO/ALR (meaning Copper/Aluminum Revised) helps improve safety. These devices use materials designed to expand and contract at rates similar to aluminum. However, this is usually considered a temporary fix rather than a full system remediation for insurance purposes.
Warning: Never use standard twist-on wire nuts (even wire nuts filled with antioxidant grease) to connect aluminum wire directly to copper wire. Standard wire connectors loosen quickly and represent a major fire hazard.
Related Questions to Explore
What other electrical and structural issues do insurance companies look for during an inspection?
Beyond wiring, insurance providers often require a 4-point inspection to evaluate the age and condition of the roof, heating and cooling system, and plumbing lines. Outdated electrical panels, polybutylene pipes, or older roofs can trigger similar insurance hurdles.
How can inspectors detect hidden home defects without tearing open walls?
Thermal imaging inspections use infrared technology to detect subtle temperature changes behind walls and ceilings. This non-invasive tool helps spot missing insulation, hidden plumbing leaks, moisture intrusion, and dangerous electrical hot spots early.
What additional specialized inspections should home buyers consider in Northeast Florida?
Standard home inspections cover major structural and mechanical systems, but specialized checks offer deeper protection. Adding sewer scope inspections checks main drain lines for blockages, while mold inspections and wind mitigation assessments help identify hidden environmental hazards and qualify buyers for insurance discounts.
How does moisture impact older homes in Jacksonville?
Coastal humidity and heavy rainfall can degrade exterior cladding over time. Professional stucco inspections and moisture testing help detect trapped water behind walls that leads to wood rot, structural framing damage, or poor indoor air quality.
When to Call a Professional
Dealing with electrical safety is never a DIY job. If you live in or are planning to purchase an older home in Jacksonville, St. Augustine, or surrounding Northeast Florida communities, scheduling a professional inspection is the safest first step.
You should contact a professional property inspector if:
You are buying or selling a home built between 1965 and 1973.
Your home insurance company is requesting a 4-Point Inspection or an electrical certification.
You notice warm switch plates, flickering lights, or burning plastic odors near outlets.
You want to evaluate previous electrical work to ensure it meets modern safety standards.
Professional inspectors deliver clear, detailed reports that give you the exact information you need to make smart home repairs and protect your property investment.
Ensuring Electrical Safety in Your Northeast Florida Home
Understanding the risks associated with single-strand aluminum wiring in house setups gives you the power to take smart, proactive steps. While uncorrected aluminum wiring presents real fire hazards and insurance challenges, modern remediation techniques make these systems safe and insurable once again.
If you are buying a home, preparing for an insurance review, or simply looking for peace of mind in your current house, expert guidance makes all the difference. Contact Inside & Out Property Inspectors INC. today to schedule a detailed home inspection, 4-Point inspection, or thermal imaging assessment across Northeast Florida. Our team helps you spot hidden issues early so you can keep your home safe, comfortable, and fully protected.
https://insideandoutpropertyinspectors.com/wp-content/uploads/2026/09/Jacksonville-Guide-to-Aluminum-Wiring-in-House-Risks.jpg10001500BJ Johnsonhttps://d39oyu4lp7snwz.cloudfront.net/wp-content/uploads/sites/54/2019/08/31171419/io-favicon-300x300.pngBJ Johnson2026-09-02 13:26:352026-09-16 20:53:32Jacksonville Guide to Aluminum Wiring in House Risks
A sagging door is one of the most common and fixable home maintenance issues, but it can also be a warning sign of something more serious. Here is how to diagnose the cause, apply the right fix, and know when the problem goes beyond a simple DIY adjustment.
Why Doors Sag
Doors do not sag randomly. There is always a cause, and identifying it correctly determines whether you can fix it in ten minutes or whether you need a professional.
The most common culprits are:
Loose or worn hinge screws. Daily use gradually loosens the screws that anchor hinges to the door frame. Even one loose screw shifts the door’s weight distribution and causes it to drop out of alignment. This is the single most common cause of door sag.
Stripped screw holes. When screw holes in the door jamb become enlarged from repeated tightening and loosening cycles, screws spin without gripping. The door then swings freely, creating an increasing sag over time.
Worn or damaged hinges.Hinges themselves can bend, corrode, or wear thin, particularly on heavy doors or doors with high traffic. A bent hinge cannot hold the door in position, regardless of how tight the screws are.
Paint buildup behind hinges. Multiple layers of paint behind hinge plates prevent the hinge from seating flush against the frame. Even a thin gap can throw a door out of alignment.
Humidity and wood movement. Wooden doors expand in humid conditions and contract when dry. This cycle can cause swelling, warping, and progressive misalignment, particularly on exterior doors in climates with pronounced seasonal moisture swings.
Foundation or structural movement. If the door frame itself has shifted, no hinge adjustment will permanently fix the sag. Foundation settlement, uneven floors, or significant structural movement will tilt the jamb and throw any door in that opening out of square.
Step-by-Step Fixes for a Sagging Door
Work through these solutions in order, starting with the simplest.
Step 1: Tighten the Hinge Screws
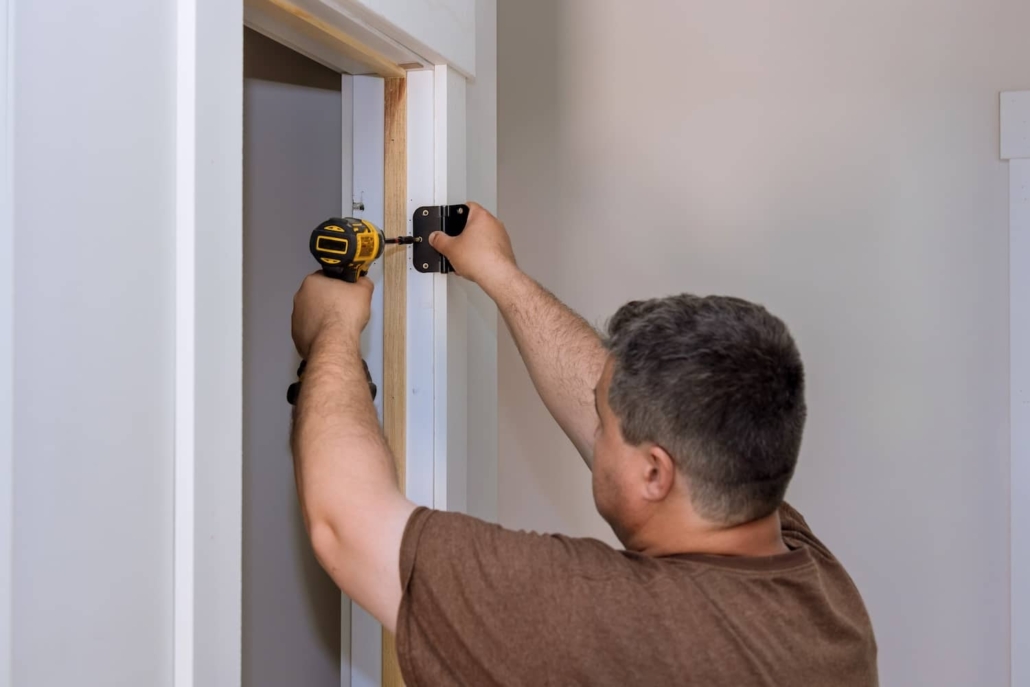
Use a manual screwdriver, not a power drill. A drill makes it easy to over-tighten, strip the wood, and make things worse. Tighten every screw on both the door-side and jamb-side of each hinge, starting with the top hinge. Even a half-turn on a loose screw can restore alignment.
Test the door after tightening. If it swings freely and latches properly, you are done.
Step 2: Fix Stripped Screw Holes
If screws spin without tightening, the holes are stripped. The simplest fix: coat several wooden toothpicks or matchsticks with wood glue and pack them firmly into the hole. Let the glue cure fully (at least an hour, overnight is better), then snap off the excess flush with the jamb and reinsert the screw. The compressed wood gives the screw fresh material to grip.
For a stronger permanent repair, use a wooden dowel of appropriate diameter, glue it in place, let it cure, trim flush, and drill a new pilot hole.
Step 3: Replace Short Screws With Longer Ones
Standard hinge screws are often only 3/4 inch long, reaching only into the door casing. Replacing the center screw on the top hinge with a 3-inch screw reaches through the casing and into the structural stud behind it. This gives the hinge a dramatically stronger anchor and distributes the door’s weight more effectively.
This single fix resolves many sagging door problems entirely and is worth doing even after tightening screws.
Step 4: Use Shims Behind the Hinge
If the door still hangs out of square after addressing the screws, shimming adjusts the depth at which the hinge sits. Remove the hinge screws on the jamb side, insert a thin cardboard or wood shim behind the hinge plate, then reattach the screws. This tilts the door slightly in the opposite direction of the sag. Start with a thin shim and test after each adjustment to avoid overcorrecting.
Step 5: Clean Paint Buildup
If hinges have accumulated paint layers over multiple paint jobs, strip the buildup with a putty knife or wood chisel before reinstalling. A hinge that cannot sit flush against the wood will hold the door out of position regardless of screw tightness.
Step 6: Adjust or Replace the Strike Plate
Once the door is properly aligned, the latch should line up with the strike plate opening without forcing. If the latch strikes high, low, or at an angle, loosen the strike plate screws and shift the plate in the direction needed. Tighten and test.
Step 7: Plane the Door Edge (Last Resort)
If the door still rubs or drags against the frame despite correct hinge alignment, the door itself may have warped or swollen. Identify exactly where it makes contact and use a hand plane or belt sander to remove a small amount of material from that edge.
Work slowly and test frequently. After planning, apply paint or sealant to any raw wood to protect against moisture absorption.
When the Problem Is the Frame
If you check for cracks or gaps where the door frame meets the surrounding wall, use a level along the jamb, and find it is not plumb, the frame itself has moved. A door opening that is out of square due to foundation settlement or significant structural movement cannot be corrected by hinge adjustments alone.
Signs that you are dealing with a structural issue rather than a hinge issue include: multiple doors and windows in the home sticking or binding simultaneously, cracks appearing in drywall near door and window openings, gaps between floors and baseboards, and visible separation at wall corners. These symptoms indicate that the issue extends beyond a single door.
When to Call a Professional
Most sagging door problems are genuinely DIY-manageable. But call a professional when:
The frame is visibly out of plumb and cannot be corrected by shimming
Multiple doors or windows in the home are sticking at the same time
You see cracks in walls or ceilings near the affected openings
The door is exterior, serves as a fire-rated separation, or is a security door that needs to latch reliably
You have tried the fixes above, and the sag returns within weeks
A recurring sagging door is one of the conditions that home inspectors note as a potential symptom of foundation or structural movement. If you are buying or selling a home with this issue, getting a professional assessment before attributing it to a simple hinge problem is the prudent approach.
Related Questions to Explore
How does Inside and Out Property Inspections recommend quickly fixing a basic sagging door? Tightening the hinge screws with a manual screwdriver and replacing the center screw of the top hinge with a three-inch wood screw resolves most minor hardware sags in about ten minutes.
Can a minor door sag noted on an inspection report be fixed without removing the door? Yes. Standard adjustments like tightening loose screws, inserting thin shims behind the hinges, or shifting the strike plate can easily be completed while the door remains securely on its hinges.
How do Inside and Out inspectors determine if a sagging door indicates a structural issue? Our inspectors look for systemic red flags rather than isolated hardware wear. We look for diagonal drywall cracks branching from frames, multiple sticking windows, and door jambs that are significantly out of plumb.
What are the typical repair costs if an inspection flags a sagging door? Simple DIY hinge repairs cost pennies, while a professional handyman typically can charge $75-150. However, if our structural assessment reveals a failing foundation causing the frame to shift, remediation costs will be much higher.
Why is it important to address a sagging door before selling your home? A sagging door never fixes itself and will only get worse over time. Catching hardware issues early prevents progressive damage to the jamb and keeps a minor maintenance item from looking like a structural red flag to potential buyers.
What a Door Can Tell a Home Inspector
During a property inspection, a sagging or sticking door is not always dismissed as a minor maintenance item. Home inspectors are trained to evaluate whether a door problem is isolated to the door hardware or indicative of a broader issue. At Inside and Out Property Inspections, we evaluate door operation as part of a complete assessment of the home’s structural and mechanical systems.
The National Fire Protection Association maintains standards for fire door operation and integrity, including requirements that fire-rated doors latch and close properly without obstruction.
A door that sticks on the latch side with no visible hinge issue, or a door in a newer home that has suddenly started sagging, warrants closer evaluation of the surrounding structure. Our inspectors document these findings clearly so you can make informed decisions about repair priorities.
Call or schedule online with Inside & Out Property Inspectors!
https://insideandoutpropertyinspectors.com/wp-content/uploads/2023/11/Fix-a-sagging-door.png9201500BJ Johnsonhttps://d39oyu4lp7snwz.cloudfront.net/wp-content/uploads/sites/54/2019/08/31171419/io-favicon-300x300.pngBJ Johnson2026-06-26 17:25:432026-06-26 20:51:50How to Fix a Sagging Door
When water pressure drops, the entire household will notice. Everything from taking a shower to running the dishwasher becomes frustrating. Low water pressure is a common issue in homes across the region, and while it may seem minor, it can point to larger plumbing concerns.
Understanding the cause is the first step. Whether it is a single fixture or a whole-house issue, there are practical steps you can take to improve water flow and protect your plumbing system.
What Counts as Low Water Pressure?
Typical household water pressure should fall between 40 and 60 psi (pounds per square inch). If you are seeing less than 30 psi or your fixtures struggle to deliver a steady stream, you may have a pressure problem.
Signs include:
Weak flow from faucets or showerheads
Washing machine or dishwasher cycles taking longer
Toilets refilling slowly
Sudden drops in pressure during use
Sprinklers not reaching full spray
Some pressure fluctuations are normal, especially during peak usage times. But consistent low pressure is worth investigating.
Common Causes of Low Household Water Pressure
1. Clogged or Corroded Pipes
Over time, mineral buildup or corrosion inside older pipes can restrict water flow. Galvanized steel pipes are especially prone to this. If your home was built before the 1970s and has never had a plumbing upgrade, old pipes may be to blame. Rust buildup can shrink the internal diameter of the pipes, restricting flow to showers, faucets, and even outdoor spigots.
2. Partially Closed Shutoff Valves
If a water valve inside or outside the home is not fully open, it can reduce flow. This often happens after plumbing repairs when valves are not reopened completely. Make sure both the main shutoff and water meter valve are in the fully open position.
3. Faulty Pressure Regulator
Some homes have a pressure-reducing valve (PRV) that controls water flow into the house. If it fails or malfunctions, your pressure could spike or dip suddenly. A failing PRV can lead to inconsistent water pressure throughout the home, and it often requires replacement by a professional.
4. Municipal Supply Issues
Sometimes the issue lies with the water supplier. Utility work, broken mains, or local regulations could affect the pressure in your home. Your neighbors may experience similar symptoms. If it is a municipal problem, a quick call to the utility company can give you clarity.
5. Leaks in the System
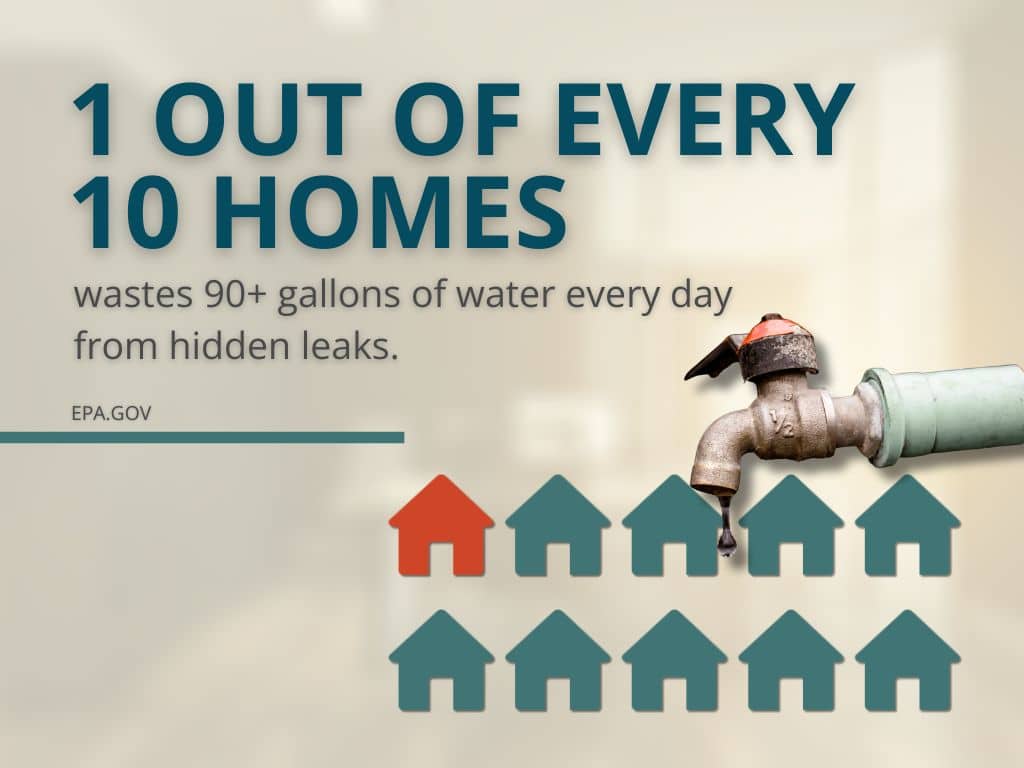
A hidden plumbing leak can divert water and cause pressure loss. About 10% of homes waste 90 gallons or more of water every day from hidden leaks
Look for signs like damp spots, high water bills, mold growth, or water stains on walls and ceilings. Leaks in underground supply lines can go undetected for months without regular inspection.
6. Dirty or Clogged Fixtures
Aerators on faucets and showerheads can collect debris or minerals that reduce water output. Cleaning or replacing these parts is an easy fix that restores pressure in a specific fixture.
7. Water Softener Malfunctions
If your home uses a water softener and it clogs or fails, it can restrict the flow of water through the system. Regularly check and maintain your softener according to the manufacturer’s guidelines.
How to Troubleshoot Low Pressure at Home
Start by identifying whether the pressure issue is isolated or throughout the home. That will help narrow down the cause.
Check individual fixtures. If only one faucet has poor pressure, clean the aerator or replace the showerhead.
Inspect shutoff valves. Make sure the main water valve and any fixture-specific valves are fully open.
Look for leaks. Monitor your water meter when no water is running. If the meter continues moving, you may have a leak.
Ask neighbors. If they also have low pressure, the issue could be with the municipal supply.
Check the pressure regulator. If your home has a PRV, it may need adjusting or replacing.
Evaluate your plumbing system. Old homes with mixed pipe types or DIY repairs might have pressure issues caused by poor system design.
If these steps do not resolve the issue, a full home inspection can reveal hidden problems that are not easy to detect without the right tools.
Other Maintenance Checks to Consider
Because low water pressure can signal larger plumbing concerns, this is a great time to schedule a full home inspection. During a standard inspection, we also check for:
At Inside & Out, we often find that water pressure issues lead homeowners to uncover deeper problems that need attention. That is why staying proactive pays off.
When to Call a Professional
Low water pressure is not always an emergency, but it should not be ignored. It can be a sign of outdated plumbing, slow leaks, or pressure imbalances that affect your water system and appliances over time. Left untreated, this can shorten the life of your water heater, dishwasher, and laundry equipment.
If you live in the Jacksonville area and are noticing consistent pressure drops or unexplained water issues, Inside & Out Property Inspectors can help. We provide detailed plumbing and home system evaluations so you can get to the root of the problem quickly and make informed decisions about your home.
Regular inspections are especially important in homes with older plumbing or if you are preparing to sell. Many buyers request water pressure tests during pre-sale inspections, and addressing issues early helps maintain your home’s value.
Related Questions
How can I test my water pressure at home?
You can use a simple pressure gauge that attaches to an outdoor hose bib. If the reading is under 40 psi, it may be time to investigate further.
Will replacing my pipes improve water pressure?
Yes, especially in older homes with corroded steel pipes. Upgrading to copper or PEX piping can improve flow and reduce long-term maintenance needs.
Is low water pressure dangerous?
Not usually, but it can be a symptom of hidden leaks, failing components, or supply problems. Addressing it early can prevent water damage or plumbing failure.
What does a home inspector look for in a plumbing system?
Inspectors evaluate pressure levels, check for leaks, examine visible pipes, and review fixtures for performance and safety. We also note materials used and highlight risks tied to older systems.
Does water pressure affect appliance efficiency?
Yes. Low pressure can make dishwashers and washing machines less effective, causing them to run longer and use more energy.
Conclusion
Low household water pressure might seem like a minor annoyance, but it can point to bigger issues inside or outside your home. Whether it’s aging pipes, a faulty valve, or something less obvious, ignoring it could lead to costly repairs later.
Inside & Out Property Inspectors offer thorough plumbing evaluations as part of our home inspection services. We help homeowners identify problems early, understand what’s going on behind the walls, and take the guesswork out of repairs. If you’re noticing pressure issues or planning to buy or sell a home, now’s a smart time to schedule an inspection.
https://insideandoutpropertyinspectors.com/wp-content/uploads/2025/07/Untitled-design-1.jpg10001500BJ Johnsonhttps://d39oyu4lp7snwz.cloudfront.net/wp-content/uploads/sites/54/2019/08/31171419/io-favicon-300x300.pngBJ Johnson2025-07-17 11:15:162025-07-17 11:15:16What Can You Do About Low Household Water Pressure?
Cleaning your laundry dryer lint trap is such an easy chore to forget. But skipping it can create bigger risks than most homeowners realize. Over time, a dirty lint trap in your laundry dryer can reduce efficiency, damage components, and even lead to dangerous fire hazards.
In this guide, we will explore why it is so important to keep your dryer’s lint trap clean and the hidden risks you may not think about.
How a Dryer Lint Trap Works
The lint trap, or lint screen, is designed to catch fibers and debris from clothing during the drying cycle. As clothes tumble, lint is released into the airflow. The lint screen captures this material to prevent it from reaching the vent system.
But even the best lint traps do not catch everything. Fine particles can still pass through and begin building up in the dryer vent ductwork over time, which is where bigger risks can develop.
Hidden Risks of a Dirty Lint Trap
1. Fire Hazard
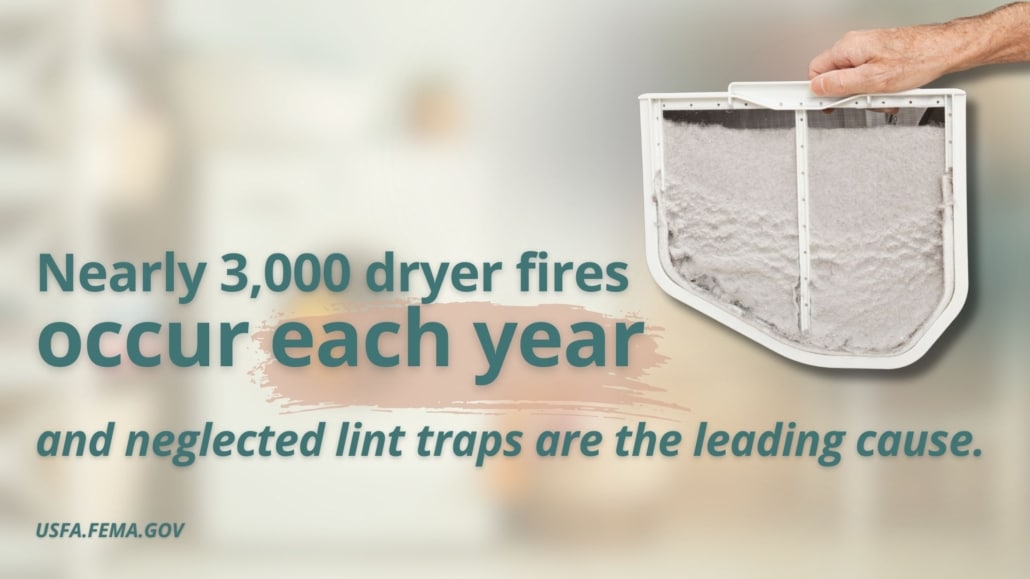
The number one risk of a dirty lint trap is fire. According to the U.S. Fire Administration, nearly 3,000 dryer fires occur each year, and failure to clean the dryer is the leading cause.
Lint is highly flammable. If airflow is restricted due to a clogged lint trap or vent, heat builds up in the dryer. All it takes is a spark or excessive heat to ignite the lint. A clogged vent can also trap hot air, increasing the risk even further.
2. Poor Dryer Performance
A clogged lint trap reduces airflow, forcing the dryer to work harder. You may notice:
Longer drying times
Damp clothes after a full cycle
Excessive heat buildup
The dryer shutting off mid-cycle due to overheating
Not only is this frustrating, but it wastes energy and drives up your utility bills.
3. Damage to the Dryer
Overheating from a blocked lint trap can cause premature wear on components like heating elements, thermostats, and motors. Over time, this can lead to expensive repairs or the need to replace the dryer entirely.
4. Moisture and Mold
When a dryer cannot vent properly, moisture builds up inside the dryer and in vent ducts. This can create an ideal environment for mold and mildew in the dryer and surrounding walls or laundry spaces.
5. Reduced Indoor Air Quality
Lint, dust, and moisture that escape from clogged vents can circulate back into the home, lowering indoor air quality. This is especially concerning for homes with allergy sufferers or respiratory conditions.
You should clean your dryer lint trap after every load of laundry! Simply remove the screen and wipe away lint. Also, plan a monthly deep clean to wash the lint screen with soap and water to remove buildup.
Skipping these simple steps allows lint to accumulate more quickly and reduces the trap’s effectiveness.
Finally, the dryer vent will need certain maintenance over the course of the unit’s lifetime, as well.
Have the dryer vent professionally cleaned once a year
Check vent hoods outside to make sure airflow is strong and not blocked
If you notice longer drying times, it may signal a partially clogged vent that needs attention
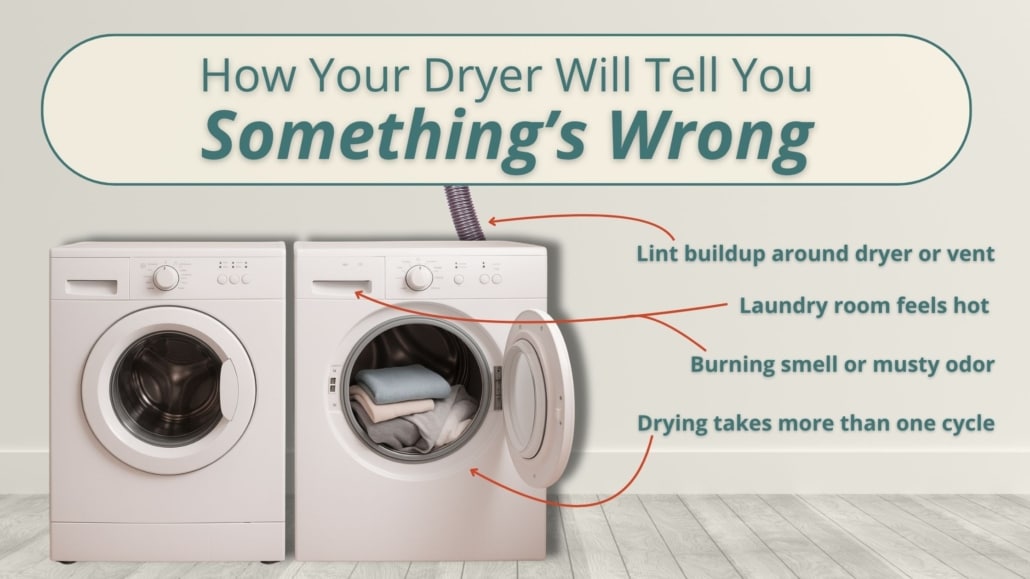
Signs of a Potential Problem
Clothes take more than one cycle to dry
The dryer or laundry room feels hot after running
A burning smell or musty odor during operation
Lint buildup around the dryer or vent outlet
If you notice any of these signs, it is time to have the system inspected.
When to Call a Professional
You should contact a home inspector or qualified technician if:
You are buying a home and want to ensure the dryer and vent system are safe
The current dryer is performing poorly
You have not had the dryer vent cleaned in over a year
You see visible lint buildup behind the dryer or around the vent
An inspection can identify hidden issues and help you correct them before they become costly or dangerous.
Conclusion
A dirty laundry dryer lint trap may seem like a small problem, but it carries real risks. From fire hazards to mold, poor air quality, and costly repairs, the consequences of neglecting this simple task can add up fast.
The good news is that with regular cleaning and professional inspections, you can keep your dryer running safely and efficiently. If you are buying or maintaining a home and want to be sure your systems are in top condition, book online with Inside & Out Property Inspectors today. Our inspections cover the small details, like lint traps and vent systems, that protect your home and family.
https://insideandoutpropertyinspectors.com/wp-content/uploads/2025/06/laundry-dryier-lint-trap.jpg10001500BJ Johnsonhttps://d39oyu4lp7snwz.cloudfront.net/wp-content/uploads/sites/54/2019/08/31171419/io-favicon-300x300.pngBJ Johnson2025-06-05 21:01:262025-06-05 21:01:26The Very Real Risks of a Dirty Laundry Dryer Lint Trap
Keeping your home safe starts long before you move in. One key element in manufactured homes that’s not talked about enough is the tie-down system. It anchors the home securely to the ground. Unlike site-built homes, manufactured homes are not permanently attached to a traditional foundation, making them more vulnerable to shifting soil or rough weather. This post will give you a closer look at what a tie-down system is, how it’s used in construction, and why every manufactured home needs one.
What is a Tie Down System?
A tie-down system is a safety feature designed for manufactured homes. These homes are built off-site and set on piers or blocks instead of permanent foundations.
They use a combination of anchors, straps, and stabilizers to firmly secure the home to the ground, providing the stability that traditional foundations offer site-built homes. Anchoring the home, tie-down systems protect it from shifting, lifting, or damage caused by high winds, heavy storms, or shifting soil conditions.
Without this in place, homes are at risk of moving or detaching during severe weather. In many areas, proper tie-down installation is legally required to meet safety standards, providing homeowners with peace of mind that their home is well-protected.
Tie-Down System Types for Construction of Manufactured Homes
Manufactured homes rely on several types of tie-down systems – frame, over-the-top, and combined systems – to ensure stability and safety. They’re each designed to address specific challenges posed by wind, shifting soil, or uplift forces.
Frame Anchors
These are attached directly to the steel frame of the home, between the home and the ground. They help prevent lateral movement and keep the home firmly in place, especially during strong winds or shifting soil conditions.
Over-the-Top Straps
Over-the-top straps run across the roof of the home and connect to ground anchors. This adds critical support against uplift forces that can occur during high winds or storms. They aren’t the most attractive but are ideal in high-risk areas where severe weather is common.
Stabilizing Plates and Ground Anchors
Ground anchors, often paired with stabilizing plates, are driven into the soil to hold the home’s anchoring system firmly in place. Stabilizing plates provide additional grip, especially in loose or sandy soil, helping to reduce movement and prevent the anchors from being pulled out of the ground.
Each component of the tie-down system works together to create a robust defense against natural forces, keeping manufactured homes secure and stable in various conditions.
How Tie-Down Systems Are Installed
Installing a tie-down system in manufactured home construction is a job for experts. It requires careful planning and precise execution. The process will look something like this:
1) Site Assessment before installation to assess the site conditions, including soil type and potential environmental factors that could impact stability. This helps determine the best type of anchors and straps to use.
2) Placement of Ground Anchors at strategic points around the perimeter of the home. The placement is critical and varies based on factors like soil conditions and local code requirements.
3) Attaching Frame Anchors and Straps go on frame-first to the home’s steel chassis. They create a strong connection between the home and the anchors. Over-the-top straps are then installed, running from one side of the home to the other and connecting to the ground anchors.
4) Securing with Stabilizing Plates to enhance the grip of the ground anchors so they remain firmly in place even in challenging soil conditions.
5) Inspection and Testing – Once the system is fully installed, a thorough inspection is conducted to ensure all components are secure and meet safety standards.
Benefits of a Proper Tie-Down
The primary purpose of a tie-down system is to keep your home anchored during severe weather, reducing the risk of damage and ensuring the safety of your family.
Also, well-installed and maintained systems meet local and federal building codes, which are often required for financing, insurance, and resale.
Finally, a reliable tie-down system protects the structural integrity of your home, minimizing wear and tear caused by movement, weather, or environmental stressors.
Signs of Tie-Down Trouble
Like any structural component, tie-down systems can wear out over time or become compromised due to environmental factors. Watch for these signs that your system may need attention:
Rust or Corrosion: Metal anchors, straps, or bolts can rust when exposed to moisture, which weakens the system’s overall strength.
Loose or Missing Components: Over time, bolts, anchors, or straps can become loose or detached, significantly reducing the system’s effectiveness.
Shifting Soil: Changes in soil conditions, such as after heavy rain or flooding, can affect the stability of ground anchors.
Other Recommended Maintenance for Manufactured Homes
Regular maintenance of your manufactured home’s tie-down system is crucial, but it’s also important to keep up with other areas:
Inspect Skirting: Check the skirting around your home for any signs of damage, gaps, or wear. Skirting helps protect the foundation and tie-down system from moisture and pests.
Maintain Proper Drainage: Make sure that water is draining away from your home’s foundation to prevent soil erosion, keep gutters clean, and make sure downspouts direct water effectively.
Check for Cracks or Gaps: Regularly check for any cracks promptly to prevent water intrusion.
Regular Foundation Inspections: Schedule routine checks of your home’s foundation and tie-down system to catch any potential issues early.
Monitor Soil Conditions: Be aware of changes in soil conditions around your home, especially after heavy rains or droughts. Shifting soil can affect anchor stability. Take corrective measures, like improving drainage or reinforcing soil with gravel or compact fill.
When to Call a Professional
If you suspect your tie-down system might be compromised or if your home has experienced severe weather, call a professional.
Certified inspectors, like those at Inside and Out Property Inspectors, are equipped to assess the condition of your tie-down system. The team can identify any weaknesses and recommend necessary repairs or adjustments.
Professionals should be called if you notice signs of wear, rust, or loose components, or if you’ve recently moved into a previously owned manufactured home that hasn’t been inspected.
Routine inspections by experts ensure your home’s tie-down system is compliant with safety codes and fully functional. For the best results, rely on professional inspectors to evaluate your tie-down system and ensure it meets all necessary standards.
Conclusion
Your tie-down system is essential in the construction of any manufactured home. They provide the stability and protection needed to withstand severe weather and other natural forces.
https://insideandoutpropertyinspectors.com/wp-content/uploads/2024/09/what-is-a-tie-down-system-in-construction.jpeg10001500BJ Johnsonhttps://d39oyu4lp7snwz.cloudfront.net/wp-content/uploads/sites/54/2019/08/31171419/io-favicon-300x300.pngBJ Johnson2024-09-26 16:18:132024-12-24 19:38:01How is a Tie Down System Used in Construction?
Keeping your home’s foundation safe from water damage starts with effective drainage. It’s an essential feature that directs water away, protecting the structure from problems and protecting your wallet from repair costs.
Every homeowner should feel empowered to select and maintain the best drainage system for their home, so we’ll cover it all in this post. Learn what foundation drainage involves, compare the different systems available, and get practical tips to keep the foundation worry-free.
Foundation Drainage Explained
Your foundation’s drainage system is designed to manage and redirect water away from the home. When water accumulates near the foundation, it can seep into the soil, creating pressure on the walls that may result in cracks, leaks, and potentially significant structural problems.
A properly functioning drainage system ensures water is moved away from the foundation, keeping it dry, stable, and prepared for long-term structural integrity.
Types of Drainage Systems
Firstly, exterior drainage systems are designed to prevent water from reaching your foundation. It works to redirect water away from the home and the common types can include:
Surface drainage uses shallow ditches or channels to divert water away from the home before it can reach the foundation.
French drains consist of a gravel-filled trench with a perforated pipe. They effectively manage groundwater, preventing saturation around the foundation.
Footing drains go at the base of the foundation, capture water, and channel it away from the foundation wall.
Conversely, interior drainage systems are used to manage water that has already entered the home. This is typically in basements or crawl spaces, so the most common systems are sump pumps and interior French drains.
A sump pump will simply collect and eject water that enters the home to keep it away from the structure.
Similarly, interior French drains manage water that seeps in and directs it to the sump pump or other drainage solution.
Lastly, grading is a fundamental method of natural drainage. It involves shaping the land around your home to ensure water flows away from the foundation, regardless of what other drainage system you choose to implement.
Common Drainage Issues
Even with a well-designed drainage system, problems can pop up and compromise it. These common concerns often result from poor installation, lack of maintenance, or natural environmental factors.
1) Clogged drains and pipes over time with debris like leaves, soil, or sediment. When blockages occur, water can’t flow freely away from the foundation, leading to pooling that increases the risk of water damage.
2) Improper grading or sloping of the ground around your home means water can pool near the foundation instead of being directed away.
3) Insufficient drainage capacity can lead to water backup, putting your foundation at risk.
4) Foundation settling or shifting over time due to natural soil movement. This movement can disrupt the drainage system’s effectiveness, allowing water to seep into areas where it shouldn’t.
5) Gutters and downspouts that are damaged, clogged, or poorly installed may allow water to spill over and collect near the foundation, leading to potential problems.
6) Tree roots can invade and block drainage pipes, reducing their efficiency. They can also disturb the grading around your home, causing water to pool near the foundation.
Drainage Tips and Other Maintenance
So, now you have an idea of the potential problems that can arise for any foundation drainage system. Don’t let it stress you out though – with a handful of regular maintenance steps and an eye for detail, you can avoid big headaches.
Clean the Gutters and Downspouts: Make sure they’re free of debris like leaves, twigs, and dirt. Clogged gutters can cause water to overflow and accumulate near your foundation, leading to potential damage.
Inspect and Clear Drains and Pipes: Periodically check your drainage systems, including surface drains, French drains, and sump pump systems, for any signs of blockages. Remove any debris that could obstruct water flow!
Check Out Your Grading: Inspect the grading around your home to ensure the ground slopes away from the foundation. If you notice any areas where water is pooling, consider regrading the soil to improve water flow and prevent water from seeping into the foundation.
Maintain the Sump Pump: Test your sump pump regularly to make sure it’s working properly. A malfunctioning sump pump can lead to water accumulation in your basement or crawl space, putting your foundation at risk. Consider installing a battery backup system to ensure your sump pump operates during power outages.
Monitor Trees and Vegetation: Tree roots can invade drainage pipes and disrupt grading, leading to water pooling near the foundation. If necessary, trim or remove trees and plants that pose a risk to your drainage system.
When to Involve an Expert
If you’re like most, you probably prefer to handle maintenance solo, when you can. However, in all these cases, a professional can offer a thorough inspection, identify the root cause of the problem, and provide the most effective solutions.
So, if you notice persistent issues, like water pooling near your foundation despite your efforts, it’s a sign that something more serious could be wrong. Cracks in your foundation walls, even small ones, can indicate underlying damage that requires expert evaluation.
Similarly, if you experience frequent sump pump failures or find that your drainage system isn’t coping with heavy rain or melting snow, a professional assessment will help.
Another red flag is when the grading around your home appears uneven or has shifted, causing water to pool near the foundation. Finally, if tree roots are encroaching on your drainage system or you suspect that they are, it’s time to bring in an expert.
Conclusion
To wrap up, protecting your home’s foundation from water damage is a big deal for ensuring long-term stability and avoiding costly repairs. There are countless benefits to securing solid drainage around your home, and various types of systems to choose from.
https://insideandoutpropertyinspectors.com/wp-content/uploads/2024/08/what-is-foundation-drainage_.jpeg10001500BJ Johnsonhttps://d39oyu4lp7snwz.cloudfront.net/wp-content/uploads/sites/54/2019/08/31171419/io-favicon-300x300.pngBJ Johnson2024-08-15 14:32:032024-12-24 19:46:57What is Foundation Drainage? Purposes, Types, and Tips
Choosing the right flooring for your home or business can be a daunting task with so many options available. SPC (Stone Plastic Composite) flooring has emerged as a popular choice for its durability, water resistance, and stylish designs. But is it the right fit for your space?
To make the decision less grueling, let’s take a closer look at SPC flooring, as well as its pros, cons, and recommended maintenance. Whether you’re renovating your kitchen, upgrading your office, or simply curious, you stand to benefit from understanding SPC flooring’s unique qualities.
What is SPC Flooring?
Stone Plastic Composite flooring is a type of luxury vinyl flooring that combines limestone and stabilizers to create a durable, multi-layered flooring option.
Unlike traditional vinyl, SPC flooring boasts a rigid core that enhances its strength and stability. It typically consists of several layers – a UV coating for protection, a wear layer for durability, a decorative layer for aesthetics, the SPC core for rigidity, and underlayment for sound insulation and comfort.
This makeup is what makes SPC flooring an excellent choice for areas with high foot traffic and potential moisture exposure. Think of areas like kitchens, bathrooms, and basements.
Pros of SPC Flooring
The unique composition and innovative design of this flooring option offer several advantages that make it a standout choice.
Durability and Water Resistance
SPC flooring is renowned for its toughness and ability to withstand heavy use. Its rigid core prevents dents and scratches, making it ideal for high-traffic areas. This flooring can last many years without significant wear, providing long-term value.
One of the standout features of SPC flooring is its waterproof nature. Unlike hardwood or laminate, SPC can handle spills and moisture without warping or damage, making it perfect for kitchens, bathrooms, and basements.
Easy Installation
SPC flooring uses a click-lock installation system, which simplifies the process and makes it accessible even for DIY enthusiasts. This method saves time and often doesn’t require glue or nails, allowing for a cleaner and quicker installation.
Quiet Comfort and Variety
The underlayment of SPC flooring adds a layer of comfort, making it softer underfoot compared to other hard flooring options. It also provides sound insulation, reducing noise levels and making it suitable for multi-story homes or office spaces.
SPC flooring comes in a wide range of styles, colors, and patterns, including realistic wood and stone looks. Variety allows homeowners and businesses to achieve their desired aesthetic without compromising on durability and functionality.
Cons of SPC Flooring
While SPC flooring has many advantages, it’s not without its drawbacks. It’s important to understand the potential drawbacks to determine if SPC is the right choice for a space.
Cost: While it offers many benefits, it can be more expensive upfront compared to other vinyl options. High-quality SPC products can come at a premium, which might be a consideration for budget-conscious buyers.
Temperature Sensitivity: Can be sensitive to extreme temperatures, leading to expansion or contraction. This issue can be mitigated with proper installation and acclimation, but it’s something to consider for areas with significant temperature fluctuations.
Hardness: Despite its many advantages, SPC flooring can be hard underfoot, which might not be comfortable for prolonged standing. This hardness is a trade-off for its durability and should be considered in spaces where comfort is a priority.
Limited Repair Options: If an SPC plank gets damaged, it often needs to be replaced entirely rather than repaired. Matching new planks with older, worn ones can also be challenging, potentially affecting the overall look of the floor.
Maintenance and Care for SPC Flooring
Maintaining SPC flooring is relatively straightforward, which adds to its appeal.
Regular Cleaning: Sweep or vacuum regularly to remove dirt and debris that can scratch the surface. Use a damp mop with a mild cleaner for deeper cleaning.
Prevent Scratches: Use furniture pads under heavy furniture to prevent scratches and dents. Avoid dragging furniture across the floor.
Handle Spills Promptly: Although it’s water-resistant, it’s still a good idea to clean up spills quickly to maintain its appearance.
Deep Cleaning: Periodically, consider deep cleaning your SPC flooring with a professional service to remove built-up grime and refresh its look.
When to Call a Professional
While many aspects can be handled by homeowners, don’t delay when it’s out of your reach. Knowing when to seek experts will keep the process more simple for you in the long run!
Difficult Installations: If your space has complex layouts or you’re unsure about the installation process, hiring a professional can ensure a perfect fit.
Significant Repairs: For major damage or issues that go beyond surface scratches, a professional can provide the expertise needed to restore your flooring.
Inspection: If you notice signs of expansion, contraction, or other unusual behavior in your flooring, a professional inspection can help identify and resolve the problem before it worsens.
Finally, schedule an annual maintenance check to address any minor issues before they become significant problems.
SPC flooring offers a compelling mix of durability, water resistance, and aesthetic appeal, making it a versatile choice for various spaces. However, weighing its pros and cons is crucial to determine if it fits your specific needs.
https://insideandoutpropertyinspectors.com/wp-content/uploads/2024/07/SPC-flooring.jpeg10001500BJ Johnsonhttps://d39oyu4lp7snwz.cloudfront.net/wp-content/uploads/sites/54/2019/08/31171419/io-favicon-300x300.pngBJ Johnson2024-07-17 17:17:592024-12-24 19:44:27What Are the Pros and Cons of SPC Flooring?
Well-maintained vinyl floors can transform a home, and keeping them that way doesn’t have to be an uphill battle. If you’ve found yourself muddling through knee-deep cleaning advice and product choices, you’ve landed in the right place. From homemade solutions to heavy-duty cleans, we’re about to share a rundown of your best cleaner options, steps, and ongoing tips to keep your vinyl floor fresher for longer.
A Note on Vinyl Floors
Vinyl flooring, best known for its resilience and versatility, is a standout choice for many homeowners. It mimics hardwood or tile at a fraction of the cost while offering impressive durability against traffic and spills.
The secret to its longevity lies in regular, proper care. The right cleaning approach not only enhances its appearance but also safeguards its lifespan, ensuring your floors remain a focal point of your home for years.
The 4 Best Vinyl Floor Cleaners
Whether you prefer the simplicity of a homemade cleaner or the robust power of professional-grade products for your vinyl floor, there’s an option tailored to your needs.
DIY Solution
A staple in eco-friendly homes, a mix of white vinegar and water offers a gentle yet effective cleaning solution. Combine one part vinegar with three parts warm water to create a cleaner that cuts through dirt and grime without leaving harmful residues.
Ideal for quick cleaning, this solution is perfect for maintaining the natural shine of your vinyl floors. For an extra boost, a few drops of essential oil can add a pleasant scent to your cleaning routine.
Eco-Friendly Commercial Cleaners
For those who prefer the convenience of store-bought products, eco-friendly options like Method and Better Life are effective and safe for homes with kids and pets.
This type of cleaner is specifically designed to be gentle on vinyl floor while offering a powerful clean for everyday dirt and spills. Their biodegradable formulas ensure you’re cleaning your floors without compromising the environment.
Heavy-Duty Cleaners
When confronted with stubborn stains, a more robust cleaner is necessary. Look for products formulated for vinyl flooring, such as Rejuvenate or Bona. These cleaners are engineered to tackle tough grime without damaging the floor’s surface.
It’s important to follow the instructions closely, as overuse can lead to dullness or damage. For the most stubborn stains, applying the cleaner directly to the stain before mopping can offer enhanced results.
Professional-Grade Steam Cleaners
For a deep clean or to tackle extensive areas, a steam cleaner can be remarkably effective. Steam cleaning uses high heat to kill bacteria and remove dirt, ensuring a thorough clean without the need for chemicals. However, not all vinyl flooring is suitable for steam cleaning.
Check with your flooring manufacturer or test in an inconspicuous area before proceeding to ensure the steam won’t warp or damage your floors.
The Path to Cleaner Vinyl Floors
Keeping your vinyl floors in pristine condition requires a blend of regular maintenance and the right cleaning techniques. Follow a regimen that looks a little like this, and you’ll be on the best track.
Daily Maintenance
Sweep or Vacuum: Begin each day with a quick sweep or vacuum to remove surface dirt, dust, and hair. Use a soft-bristle broom or ensure your vacuum is set to the “hard floor” setting to avoid scratches.
Immediate Spill Clean-Up: Address spills as soon as they happen with a clean, damp cloth. This prevents stains from setting in and keeps your floors looking new.
Weekly Cleaning
Choose Your Cleaner: Based on the current state of your floors, select the appropriate cleaner. The DIY vinegar and water solution works well for regular weekly cleaning.
Mop Gently: Using a microfiber mop, apply your chosen cleaner to the floor in sections. Rinse the mop frequently to avoid spreading dirt. Ensure the mop is damp, not wet, to prevent water from seeping into seams and edges.
Rinse if Necessary: If you’ve used a commercial cleaner, follow up with a clean water rinse to remove any potential residue, unless the product specifies no rinse needed.
Monthly Deep Clean
Inspect Your Floors: Before deep cleaning, inspect your floors for any tough stains or areas that need special attention.
Apply Heavy-Duty Cleaner: For stubborn stains identified during your inspection, apply a heavy-duty cleaner as directed. Allow it to sit on the stain for a few minutes before wiping away.
Consider a Steam Clean: If your floors are compatible with steam cleaning and need a deep clean, this is the time to do it. Ensure you use a steam cleaner suitable for vinyl floors and follow the manufacturer’s instructions closely.
Seasonal Check-Ins
Protective Measures: As part of your cleaning routine, reassess the need for protective felt pads under furniture and consider refreshing protective mats in high-traffic areas.
Professional Inspection: Once a year, consider having a professional inspection to identify any issues that might require expert care, such as deep scratches or peeling.
Other Recommended Maintenance Tips
Routine care extends beyond cleaning to include daily habits in the home too! Consider the following when caring for your vinyl:
Use Suitable Floor Mats: Invest in quality doormats at every entrance to reduce the amount of dirt and grit brought onto your vinyl floors. This simple step can significantly decrease the potential for scratches and wear.
Embrace Sunlight Protection: Prolonged exposure to direct sunlight can fade and discolor your vinyl flooring. Utilize blinds, curtains, or UV window films to protect your floors from sun damage, especially during peak hours.
Appropriate Furniture Handling: When moving furniture, always lift and carry rather than drag across the floor. This avoids potential scratching and gouging.
Humidity Control: Maintain a stable indoor humidity level to prevent vinyl plank flooring from warping or gapping. Ideal humidity levels are generally between 30% to 50%.
When to Call a Professional
Even with diligent care, there may come a time when professional services are needed for your vinyl floors. Here’s when it’s time to call in the experts:
Deep Scratches and Scuffs: If your floor has suffered deep scratches or scuffs that household remedies can’t address, a professional can repair or replace the affected sections, restoring the floor’s aesthetics.
Peeling or Lifting Edges: Should the edges of your vinyl flooring begin to peel or lift, it’s crucial to seek professional help. This issue can indicate adhesive failure or subfloor problems, which require expert repair to prevent further damage.
Water Damage: Vinyl is water-resistant, not waterproof. Flooding or persistent moisture can lead to water damage underneath vinyl floors, necessitating a professional assessment to prevent mold growth and structural issues.
Comprehensive Floor Revival: Over time, floors may lose their luster or become extensively worn in high-traffic areas. Professional refinishing services can rejuvenate your floors, by applying industrial-grade products for durability and shine.
When it comes to vinyl floor, you can expect it to continue providing beauty and resilience – the cleaner you keep it, the better. Whether opting for a homemade solution or professional assistance, the key to enduring shine lies in regular, attentive care.
If you have concerns about the condition of your floors or need to schedule an inspection of your entire home in Jacksonville, FL, and surrounding areas, call Inside and Out Property Inspections!
https://insideandoutpropertyinspectors.com/wp-content/uploads/2024/04/best-vinyl-floor-cleaner.jpeg10001500BJ Johnsonhttps://d39oyu4lp7snwz.cloudfront.net/wp-content/uploads/sites/54/2019/08/31171419/io-favicon-300x300.pngBJ Johnson2024-04-10 15:51:512024-12-24 19:42:02The 4 Best Ways to Get Your Vinyl Floor Cleaner Than Ever
When it comes to home improvement, certain tasks challenge your skills while rewarding you with a profound sense of achievement. Removing tile from a concrete floor certainly falls into this category. Whether you’re a regular DIY enthusiast or a homeowner starting a significant renovation, understanding how to remove tile from a concrete floor is an invaluable skill to have.
In this post, we will break the process into manageable steps, get prepared, prioritize safety, and learn to recognize when experts might be necessary. So, let’s pull up our sleeves and transform your floor, one tile at a time.
Preparing for the Job
Removing tile from a concrete floor requires more than just an excited spirit—it calls for careful preparation that ensures both efficiency and safety. After all, proper preparation is the cornerstone of any successful DIY project.
Understanding the Process
First, it’s important to grasp the full scope of the task. Removing tile from a concrete floor involves a methodical process of chiseling away each tile without causing undue damage to the underlying concrete. It can be a physically demanding task that requires patience, but with the right approach, it’s certainly doable.
Gathering Your Tools
Next, you’ll need to arm yourself with the right tools. Here’s a basic list to get you started: a floor scraper or a chisel and hammer, a pry bar, safety glasses, work gloves, and a sturdy broom for cleanup.
Remember, quality tools make a world of difference in facilitating the task and ensuring your safety.
Setting Realistic Expectations
Finally, it’s crucial to set realistic expectations. Bear in mind that this project can be time-consuming, especially for larger areas. It’s not a race, and it’s perfectly acceptable to spread the work over a few days or even a weekend.
But don’t let this deter you! With each tile you remove, you’re one step closer to revealing the potential of your concrete floor. And each time you look at the finished result, you’ll be reminded of the effort you’ve put in.
Prioritizing Safety
As in any home improvement project, safety is paramount when removing tile from a concrete floor. The process involves sharp tools and shards of tile, which can pose risks if not handled with care. Here are the ways you should prioritize safety during this task.
Wear Protective Gear
As mentioned above, it’s always paramount to equip yourself with the appropriate personal protective equipment. Safety glasses are crucial to protect your eyes from flying debris. Work gloves can safeguard your hands from sharp tile shards and provide a better grip on your tools. Consider also wearing a long-sleeved shirt and durable pants to protect your skin. Lastly, don’t forget about your feet—closed-toe, slip-resistant work shoes are a must.
Maintain a Clean Workspace
A clean workspace is a safe workspace. Regularly sweep up the debris to keep your work area clean and prevent tripping hazards. Dispose of broken tiles immediately—they can be sharp and potentially dangerous.
Use Tools Correctly
Understanding and respecting your tools is a key aspect of safety. Use your tools as they’re intended to be used, and never force a tool to do a job it’s not designed for. Remember, a chisel is for chipping away, not prying up tiles—that’s a job for the pry bar.
Take Regular Breaks
Given the physically demanding nature of tile removal, ensure you take regular breaks. Overexertion can lead to fatigue, decreased alertness, and increased risk of accidents. Hydrate, rest, and only continue when you’re ready.
Be Aware of Your Surroundings
Lastly, be mindful of your surroundings. Be aware of where your tools are at all times to avoid accidental injuries. If you’re working in a confined space, ensure there’s sufficient ventilation. And remember to keep curious pets and children away from the work area.
Steps for Removing Tile From Concrete Floor
Now that we’ve prepared and prioritized safety, it’s time to get down to business. Here’s a step-by-step guide to help you remove tile from your concrete floor systematically and safely.
Step 1: Start at the Edge
Begin at the edge of the room or near a loose tile, if there is one. This will provide an ideal starting point, as the edge tiles are generally easier to remove.
Step 2: Loosen the First Tile
Using your floor scraper or hammer and chisel, start chipping away at the grout around the tile. Once the grout is sufficiently removed, angle your tool beneath the tile and apply pressure to pry it up. Be patient during this process—it might take a few tries to get the tile to budge.
Step 3: Remove the Tile
Once the tile is loose, use your pry bar to lift it away from the concrete floor. Be cautious during this step; broken tiles can be sharp.
Step 4: Continue the Process
Continue this process, working one tile at a time. Be systematic—move in a straight line or follow a specific pattern to ensure you don’t miss any tiles. Remember, patience is key here. Some tiles may be more stubborn than others.
Step 5: Clean Up
With all tiles removed, it’s time for cleanup. Use your broom to sweep up all the debris and broken tile pieces. Ensure the floor is clean and free of any remaining tile adhesive.
Step 6: Inspect the Concrete
Finally, inspect your concrete floor for any damage or remaining adhesive. If you notice any residual glue, consider using a floor grinder to smooth out the surface.
And with that, congratulations! With patience, preparation, and safety precautions, you’ve transformed your space, revealing a concrete floor full of potential.
Recommended Maintenance
Once you’ve put in the effort to remove tile from your concrete floor, maintaining the exposed surface becomes crucial. Applying a good quality sealer is an effective way to provide a protective barrier against moisture and stains, thereby extending the floor’s lifespan.
Additionally, regular cleaning with a pH-neutral cleaner helps to preserve the floor’s appearance without causing damage. In case of stubborn stains, occasional use of a mild abrasive cleaner is permitted, but harsh chemicals should always be avoided as they can degrade the concrete and dull the finish.
When to Call a Professional
If you encounter particularly stubborn tiles that resist your removal attempts or discover extensive damage to the concrete beneath the tiles, a professional’s specialized tools and expertise can be helpful. Professionals can also safely handle the presence of asbestos, which can be found in older adhesive materials and requires specific safety measures to address.
When it comes to maintaining your concrete floor, the appearance of large cracks, significant surface damage, or persistent, hard-to-remove stains might also necessitate professional intervention. A professional can assess the condition and recommend appropriate treatments or repairs to maintain the integrity and aesthetics of your floor.
Lastly, if you’re short on time or if the scale of the project is overwhelming, professional help can be a time-efficient solution.
Final Thoughts
Embracing the DIY spirit to transition from a tiled to a bare concrete floor can be a gratifying journey. It’s a pathway that demands careful preparation, patience, and a strong commitment to safety.
Every tile you remove brings you a step closer to unveiling a floor brimming with potential. Maintain it well and know when to seek professional assistance to ensure its longevity and beauty. If you have questions about the condition of your floor, or for a comprehensive home inspection, reach out to Inside & Out Property Inspectors today.
https://insideandoutpropertyinspectors.com/wp-content/uploads/2023/12/How-to-remove-tile-from-concrete.jpeg10001500BJ Johnsonhttps://d39oyu4lp7snwz.cloudfront.net/wp-content/uploads/sites/54/2019/08/31171419/io-favicon-300x300.pngBJ Johnson2023-12-06 18:56:452023-12-06 18:56:46How to Remove Tile From Concrete Floor