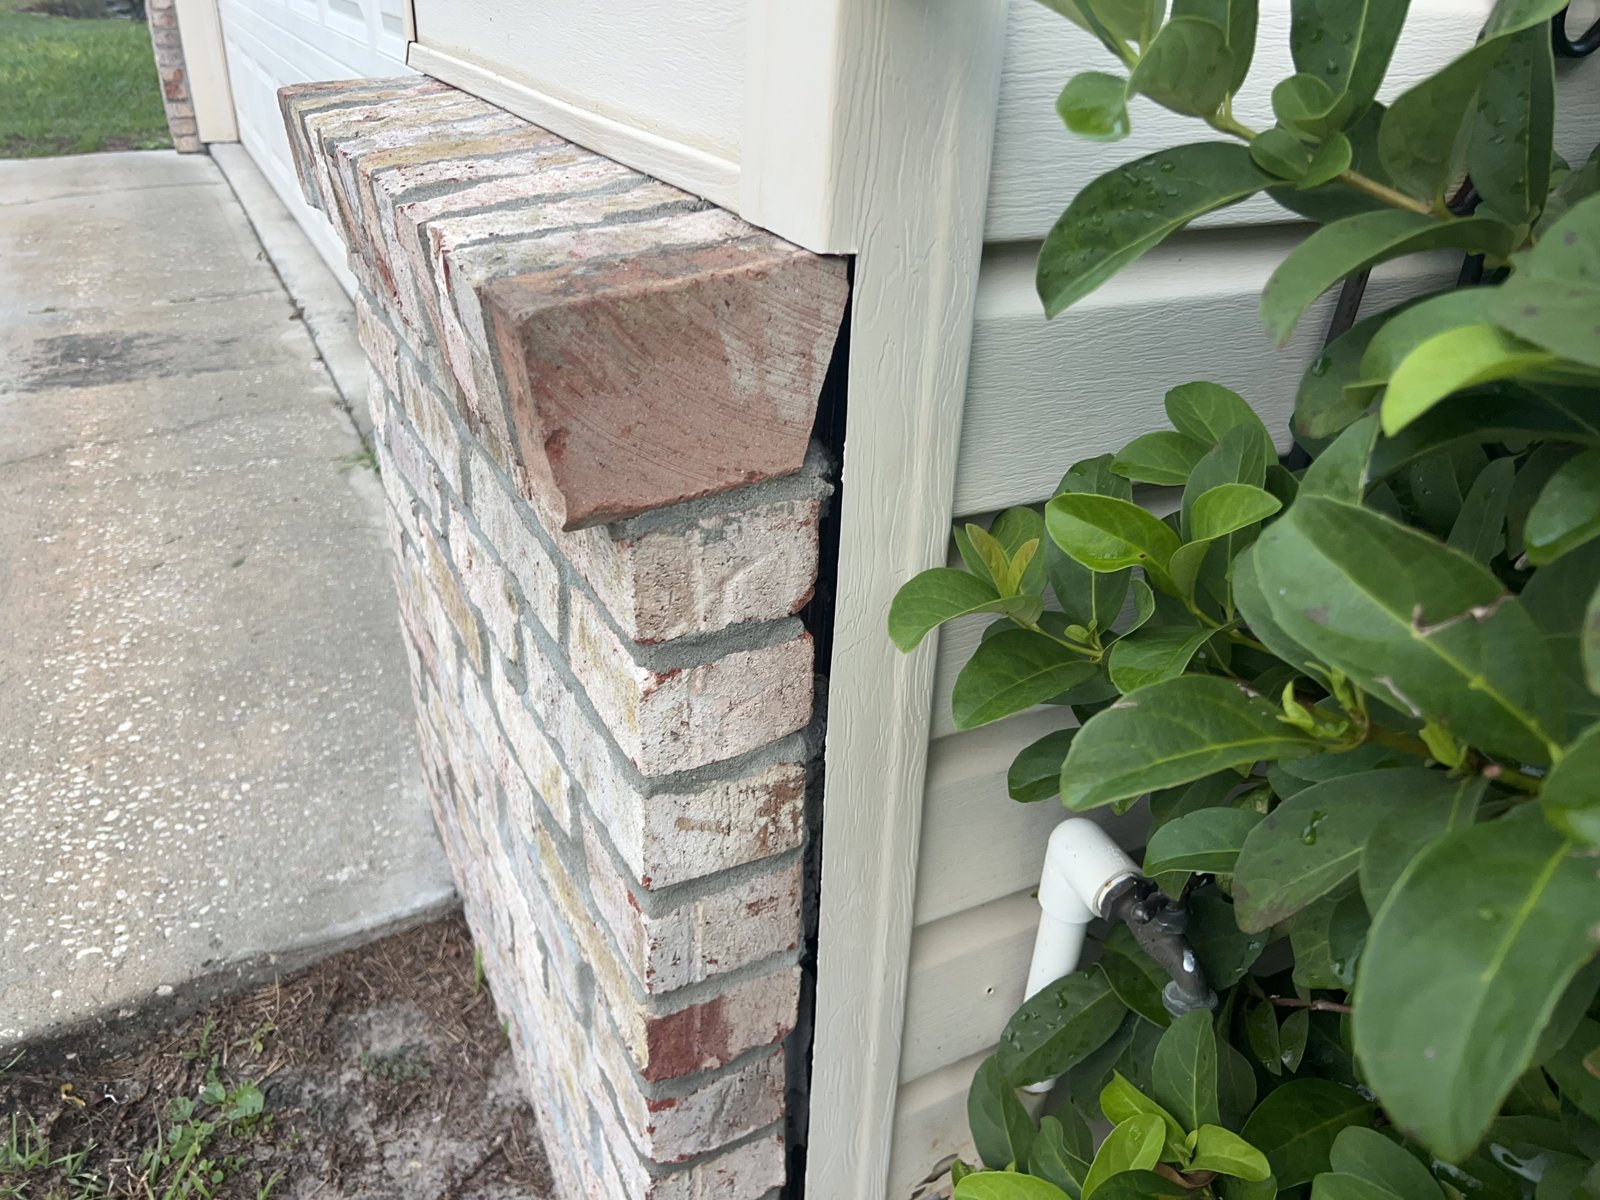
From the street, the house looked fine. The vinyl siding was straight, the color was even, and nothing jumped out. Then Inspector Will got down low at the garage corner, where the brick meets the siding, and started looking closer.
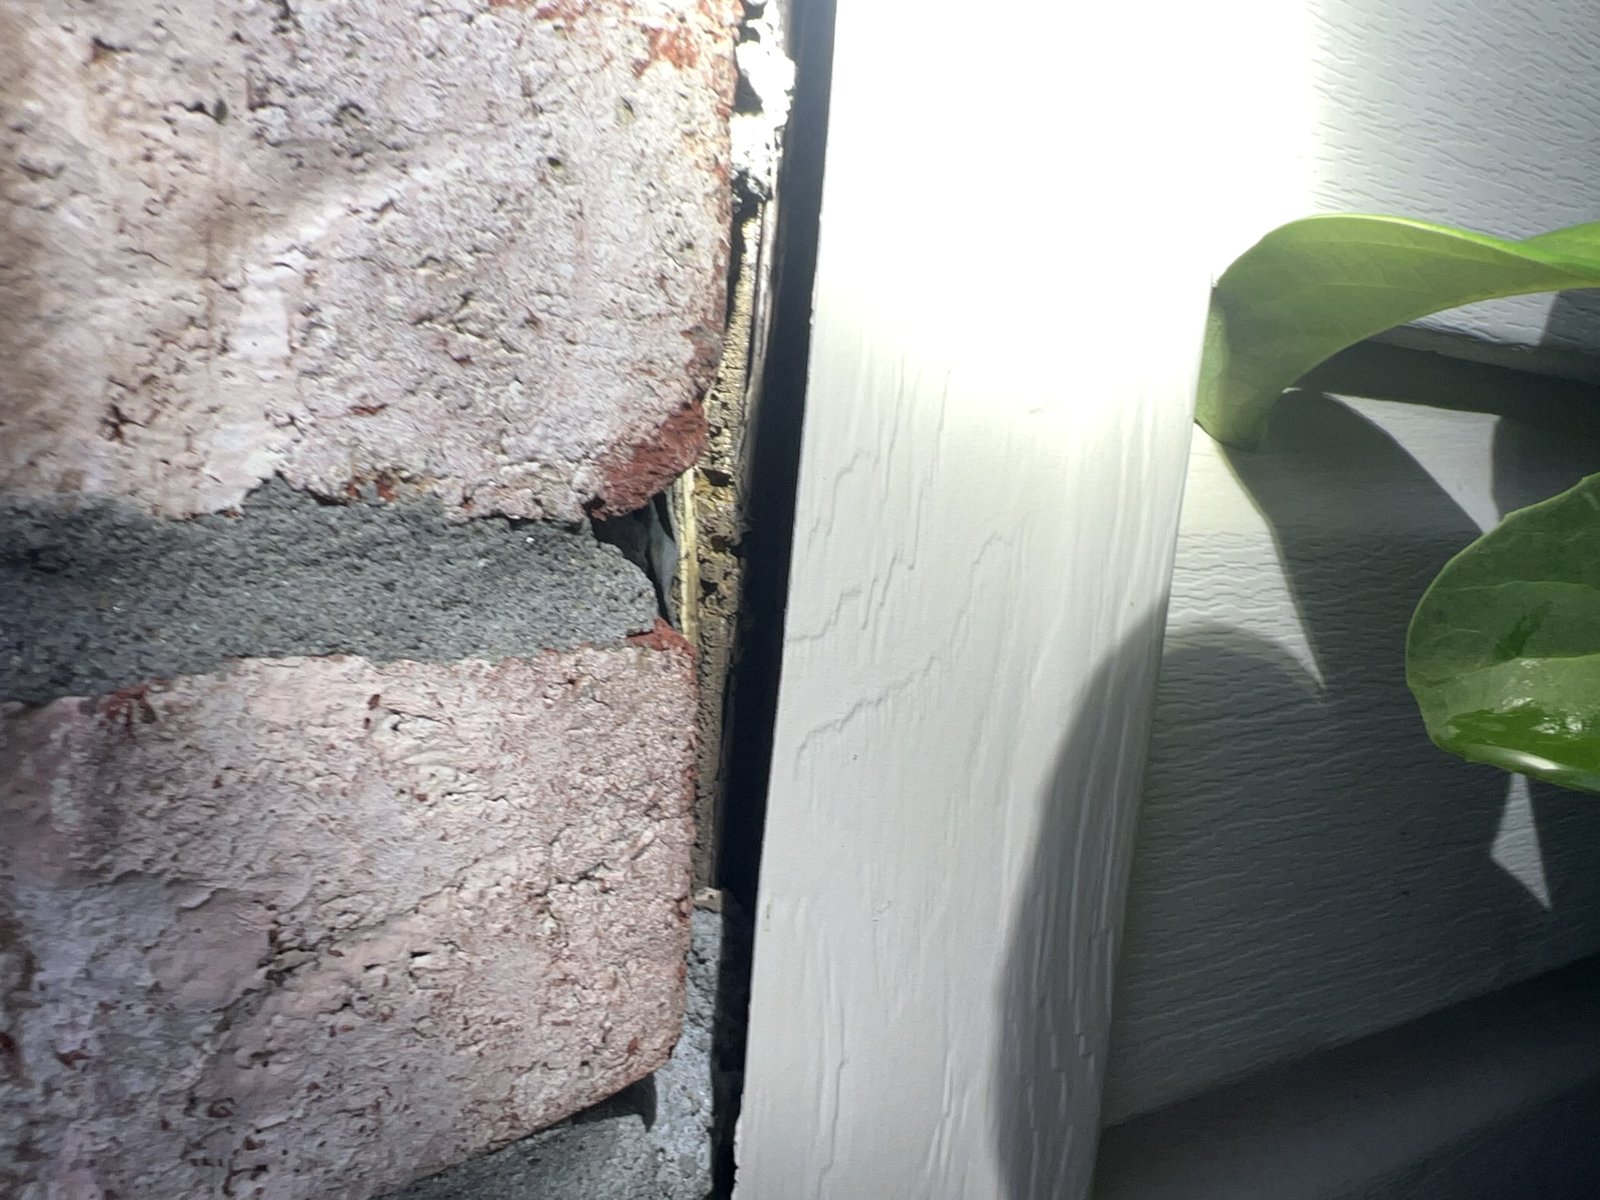
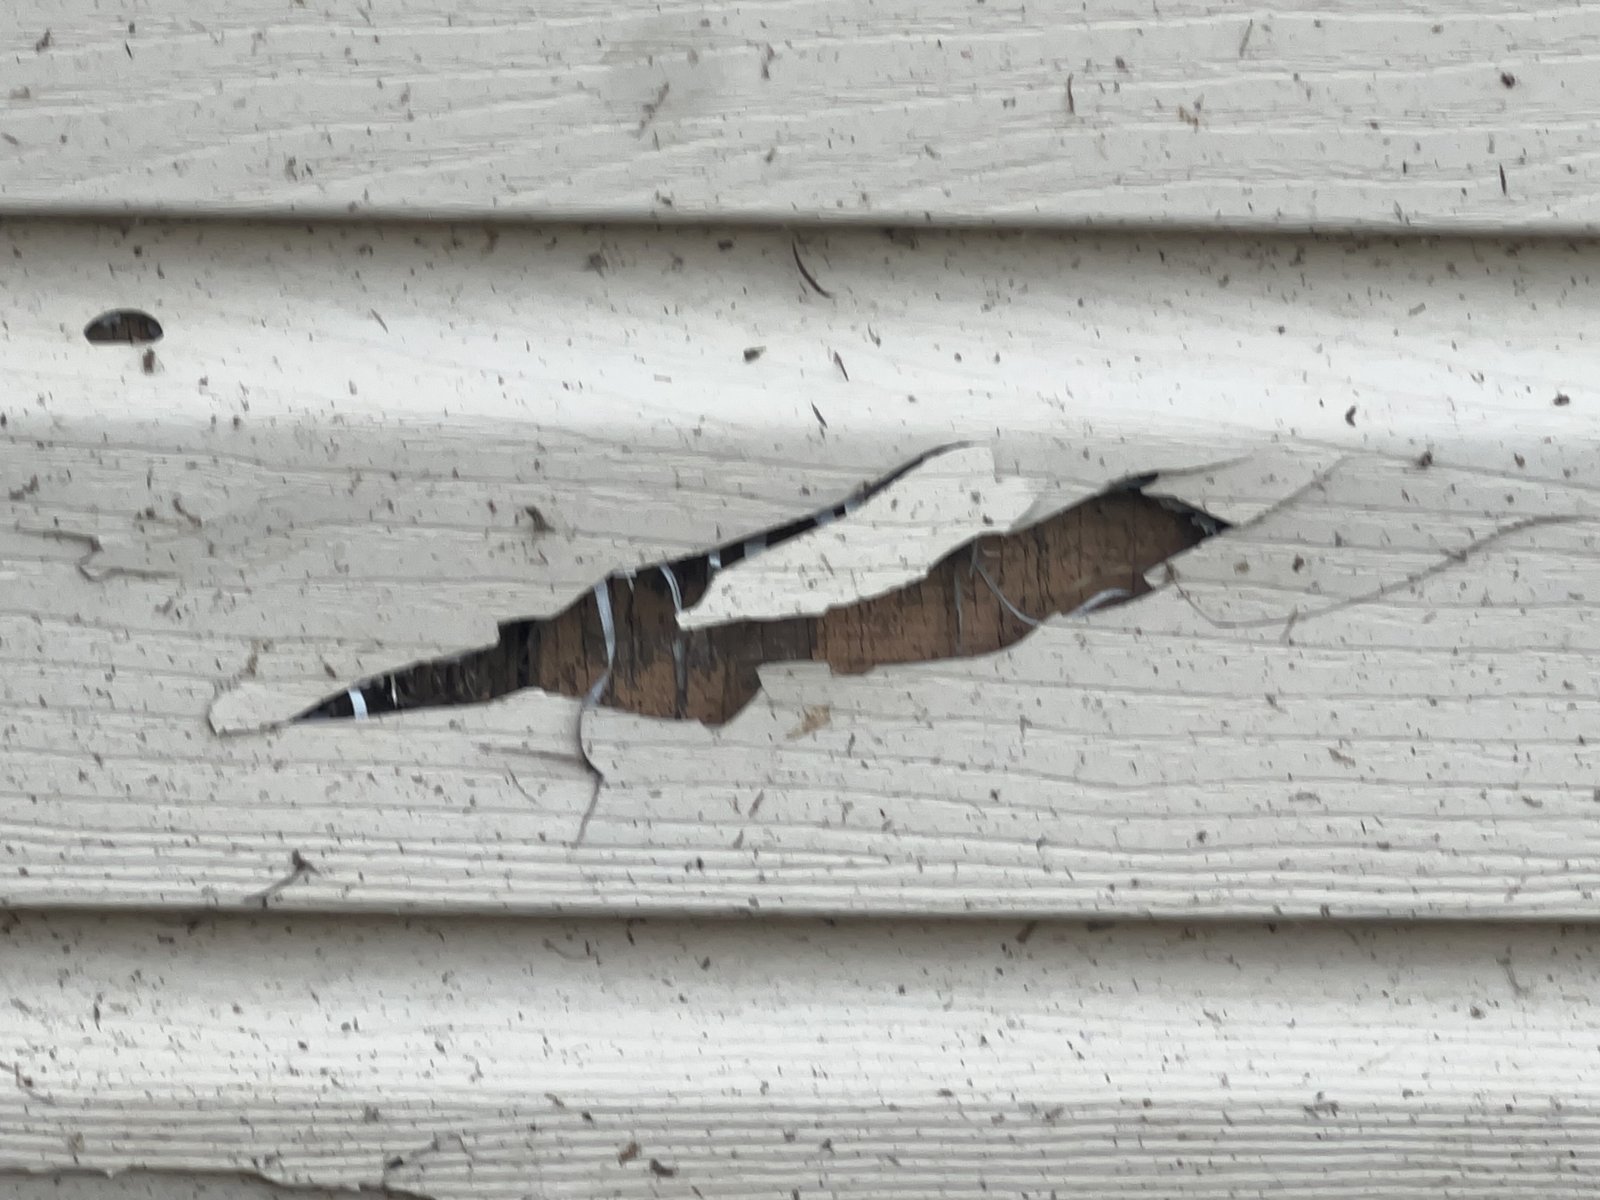
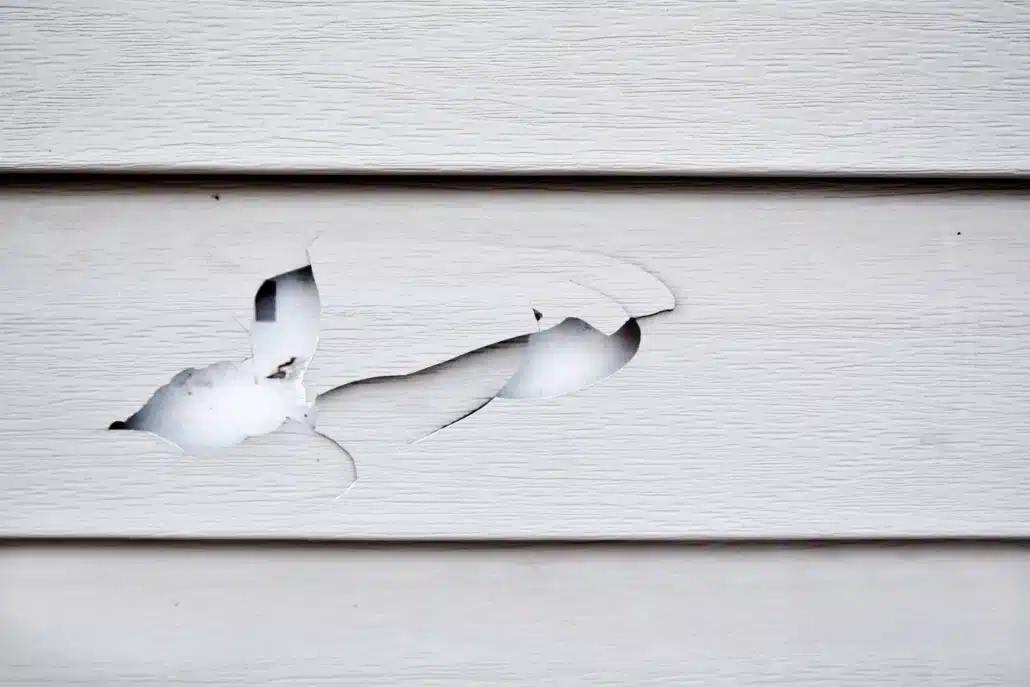
What he found was a torn spot in the siding. Behind it, the house wrap that’s supposed to protect the wall was torn and missing, and the wood sheathing underneath was dark and decayed. That’s the kind of damage that rarely stops where you can see it, so it went in the report as likely hidden damage that needs a closer look.
Vinyl siding is not waterproof
A lot of buyers assume the siding is what keeps water out of the wall. It’s only the first layer. The vinyl siding industry’s own installation manual says vinyl siding is an exterior cladding, not a water-resistive barrier. It’s designed to let the wall behind it breathe, and it must be installed over a water-resistive barrier that stops the water that gets past the siding from going further into the wall (Vinyl Siding Institute installation manual). If you’re curious how long siding holds up in general, see How Long Does Vinyl Siding Last?
In other words, some water behind vinyl siding is expected. The house wrap and the flashing are what handle it. When the wrap is torn or missing, that water lands right on the sheathing.
Why it matters more in Northeast Florida
Around Jacksonville and St. Johns County, walls get a lot of wind-driven rain, plus sprinklers that hit the same low section of wall day after day. Water that sneaks behind the siding has time to soak into the sheathing and framing, and it can stay damp in our humidity. Wood that stays wet decays, and the siding hides it the whole time. Learn more about what water intrusion is. (Have a stucco home instead? Read about common concerns with stucco for an exterior wall.)
By the time you notice something from the outside, like a soft spot, a stain inside, or a musty smell in that room, the damage is usually bigger than it looks.
Where water gets in
On this house, the trouble spot was the gap where the brick and the siding meet at the garage corner. Transitions like that are common places for water to get behind the cladding. The installation manual calls for flashing that ties into the water-resistive barrier around windows, doors, corners, other openings and roof lines for exactly this reason (Polymeric Exteriors, getting started).
Here’s what we look at on the outside walls during a home inspection:
Gaps and holes at brick-to-siding transitions, around windows and doors, and where pipes, wires and vents pass through the wall.
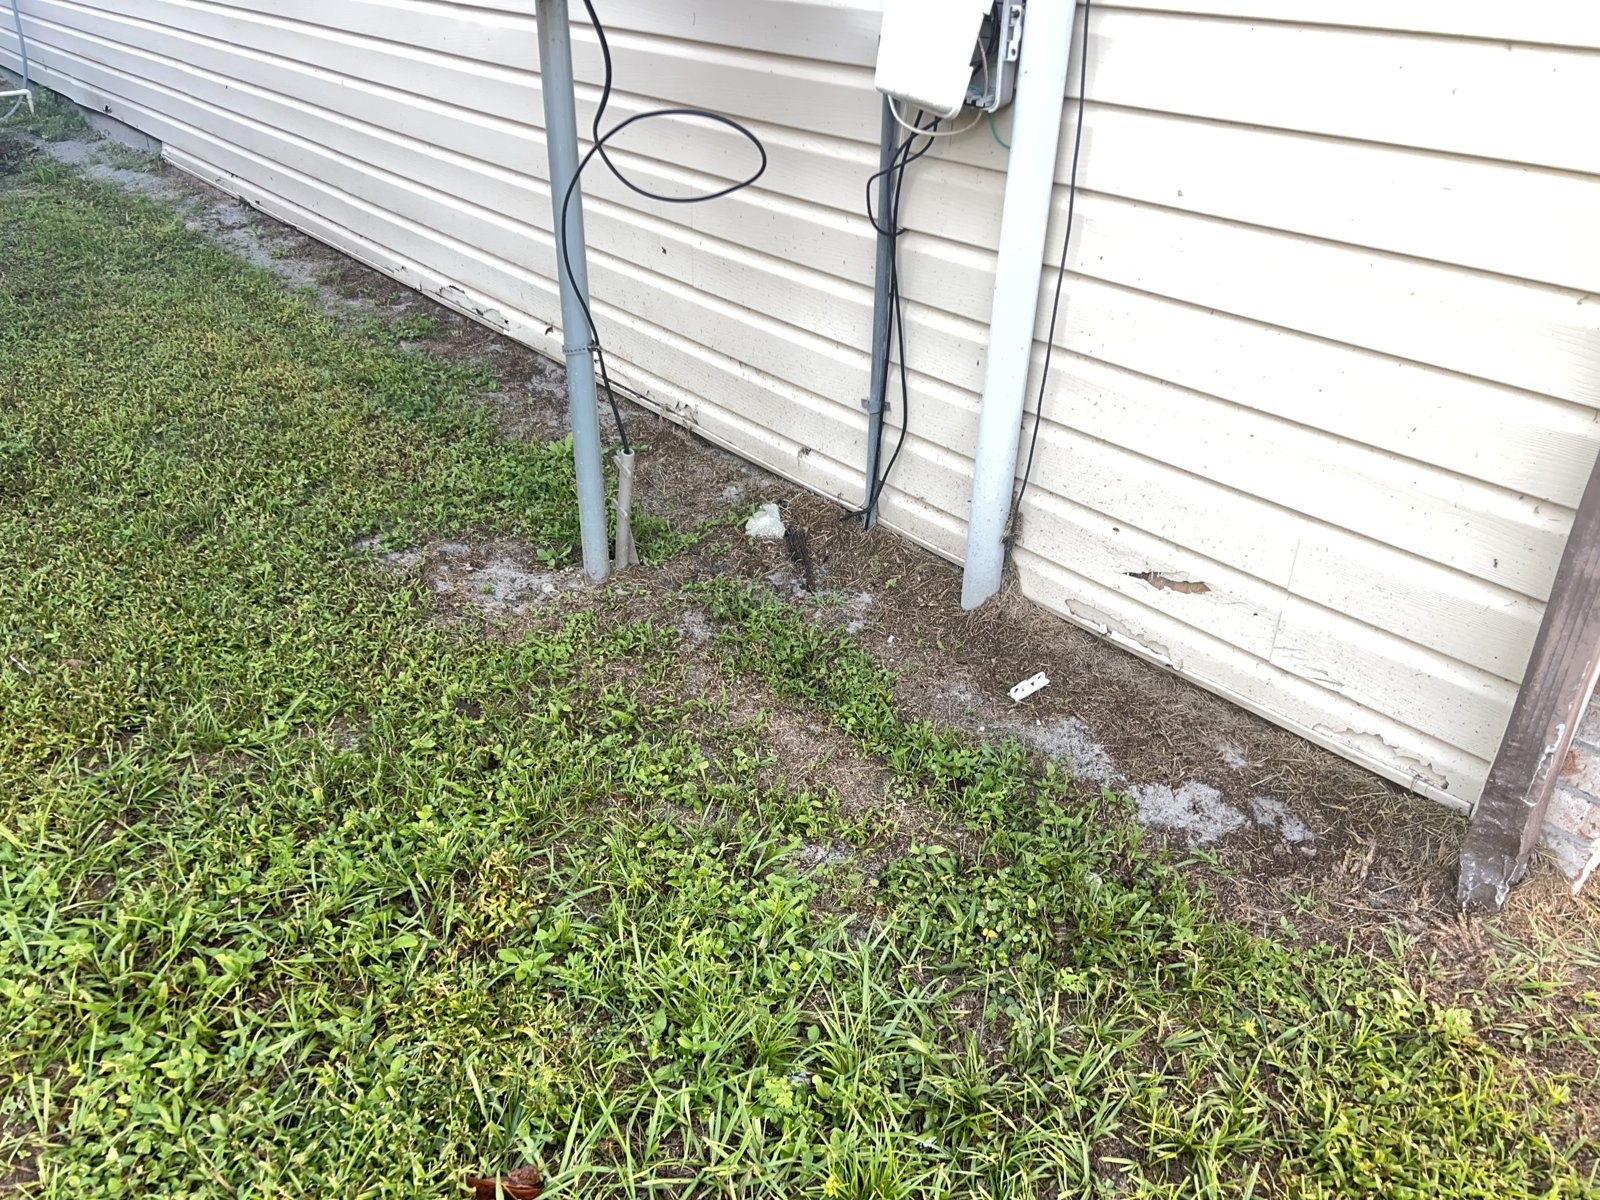
Torn, cracked or loose siding, especially low on the wall where mowers, trimmers and pets do damage.
Siding that runs down to the dirt or mulch, which keeps the bottom edge wet.
Missing or poorly done flashing at roof-to-wall lines and above windows and doors.
Signs on the inside of the same wall, like stains, swollen baseboards or high moisture readings.
What to do if your inspector finds it
A torn spot in the siding is a cheap fix. Rotted sheathing behind it isn’t something you want to find after closing. If your report flags damage like this, it’s worth having a qualified siding or general contractor open the wall in that area to see how far it goes before your inspection period ends. That gives you the facts you need to talk repairs with the seller.
If you already own the home, don’t just snap a new piece of siding over the hole. Find out what’s behind it first.
Why we look closer
Anyone can walk past siding that looks fine from six feet away. Our inspectors get down at the corners, the transitions and the bottom edge, because that’s where these problems start. Will’s find on this house is a good example of why a thorough home inspection pays for itself before you buy.
Buying in Jacksonville, St. Augustine or anywhere in St. Johns County? Call Inside & Out Property Inspectors at 904-395-1900 or book online. See our home inspection services in St. Johns County.
Roof vents are not something most Jacksonville homeowners think about until something goes wrong. But proper roof ventilation is one of the more important factors in how well a home holds up over time, and it comes up in more inspection types than most people realize.
Whether you are buying, selling, or maintaining a home in Northeast Florida, understanding how roof vents work and what inspectors or buyers will look for is practical knowledge worth having before you really need it.
Why Roof Ventilation Matters in Florida
A roof ventilation system creates continuous airflow through the attic space. Cool, fresh air enters through intake vents at the soffits. Hot, moist air escapes through exhaust vents near the ridge. That exchange keeps trapped air from building up directly above your living space.
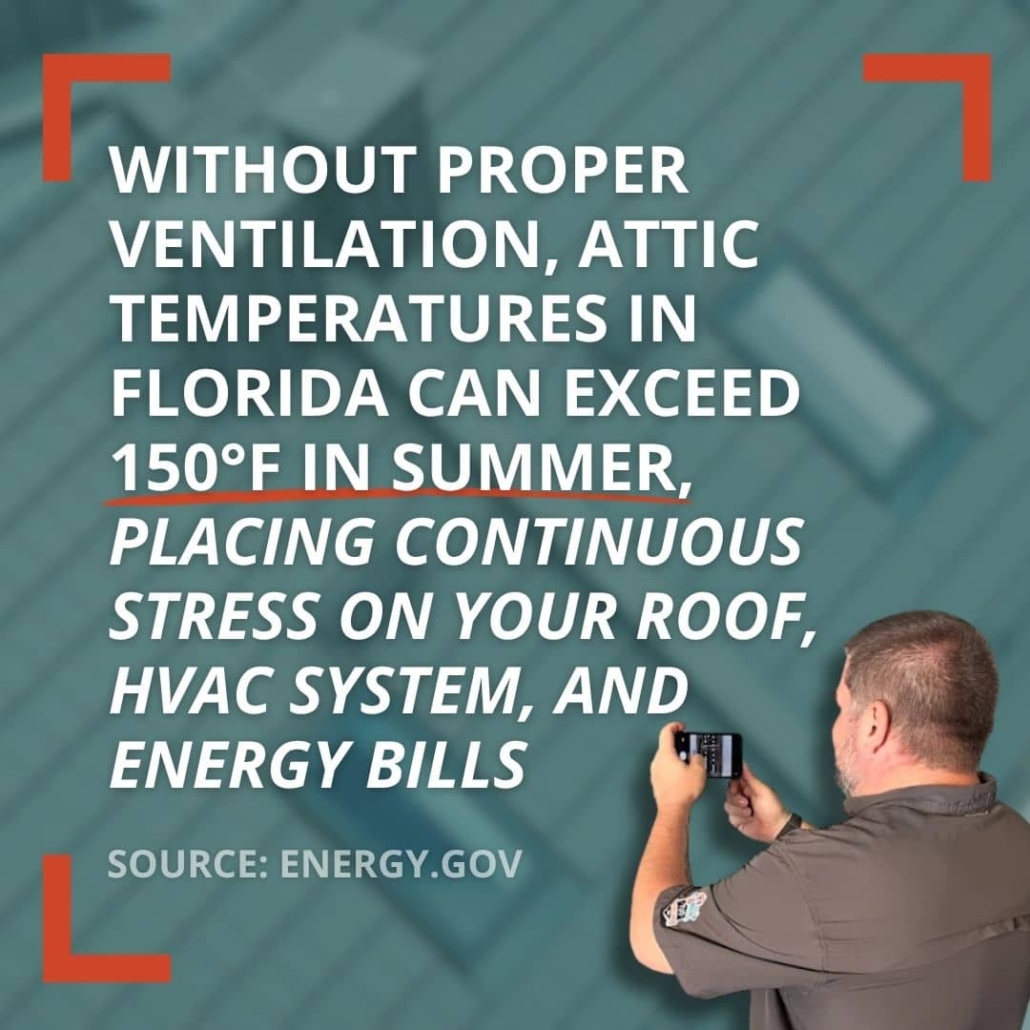
Without proper attic ventilation, attic temperatures in a Jacksonville summer can exceed 150 degrees Fahrenheit. That heat and moisture buildup compounds quietly over time. It consistently shows up as one of the more significant findings during home inspections in Northeast Florida.
Poor attic ventilation commonly leads to:
Premature shingle aging and cracking from sustained heat below the roof deck
Moisture buildup and mold growth on decking, framing, and attic insulation
Wood rot in structural framing from prolonged humid air exposure
Increased cooling costs and strain on HVAC systems year-round
Accelerated roof wear that affects 4-point inspection outcomes and insurance eligibility
That last point matters a lot in Florida. Insurance companies here scrutinize roof condition more closely than in most states. A roof showing premature deterioration from poor ventilation can affect both coverage eligibility and premiums. Wind mitigation inspections and 4-point inspections both evaluate roof condition directly, and ventilation is part of what both assess.
How a Roof Ventilation System Works
Proper roof ventilation depends on a balance between intake and exhaust vents, not just the presence of vents. Hot air rises naturally. When exhaust ventilation sits at or near the roof’s peak, the system works with physics. Intake vents along the roof eaves bring cooler air in at a low point while exhaust vents release hot attic air above.
A well-designed ventilation system follows the general standard of one square foot of net free ventilation area per 150 square feet of attic size. This reduces to one square foot of net free ventilation area per 300 square feet when intake and exhaust are properly balanced.
An attic with adequate exhaust but blocked intake will not achieve proper airflow, regardless of how many vents sit on the roof surface. Blocked soffit vents are the most common ventilation deficiency inspectors find in the Jacksonville area. Attic insulation pushed against the soffit is a frequent cause. It is easy to miss without a thorough inspection.
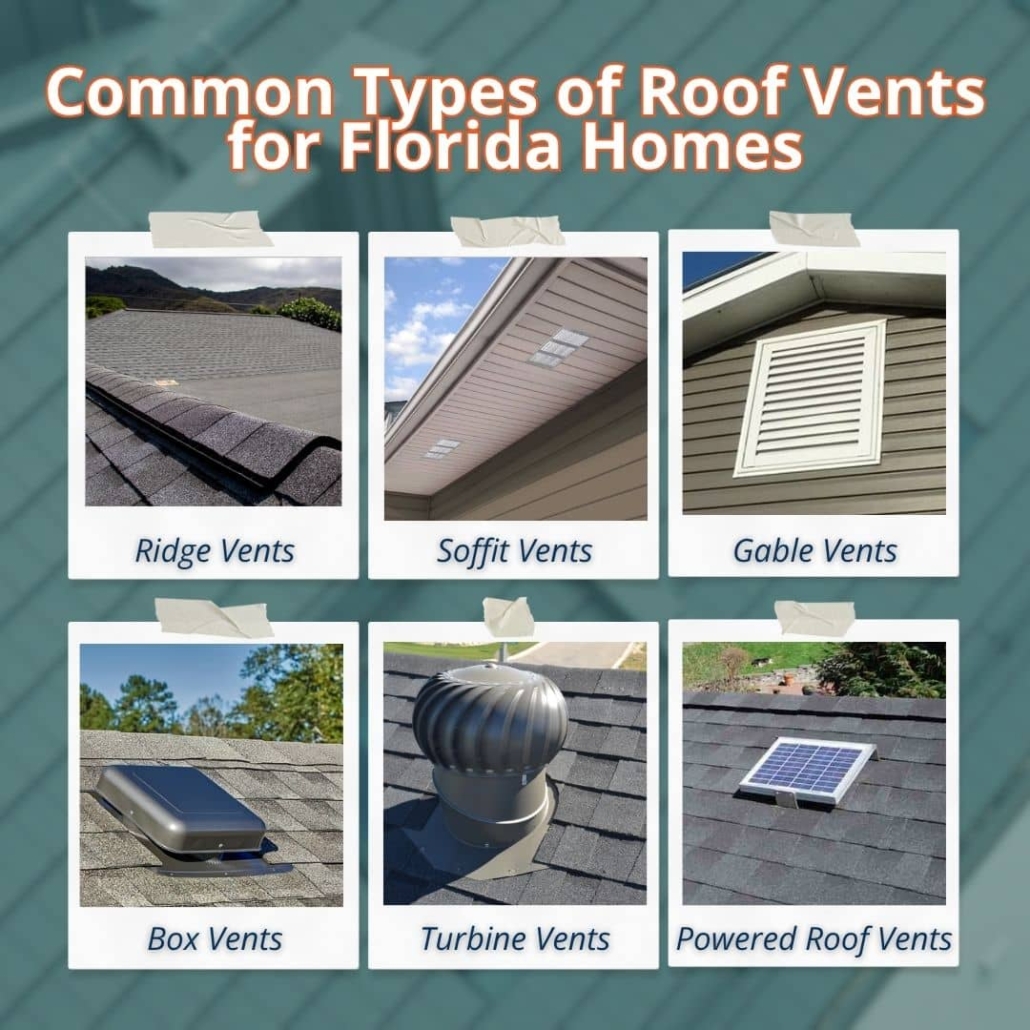
Common Types of Roof Vents
Not all roof vents serve the same purpose, and the combination of any given home says a lot about how well the attic ventilation system performs. Here are the most common types of roof vents on homes across Northeast Florida, along with how each one functions.
Ridge Vents
Ridge vents run along the full length of the roof’s ridge and rank among the most effective exhaust vents available. They span the entire peak, providing uniform exhaust ventilation across the attic rather than venting from a single point.
Ridge vents are common on newer construction in Florida. They are low-profile, support natural airflow effectively, and perform well in high-wind conditions when properly installed. Wind mitigation inspectors evaluate them for insurance purposes.
Soffit Vents
Soffit vents are roof intake vents on the underside of the roof overhang along the eaves. They form the intake side of the ventilation system and work directly with ridge or other exhaust vents above to create a balanced attic ventilation system.
When soffit vents are blocked, the entire ventilation cycle suffers. This holds true regardless of how many exhaust vents are present. Inspectors flag this issue consistently across Jacksonville, St. Johns, and Clay counties.
Gable Vents
Gable vents sit in the triangular wall section at each end of a gable roof. They are common on older homes throughout Northeast Florida and can serve as both intake and exhaust vents depending on wind direction and speed.
Gable vents work reasonably well on their own but are less efficient than a balanced ridge and soffit setup. Combining them with ridge vents on the same roof can disrupt proper ventilation by short-circuiting airflow horizontally.
There is also a storm concern worth noting: gable end vents are one of the more common points of water intrusion during high-wind events and driving rain, which matters for any home in Northeast Florida heading into hurricane season.
Box Vents and Roof Louvers
Box vents, also called roof louvers or static roof vents, are square or rectangular passive vents near the ridge line. They allow hot air to escape naturally with no moving parts, relying on natural airflow and wind to ventilate the attic space.
Most larger roofs need multiple units to ventilate adequately. Static vents are common on both older and newer homes in Northeast Florida. They are also a reliable solution for managing moisture buildup in attics on gable roof designs.
Hip Vents
Hip vents work like ridge vents but serve homes with hip roofs. Hip roofs have sloped sides on all four faces and limited or no traditional ridge area. Hip vents run along the hip lines and provide exhaust ventilation where a standard ridge vent cannot go.
Hip roofs are common in Florida for their wind resistance. That makes hip vents a relevant option for many Jacksonville-area homes. Wind mitigation inspectors assess their performance and condition the same way they assess ridge vents.
Turbine Vents
Turbine vents use wind energy to actively pull hot air out of the attic. When spinning freely, they move significantly more air than a static vent of the same size. They perform well in the coastal and breezy conditions common across Northeast Florida.
A turbine that is not spinning freely or has a seized bearing provides almost no benefit, and inspectors note this during roof assessments. It is also worth knowing that turbine vents sit higher off the roof surface than most other vent types, making them more vulnerable to storm debris and high winds.
In a hurricane-prone area like Northeast Florida, that is a practical consideration when evaluating or replacing them.
Powered Roof Vents
Powered roof vents, including electric attic fans and solar-powered vents, use mechanical ventilation to actively pull air out of the attic. A thermostat or humidistat controls the cycle. Solar-powered vents deliver the same active ventilation without adding to energy costs, making them a smart option in Florida’s sun-heavy climate.
One important consideration: a powered vent in an attic with insufficient intake vents can depressurize the attic. It then pulls conditioned air up from the living space through ceiling penetrations, increasing cooling costs rather than reducing them. Proper airflow balance between intake and exhaust is essential before installing or evaluating any powered solution.
What Do Inspectors Evaluate Here?
Roof ventilation comes up across multiple inspection types. What inspectors assess depends on the scope.
Standard home inspection: Inspectors assess overall attic ventilation adequacy, intake and exhaust balance, soffit blockage, and signs of heat or moisture damage to the roof deck, insulation, and framing. Inside & Out Property Inspectors has a Level II Certified Thermographer on staff who identifies heat and moisture patterns that a standard visual inspection may miss.
Wind mitigation inspection: This inspection evaluates the roof’s ability to resist wind-driven damage, including vent type and condition. In Florida, wind mitigation reports feed directly into homeowners’ insurance premiums.
4-point inspection: This covers the four major systems, including the roof, assessing condition, and remaining useful life. Poorly ventilated roofs show accelerated wear. That affects how inspectors rate the roof and whether an insurer will issue or renew a policy.
Other Related Questions
What is the difference between a wind mitigation inspection and a 4-point inspection? A wind mitigation inspection evaluates features that reduce wind damage risk, including roof covering, deck attachment, and roof-to-wall connections. A 4-point inspection evaluates the four major systems: roof, HVAC, electrical, and plumbing. Florida insurers commonly require both, but they serve different purposes and produce separate reports.
How does attic moisture connect to mold risk in Florida homes? Poor ventilation allows moisture to accumulate on roof decking and framing, creating conditions where mold thrives year-round in Florida’s humidity. A mold inspection identifies whether growth is present in the attic. Thermographic inspection detects moisture patterns before they become visible to the naked eye.
What should buyers know about roof inspections when purchasing a home in Northeast Florida? Roof condition ranks among the most consequential findings in any Florida home inspection report. It directly affects insurance eligibility and premiums. Knowing the roof type, maintenance history, and estimated remaining life before closing can significantly influence negotiation and long-term ownership costs.
When to Call a Professional
Roof ventilation issues are not always visible from the ground or a quick attic look. Schedule a professional inspection when:
You are buying or selling a home and want a complete picture of the roof system
Cooling costs are unusually high, and the attic has not been assessed recently
You notice staining, moisture, or mold growth on attic framing or decking
Your roof is aging, and you are approaching an insurance renewal or a 4-point inspection
You are unsure whether your home’s intake and exhaust vents are balanced or functioning correctly
Roof vents do important work that most homeowners never think about until there is a problem. A well-designed ventilation system extends the life of your roof, reduces cooling costs, improves indoor air quality, and prevents moisture damage and wood rot from showing up in inspection reports at the worst possible time.
In Northeast Florida, heat, humidity, and storm exposure make proper attic ventilation more consequential than in most parts of the country. If you have questions about your roof system or want to schedule an inspection, contact Inside & Out Property Inspectors today.
https://insideandoutpropertyinspectors.com/wp-content/uploads/2024/07/types-of-roof-vents.jpeg10001500BJ Johnsonhttps://d39oyu4lp7snwz.cloudfront.net/wp-content/uploads/sites/54/2019/08/31171419/io-favicon-300x300.pngBJ Johnson2026-04-09 12:00:302026-10-29 10:35:44Importance of Roof Vents & Common Types for Florida Homes
Stucco is one of the most popular exterior finishes on homes throughout Jacksonville, St. Augustine, and the surrounding Northeast Florida area. It holds up well in warm climates, offers design flexibility, and, when properly maintained, can last for decades.
But stucco has a well-documented set of vulnerabilities, and in Florida’s humid, coastal climate, those vulnerabilities get tested constantly.
Understanding the most common concerns helps homeowners and buyers know what to watch for, when to act, and when a professional inspection is the right next step.
Why Stucco Concerns Should Be Taken Seriously
Most stucco problems start small. A hairline crack here, a faint stain there. The issue is that stucco is a layered system applied over the wall assembly, which means surface problems often reflect something more significant happening behind them.
Water that gets past the stucco face does not simply evaporate. It sits inside the wall, where it can damage sheathing, promote mold growth, and compromise structural framing, all while the exterior looks relatively normal.
In Florida, that risk is amplified. High humidity, heavy rain, tropical storms, and salt air along the coast all accelerate the conditions that lead to stucco failure. Homes in communities like Nocatee, Ponte Vedra Beach, Atlantic Beach, and St. Augustine Beach face particularly demanding exterior exposure year-round.
Traditional Stucco vs. EIFS: Why the Type Matters
The two main systems installed on homes today have very different risk profiles, and that distinction shapes how any stucco concern should be evaluated.
Traditional hard-coat stucco is cement-based, applied in multiple layers over metal lath. It is durable, fire-resistant, and breathable, allowing moisture to escape rather than become trapped. When properly installed and maintained, it is one of the more forgiving exterior finishes available.
EIFS (Exterior Insulation and Finish System), sometimes called synthetic stucco, uses foam insulation boards topped with a polymer coating. It offers better energy efficiency but is significantly less forgiving with moisture. Any water that gets past the finish layer has fewer ways out. EIFS systems without proper drainage planes or flashing are among the most common sources of hidden moisture damage found during stucco inspections in Northeast Florida.
Feature
Traditional Stucco
EIFS / Synthetic Stucco
Base material
Cement, lime, sand
Foam insulation + polymer coating
Breathability
Higher
Lower
Moisture risk
Moderate with age
Higher if not installed correctly
Durability
50+ years when maintained
Varies by installation quality
Common failure point
Cracking, efflorescence
Moisture intrusion, improper flashing
The Most Common Stucco Problems on Florida Homes
Florida’s climate puts stucco through a demanding cycle of heat, humidity, rain, and UV exposure year-round. These are the problems that show up most often as a result.
Cracking: Some cracking is normal as stucco expands and contracts with weather changes. Hairline cracks are typically cosmetic and manageable with timely sealing. The concern arises with cracks wider than 1/8 inch, diagonal cracks at window and door corners, or patterns that develop or grow over time. In Florida, where clay soils shift with moisture changes, these can indicate settlement or installation failure.
Moisture intrusion: This is the most consequential stucco problem. Water can enter through unsealed cracks, failed caulking, missing flashing, and gaps at roof-to-wall transitions. Once inside the wall, it damages sheathing, promotes mold, and compromises framing, often invisibly. By the time interior signs appear, like a mildew smell or soft drywall near a window, the damage behind the stucco is typically well established.
Efflorescence: White or chalky deposits on the stucco surface are caused by water moving through the material and carrying dissolved salts to the face as it evaporates. Efflorescence is not structurally damaging on its own, but it reliably signals that water is actively moving through the system.
Failed caulking and sealant: Every penetration in a stucco wall, windows, doors, utility lines, and hose bibs is a potential water entry point. Caulk and sealant break down over time under Florida’s UV exposure and temperature swings. Failed sealant around windows is one of the most common findings during stucco inspections in the Jacksonville area and one of the most preventable causes of moisture intrusion.
Improper installation: Missing weep screeds, insufficient stucco thickness, inadequate lath coverage, and poor flashing integration all create conditions for premature failure. These issues are often not visible during routine maintenance checks, which is why pre-purchase stucco inspections matter on homes where the installation history is unknown.
Warning Signs to Watch For
Whether you own a stucco home or are considering buying one, these are the signs that warrant a closer look:
Cracks wider than a hairline, especially diagonal ones at the window and door corners
Staining, discoloration, or dark streaking on the surface
White chalky deposits (efflorescence) in recurring patterns
Soft, spongy, or hollow-sounding areas when you tap the stucco
Gaps or missing caulk around windows, doors, or stucco-to-trim transitions
Interior signals: mildew smell near exterior walls, damp drywall, staining above baseboards, or warped window casings
Any combination of interior and exterior signs together is a strong indicator that moisture has already entered the wall system.
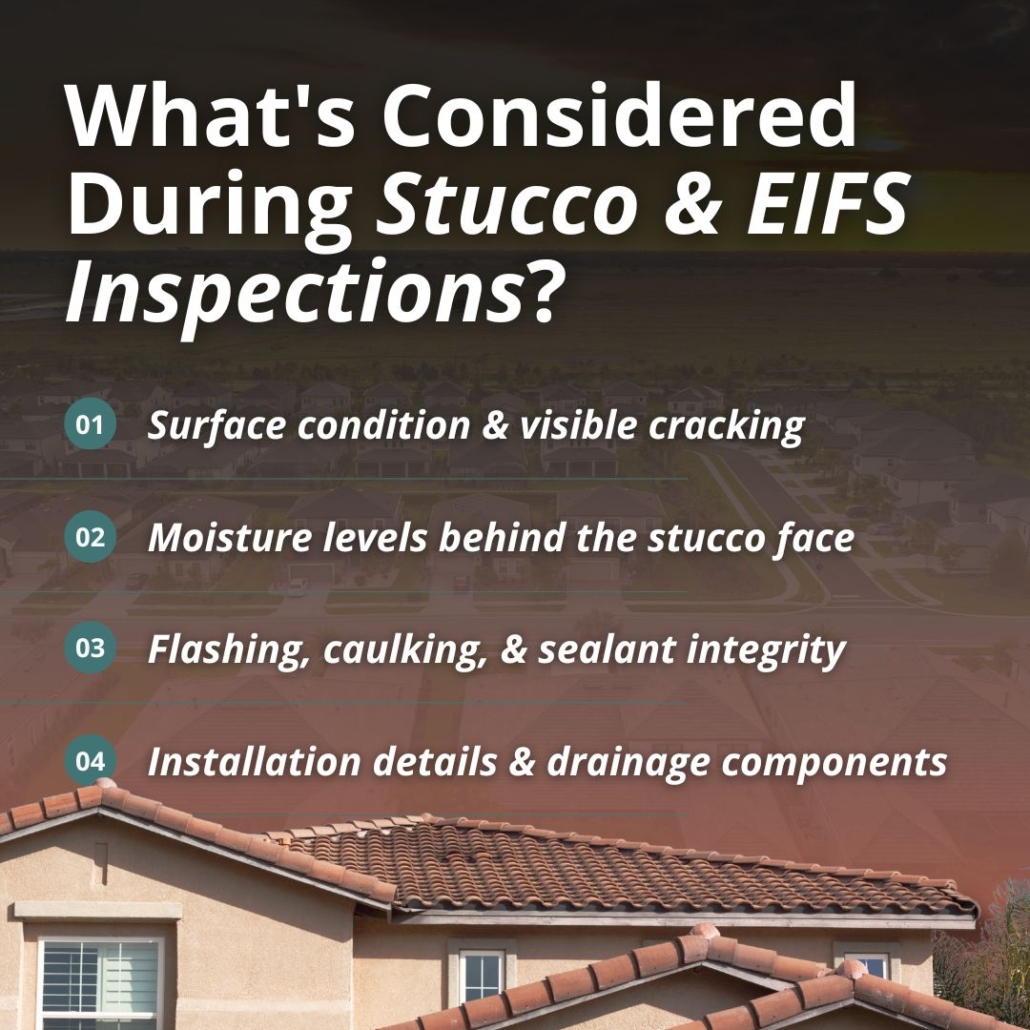
What Does a Stucco Inspection Involve?
A standard home inspection includes a visual evaluation of the exterior, but a dedicated stucco inspection goes further. At Inside & Out Property Inspectors, our team holds a Level II certification from the Exterior Design Institute (EDI) and brings over 20 years of building experience to every stucco evaluation.
We use moisture meters and infrared thermography to detect anomalies behind the stucco face without opening the wall. Where findings warrant, invasive probing involves small openings in the stucco to directly assess the condition of the sheathing and framing below. This is the only way to confirm what is happening inside a wall that shows surface indicators of damage, and it is particularly important for homes with EIFS systems or undocumented prior repairs.
Maintenance That Extends Stucco Life
Staying ahead of stucco issues is always less expensive than addressing them after water damage has set in. These are the habits that make the biggest difference:
Inspect and reseal caulk around all windows, doors, and penetrations annually
Check for new cracks after severe weather or significant rain events
Keep gutters clean and direct downspouts away from stucco walls
Trim vegetation that contacts or overhangs stucco, since plant material holds moisture against the wall
Apply a breathable exterior sealant every five to ten years, depending on exposure
Address any crack or gap promptly rather than waiting for the next maintenance cycle
Related Questions
Stucco is rarely the only exterior concern on a Northeast Florida home. Here are questions that come up most often in connection with it.
How does moisture behind stucco connect to mold?
When water becomes trapped inside a wall assembly, the warm, dark conditions behind stucco create an environment where mold can develop on sheathing and framing before any visible signs appear on the interior. Homes with a history of stucco moisture intrusion often benefit from mold testing alongside the stucco evaluation.
What role does a home inspection play when buying a stucco home?
A full home inspection evaluates the condition of the entire property, including the exterior wall systems. For stucco homes, that evaluation is more meaningful when paired with a dedicated stucco inspection, particularly if the property has EIFS, visible cracking or staining, or a renovation history that is not well documented.
How do wind mitigation or 4-point inspections relate to stucco condition?
Stucco itself is not a direct component of a wind mitigation or 4-point inspection, but active moisture damage found during a stucco assessment can intersect with those reports if it has affected the roof system, electrical, HVAC, or plumbing. Insurers may require documentation of repairs before issuing or renewing coverage on homes with known water intrusion.
What should buyers know about stucco on a new construction home?
Even new stucco can be installed incorrectly. Missing weep screeds, insufficient flashing, and poor window integration are errors that a builder’s quality control process may not catch. A pre-drywall inspection or new construction inspection creates an opportunity to identify these issues before walls are closed and before closing day.
When to Call a Professional
These are the situations where a dedicated stucco evaluation is the right call:
You are purchasing a home with a stucco or EIFS exterior
You have noticed any of the warning signs listed above
The home has had stucco repairs with no documentation of what was done
You are buying a home built before 2000, when EIFS installation standards were less regulated
You have not had a stucco assessment in five or more years
Inside & Out Property Inspectors holds EDI Level II stucco certification and serves buyers, sellers, and homeowners across Jacksonville, St. Augustine, Ponte Vedra Beach, Nocatee, Fleming Island, and throughout Northeast Florida.
Conclusion
Stucco is a durable and widely used exterior finish that performs well in Florida’s climate when installed correctly and maintained consistently. The concerns that come with it are real but manageable, and most serious damage traces back to installation issues or early warning signs that were not addressed promptly.
Whether you are buying, selling, or maintaining a stucco home in Northeast Florida, knowing what to look for and when to bring in a certified inspector gives you the information you need to protect your investment. Get a free quote today.
https://insideandoutpropertyinspectors.com/wp-content/uploads/2025/09/stucco-for-exterior-wall.jpg10001500BJ Johnsonhttps://d39oyu4lp7snwz.cloudfront.net/wp-content/uploads/sites/54/2019/08/31171419/io-favicon-300x300.pngBJ Johnson2026-03-26 08:34:512026-10-29 09:48:13Common Concerns With Stucco For an Exterior Wall
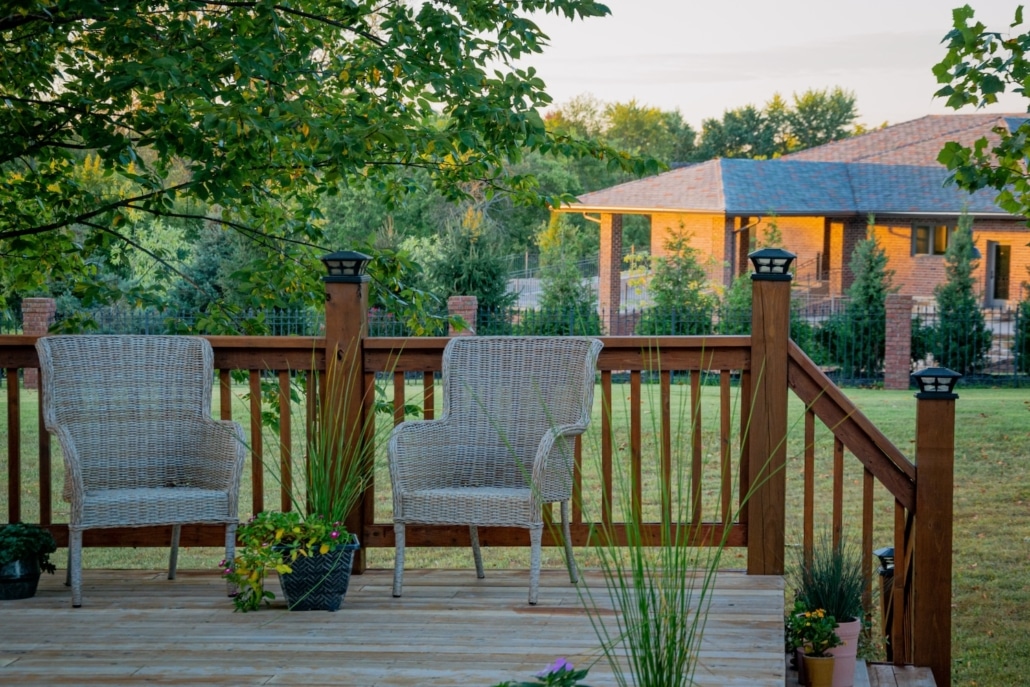
A deck creates a perfect space to relax and entertain, but not every homeowner wants to attach one to their house. Whether it’s to avoid modifying the home’s structure, prevent moisture issues, or simply have more flexibility in design, a freestanding deck can be a great alternative.
Before moving forward with construction, it’s important to know how a detached deck differs from an attached one and what factors ensure long-term stability. This guide covers the pros and cons, common concerns, building code requirements in and around Jacksonville, plus key maintenance tips.
Can You Build a Deck Without Attaching It to the House?
Yes, a deck can be built without needing to attach it to the house, if you don’t want to—but it requires careful planning to ensure stability and safety.
Freestanding decks stand independently, supported entirely by posts and footings rather than being anchored to the home’s structure. Homeowners often choose a detached deck for a few reasons:
Avoiding potential damage to siding, foundation, or waterproofing systems
Greater flexibility in design and placement, especially for yards with uneven terrain
Local building restrictions that may limit modifications to the home
No need to cut into exterior walls or install ledger boards
While this type of deck provides flexibility, it also requires extra structural components to ensure long-term durability.
That being said, it’s important to weigh the benefits and potential drawbacks against your goals and needs. If you’re wondering whether a freestanding deck is the right choice for your home, here’s what you need to know.
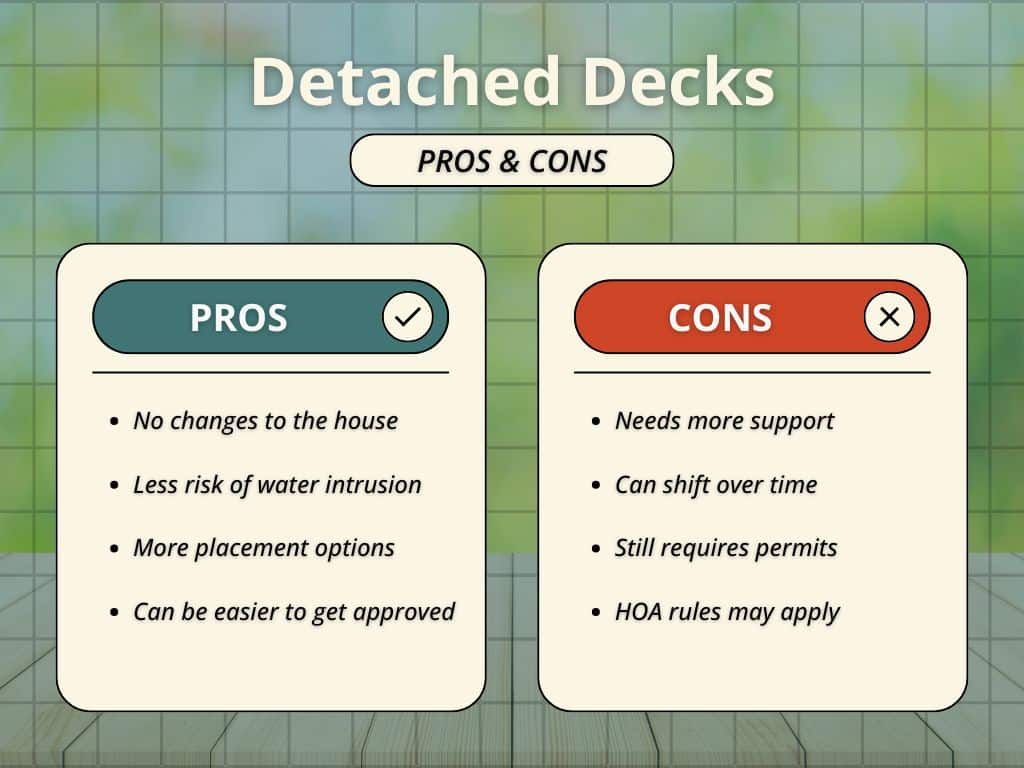
Detached Deck Pros
No changes to the house: A detached deck doesn’t require cutting into siding, drilling into brick, or reinforcing the home’s foundation. This makes it a good option for homes with stucco, masonry, or older construction.
Less risk of water damage: Since the deck isn’t attached, there’s no direct connection trapping moisture against the house. This helps prevent issues like wood rot, mold, and foundation damage.
More placement options: A freestanding deck can go anywhere in the yard, making it a great solution for uneven terrain, poolside seating, or homes with limited space near the house.
Can be easier to get approved: Some homes aren’t designed to support an attached deck without major structural changes. In those cases, a detached deck may be a simpler option that avoids extra permits or reinforcement.
The Cons
Needs more support: Without the house for stability, a freestanding deck relies entirely on its footings. This means more posts, deeper footings, and additional bracing, which can increase costs.
Can shift over time: In areas with soft or sandy soil—common in Jacksonville—decks may settle or shift. Strong footings and proper drainage help prevent this, but extra reinforcement may be needed.
Still requires permits: Even though it’s not attached, a detached deck must meet local building codes for safety. Height, weight capacity, and railing requirements all still apply.
HOA rules may apply: Some homeowner associations limit detached structures. It’s always best to check community guidelines before building.
FAQ: Building a Safe and Durable Deck
Do all decks need footings?
Most decks require footings to provide a stable foundation and prevent shifting over time. The depth and material depend on the soil type, climate, and local building codes. In areas like Jacksonville, where sandy soil is common, deeper footings or reinforced piers may be needed for extra stability.
What materials work best?
Pressure-treated wood, composite decking, and tropical hardwoods are common choices. Composite requires less upkeep and resists moisture damage, while hardwoods like ipe or teak are highly durable but need regular sealing. Pressure-treated wood is budget-friendly but requires ongoing maintenance to prevent rot.
Can the deck be built directly on the ground?
Ground-level decks are possible, but proper drainage is key. Without it, wood can rot, and the structure may shift over time. A stable base, such as gravel, concrete pavers, or compacted soil, helps prevent moisture buildup and keeps the deck level.
What helps prevent shifting or sinking?
A solid foundation is essential. Deep footings, reinforced framing, and proper drainage keep a deck stable. If the soil is soft or prone to erosion, using helical piers or compacting the ground before construction can provide extra support.
Are decks allowed in HOA communities?
HOA rules vary. Some require approval before building, while others regulate deck placement, height, and materials. Checking community guidelines before starting construction can help avoid unexpected restrictions or costly changes.
Permits and Buildings in the Jacksonville Area
Even though a freestanding deck isn’t attached to the house, most still require a permit. Jacksonville and nearby areas have building codes in place to ensure decks are safe and meet structural standards.
Homeowners should keep in mind:
Permit requirementsdepend on deck height, size, and location. Decks above a certain square footage or height may need approval before construction.
Footing depth regulationsensure stability in sandy or shifting soil, common in Florida. Some areas may require deeper footings or reinforced piers.
Railings and safety featuresare required for decks above a certain height to prevent falls and meet local safety codes.
Property setback rulesdetermine how far a deck must be from property lines, fences, or easements.
Checking with the local permitting office or working with an inspector before starting construction helps avoid costly mistakes and ensures the deck is up to code.
Other Recommended Maintenance
Regular maintenance helps keep a freestanding deck safe and in good condition. Homeowners should:
Inspect the deck for signs of shifting, sinking, or uneven settling
Keep drainage areas clear to prevent water from pooling under the deck
Clean and seal wood decks to prevent moisture damage and rot
Ensure footings remain stable and show no signs of deterioration
When to Call a Professional
A professional inspection can help ensure a detached deck is safe and structurally sound. Homeowners should consider reaching out if:
They need help navigating local building codes and permits
The deck is showing signs of shifting, sinking, or structural wear
Footings seem unstable, especially in soft or sandy soil
There are drainage concerns that could affect the deck’s longevity
They’re buying or selling a home with an existing deck and want an expert evaluation
Inside & Out Property Inspectors provides expert inspections to help homeowners ensure their decks, foundations, and outdoor structures are safe, stable, and built to last.
Conclusion
Don’t want to attach the deck to your house? A freestanding deck can be a great option for anyone looking for flexibility and fewer structural modifications to their home.
While it offers advantages like lower moisture risk and more placement options, it also requires careful planning to stay stable and meet building codes. For homeowners in or around Jacksonville who want to build a deck or get trained eyes on their home, Inside & Out Property Inspectors have the expertise you need.
https://insideandoutpropertyinspectors.com/wp-content/uploads/2025/02/i-dont-want-to-attach-deck-to-house.jpg9991500BJ Johnsonhttps://d39oyu4lp7snwz.cloudfront.net/wp-content/uploads/sites/54/2019/08/31171419/io-favicon-300x300.pngBJ Johnson2025-02-13 21:01:102026-10-23 11:30:50What if I Don’t Want to Attach My Deck to the House?
Your home’s siding does more than just look good—it’s the first point of defense against the elements, pests, and everyday wear. There are different types of siding, but the right one can protect your home from costly damage, improve energy efficiency, and even boost curb appeal.
This guide breaks down nine common siding materials, comparing their strengths, weaknesses, and unique characteristics. For homeowners in Florida, where heat, humidity, and storms are part of life, choosing the right siding isn’t just smart—it’s essential.
What is House Siding and Why Does it Matter?
House siding is the protective layer that covers the exterior walls of your home. It shields your home from harsh weather, pests, and moisture while adding an important layer of insulation.
Beyond protection, siding plays a big role in how your home looks, contributing to its overall style and curb appeal.
Your selection from among the different types of siding impacts more than just appearances. Durable materials can handle years of wear, while others may require frequent maintenance to stay in good shape.
Some siding options also improve energy efficiency by helping regulate indoor temperatures, which is especially helpful in hot climates like Florida. Without proper siding, homes can suffer from water damage, rot, and even structural issues.
Over time, cracks or damage to siding can let in moisture or pests, creating problems that can become costly to fix. That’s why choosing the right material and keeping it in good condition is essential for protecting your investment and ensuring your home lasts for years to come.
1. Vinyl Siding
Vinyl siding is one of the most popular types of siding for homeowners, and its different benefits make it easy to see why. Made from PVC, this material is affordable, lightweight, and available in a wide variety of colors and styles to suit any home.
Benefits:
Low maintenance: Resists fading, cracking, and pests.
Affordable: Budget-friendly for initial installation and long-term upkeep.
Versatile: Comes in styles that mimic wood or other materials.
Drawbacks:
It can crack in extreme temperatures or with heavy impact.
Over time, intense sun exposure may cause fading.
Vinyl siding works well in most climates, but Florida homeowners should look for UV-resistant products to handle the sun’s intensity.
2. Fiber Cement Siding
Fiber cement siding, made from a mix of cement, sand, and cellulose fibers, is designed to mimic the look of wood or stone while offering exceptional durability.
Benefits:
Extremely durable: Resists heat, moisture, and pests.
Fire-resistant: A safe option in areas prone to wildfires.
Long-lasting: Often backed by long warranties.
Drawbacks:
Heavy material: Requires skilled installation, which can increase costs.
Higher upfront cost compared to vinyl or wood.
For Florida homes, fiber cement siding is a great choice because it handles heat and humidity well while requiring minimal maintenance.
3. Wood Siding
Wood siding is a classic choice, valued for its natural beauty and charm. It’s available in a variety of options, including cedar, pine, and redwood.
Benefits:
Timeless appeal: Offers a warm, natural aesthetic.
Eco-friendly: A renewable resource when sourced responsibly.
Drawbacks:
High maintenance: Requires regular sealing or painting to prevent rot.
Susceptible to pests: Particularly termites in Florida’s climate.
Wood siding can be a beautiful option, but it requires a serious commitment to maintenance, especially in humid environments.
4. Brick Siding
Brick siding is a durable and low-maintenance option, often chosen for its timeless and elegant appearance. Most modern applications use brick veneer, which is thinner and lighter than solid brick.
Benefits:
Highly durable: Resistant to fire, pests, and weather damage.
Low maintenance: Requires occasional cleaning but little else.
Drawbacks:
Higher upfront cost: It can be expensive to install.
Limited style options: Traditional brick look may not suit every aesthetic.
Brick siding is ideal for homes in Florida due to its durability, but proper installation is key to avoiding moisture issues.
5. Stone Veneer Siding
Stone veneer offers the look of different types of stone without the weight or cost. It’s typically made from lightweight composite materials that replicate the texture and color of real stone.
Benefits:
Luxurious appearance: Adds a high-end look to any home.
Lightweight: Easier to install than natural stone.
Drawbacks:
Expensive: Still pricier than many other siding materials.
Installation challenges: Requires precise work to prevent cracks or water infiltration.
Stone veneer siding works well as an accent or full exterior and can withstand Florida’s heat when installed properly.
6. Stucco Siding
Stucco siding is made from a mix of cement, sand, and water. It’s often applied in layers to create a seamless finish that works well in both modern and traditional designs.
Benefits:
Energy-efficient: Provides excellent insulation.
Customizable: Smooth or textured finishes allow for design flexibility.
Drawbacks:
Prone to cracking: Florida’s humidity and frequent storms can cause issues.
High maintenance: Cracks must be repaired promptly to prevent water damage.
Stucco is common in Florida homes, but regular inspections and repairs are necessary to keep it in good condition.
7. Metal Siding
Metal siding, typically made from aluminum or steel, is known for its sleek, modern appearance and impressive durability.
Benefits:
Resistant to pests: Termites and other insects can’t damage it.
Long-lasting: Handles heat and moisture well with proper care.
Drawbacks:
Prone to dents: Hail or debris can leave noticeable marks.
Rust risk: Requires protective coatings in humid climates like Florida’s.
Metal siding can be a smart choice in Florida if rust prevention measures are in place.
8. Engineered Wood Siding
Engineered wood siding is a composite material designed to mimic the look of natural wood while addressing some of its common drawbacks.
Benefits:
Cost-effective: Less expensive than natural wood.
Resistant to warping: More stable in fluctuating temperatures.
Drawbacks:
Shorter lifespan: It doesn’t last as long as natural wood or fiber cement.
It may need periodic sealing or painting in humid environments.
Engineered wood siding offers a wood-like look with less maintenance but isn’t ideal for Florida’s high humidity.
9. Hardboard Siding (Masonite)
Hardboard siding, often referred to as Masonite, is made from wood fibers compressed with adhesives. Though less common today, it’s still used in older homes.
Benefits:
Smooth finish: Can be painted any color.
Affordable: A budget-friendly option for homeowners.
Drawbacks:
Prone to moisture damage: Florida’s humidity can cause swelling and warping.
High maintenance: Requires regular painting and sealing to protect against water intrusion.
Hardboard siding can work as a short-term option but requires significant upkeep in Florida’s climate.
Best Options for Florida Homes
Florida’s climate brings heat and different types of elements than anywhere else, so your home needs siding that can take it.
These are some of the best siding materials for Florida homes:
Fiber Cement Siding: Its durability, fire resistance, and ability to withstand heat and moisture make it an excellent choice for Florida’s humid environment.
Vinyl Siding: Affordable and low-maintenance, vinyl can work well in Florida when you choose UV-resistant options to protect against fading from the sun.
Brick Siding: Brick veneer is durable and low-maintenance, with the added bonus of being pest- and fire-resistant. Proper installation ensures moisture doesn’t seep behind the bricks.
Metal Siding: Aluminum and steel are good options for Florida homes because they resist pests and handle moisture well when coated for rust prevention.
Stucco Siding: Common in Florida homes, stucco provides energy efficiency and a seamless finish, but it needs regular upkeep to address cracking caused by humidity and storms.
When choosing siding for your home, consider not only the material’s durability but also its ability to handle extreme weather and high moisture levels.
Exterior Home Maintenance Pointers
While the types of siding may have different maintenance needs, regular maintenance can extend the lifespan of them all. Keep your home protected—here are a few tips:
Inspect your siding for cracks, warping, or signs of moisture damage at least once a year.
Clean siding regularly to remove dirt, mold, or algae, especially in Florida’s humid climate.
Repaint or reseal materials like wood, stucco, or engineered wood as needed to maintain their protective layer.
Check for pests, particularly with wood siding, and address any infestations quickly.
When to Call a Professional
While some siding upkeep can be handled by homeowners, there are times when calling a professional is essential:
Visible damage such as large cracks, warping, or signs of water intrusion.
Persistent issues with pests or mold that can compromise the siding.
Concerns about storm damage after severe weather.
A professional inspection can identify hidden problems and ensure your siding is in top shape.
For Florida homeowners, partnering with experts who understand the challenges of the local climate can make all the difference.
Conclusion
Your home’s siding is one of its most important features and there are several types of siding materials to choose from—all with different benefits. Choosing the right siding for a unique climate requires careful consideration of durability, maintenance, and cost.
If you’re unsure about which siding is right for your home or want to ensure your current siding is performing at its best, a professional inspection can provide peace of mind. At Inside & Out Property Inspectors, we’re here to help you protect your home and investment.
https://insideandoutpropertyinspectors.com/wp-content/uploads/2025/01/Comparing-9-Different-Common-Types-of-Siding.jpeg9601500BJ Johnsonhttps://d39oyu4lp7snwz.cloudfront.net/wp-content/uploads/sites/54/2019/08/31171419/io-favicon-300x300.pngBJ Johnson2025-01-31 16:15:332026-09-17 13:44:05Comparing 9 Different Common Types of Siding
Stucco is a common choice for home exteriors, offering durability, style, and versatility. From sleek and smooth to intricate textures, there’s a stucco finish to suit any home. But with so many options available, many wonder if choosing the right type really makes a difference.
Believe it or not, your choice impacts more than just curb appeal—it affects how well your home stands up to weather, how much maintenance it needs, and even your energy costs. This post will explore the types of stucco finishes, their benefits, and how to make the best choice saving time, money, and stress in the long run.
What is a Stucco Finish?
A stucco finish is a durable, protective layer applied to a home’s exterior. Made from a blend of cement, sand, lime, and water, stucco creates a tough, weather-resistant surface.
It’s a common choice in places like Florida, where its resilience against heat, humidity, and salt air helps homes withstand the elements. Besides providing protection, stucco finishes add style to a home’s exterior.
Using different techniques, homeowners can achieve a range of looks, from smooth to highly textured surfaces that add character and curb appeal.
Popular Finish Styles
Stucco finishes come in various styles, each offering unique aesthetics and benefits. Here are some of the most common types:
A smooth finish provides a sleek, modern look that’s easy to clean and complements minimalist designs.
Sand or swirl finish adds texture and depth, creating an eye-catching appearance that blends well with traditional or contemporary homes.
The trowel finish showcases handcrafted details, with unique patterns that bring character to any exterior.
Dash finish offers a rough, bold texture that hides imperfections and stands up well to wear.
The lace finish delivers an elegant, classic look often used in Mediterranean or Spanish-style homes.
Each style offers something different, making matching your home’s architectural style and personal taste easier.
Key Features of Different Finish Types
Every stucco finish type has its strengths and potential drawbacks. Knowing what to expect can help you choose the right option for your home, so take a look at the primary considerations below before settling on one finish.
Durability: Stucco is naturally tough, but rough finishes like dash or lace can hide minor cracks better than smooth styles.
Aesthetics: Smooth finishes are modern but may highlight imperfections, while textured finishes add visual interest and help mask wear.
Energy efficiency: Stucco acts as an insulator, helping to maintain comfortable indoor temperatures year-round.
Maintenance: Smooth finishes are easy to clean but may show dirt and wear more visibly, while textured styles can trap debris but are less likely to show scratches.
Common issues: Cracks, moisture retention, and fading are risks for all stucco finishes, particularly in extreme weather conditions. Regular care can minimize these problems.
Understanding these factors ensures you select a finish that aligns with your home’s needs and your maintenance preferences.
Selecting a Finish
Choosing the best stucco finish depends on several factors:
Climate: Florida’s heat, humidity, and salt air call for finishes that can withstand moisture and prevent fading.
Style: Consider how the finish complements your home’s design and the overall aesthetic of your neighborhood.
Maintenance needs: Smooth finishes require less cleaning effort but may need more frequent touch-ups, while textured finishes can hide flaws but demand more thorough cleaning.
Budget: Some finishes have higher initial costs but may save on maintenance or energy expenses over time.
Maintenance Tips for Stucco Finishes
Taking care of your stucco finish helps it stay in great condition:
Clean surfaces regularly to remove dirt and prevent staining.
Repaint or reseal as needed to maintain moisture resistance and durability.
A little proactive maintenance can go a long way in preserving your home’s exterior; most of it can be done independently.
When to Call a Professional
While small cracks or slight fading might seem harmless, they can signal deeper problems if left unchecked. A professional should be called when you notice large cracks, bulges, or areas where the stucco seems to be separating from the surface underneath.
Water damage is another red flag. If you see stains, damp patches, or mold near stucco surfaces, it’s a sign that moisture has penetrated the finish. Left untreated, water intrusion can lead to rot, mold growth, or even compromised structural integrity.
Finally, if your stucco is aging or showing widespread wear, such as discoloration or crumbling, an expert can determine whether it’s time for repairs, resealing, or replacement.
Conclusion
The right stucco finish offers more than just curb appeal. It provides durability, energy efficiency, and a lasting style that suits your home’s unique needs. With proper maintenance and expert guidance, stucco can be a low-maintenance, high-value option for years to come.
https://insideandoutpropertyinspectors.com/wp-content/uploads/2024/11/what-is-a-stucco-finish-1.jpeg10001500BJ Johnsonhttps://d39oyu4lp7snwz.cloudfront.net/wp-content/uploads/sites/54/2019/08/31171419/io-favicon-300x300.pngBJ Johnson2024-11-21 14:11:342026-10-23 11:25:55Are There Benefits to Different Stucco Finish Types?
Keeping your home’s foundation safe from water damage starts with effective drainage. It’s an essential feature that directs water away, protecting the structure from problems and protecting your wallet from repair costs.
Every homeowner should feel empowered to select and maintain the best drainage system for their home, so we’ll cover it all in this post. Learn what foundation drainage involves, compare the different systems available, and get practical tips to keep the foundation worry-free.
Foundation Drainage Explained
Your foundation’s drainage system is designed to manage and redirect water away from the home. When water accumulates near the foundation, it can seep into the soil, creating pressure on the walls that may result in cracks, leaks, and potentially significant structural problems.
A properly functioning drainage system ensures water is moved away from the foundation, keeping it dry, stable, and prepared for long-term structural integrity.
Types of Drainage Systems
Firstly, exterior drainage systems are designed to prevent water from reaching your foundation. It works to redirect water away from the home and the common types can include:
Surface drainage uses shallow ditches or channels to divert water away from the home before it can reach the foundation.
French drains consist of a gravel-filled trench with a perforated pipe. They effectively manage groundwater, preventing saturation around the foundation.
Footing drains go at the base of the foundation, capture water, and channel it away from the foundation wall.
Conversely, interior drainage systems are used to manage water that has already entered the home. This is typically in basements or crawl spaces, so the most common systems are sump pumps and interior French drains.
A sump pump will simply collect and eject water that enters the home to keep it away from the structure.
Similarly, interior French drains manage water that seeps in and directs it to the sump pump or other drainage solution.
Lastly, grading is a fundamental method of natural drainage. It involves shaping the land around your home to ensure water flows away from the foundation, regardless of what other drainage system you choose to implement.
Common Drainage Issues
Even with a well-designed drainage system, problems can pop up and compromise it. These common concerns often result from poor installation, lack of maintenance, or natural environmental factors.
1) Clogged drains and pipes over time with debris like leaves, soil, or sediment. When blockages occur, water can’t flow freely away from the foundation, leading to pooling that increases the risk of water damage.
2) Improper grading or sloping of the ground around your home means water can pool near the foundation instead of being directed away.
3) Insufficient drainage capacity can lead to water backup, putting your foundation at risk.
4) Foundation settling or shifting over time due to natural soil movement. This movement can disrupt the drainage system’s effectiveness, allowing water to seep into areas where it shouldn’t.
5) Gutters and downspouts that are damaged, clogged, or poorly installed may allow water to spill over and collect near the foundation, leading to potential problems.
6) Tree roots can invade and block drainage pipes, reducing their efficiency. They can also disturb the grading around your home, causing water to pool near the foundation.
Drainage Tips and Other Maintenance
So, now you have an idea of the potential problems that can arise for any foundation drainage system. Don’t let it stress you out though – with a handful of regular maintenance steps and an eye for detail, you can avoid big headaches.
Clean the Gutters and Downspouts: Make sure they’re free of debris like leaves, twigs, and dirt. Clogged gutters can cause water to overflow and accumulate near your foundation, leading to potential damage.
Inspect and Clear Drains and Pipes: Periodically check your drainage systems, including surface drains, French drains, and sump pump systems, for any signs of blockages. Remove any debris that could obstruct water flow!
Check Out Your Grading: Inspect the grading around your home to ensure the ground slopes away from the foundation. If you notice any areas where water is pooling, consider regrading the soil to improve water flow and prevent water from seeping into the foundation.
Maintain the Sump Pump: Test your sump pump regularly to make sure it’s working properly. A malfunctioning sump pump can lead to water accumulation in your basement or crawl space, putting your foundation at risk. Consider installing a battery backup system to ensure your sump pump operates during power outages.
Monitor Trees and Vegetation: Tree roots can invade drainage pipes and disrupt grading, leading to water pooling near the foundation. If necessary, trim or remove trees and plants that pose a risk to your drainage system.
When to Involve an Expert
If you’re like most, you probably prefer to handle maintenance solo, when you can. However, in all these cases, a professional can offer a thorough inspection, identify the root cause of the problem, and provide the most effective solutions.
So, if you notice persistent issues, like water pooling near your foundation despite your efforts, it’s a sign that something more serious could be wrong. Cracks in your foundation walls, even small ones, can indicate underlying damage that requires expert evaluation.
Similarly, if you experience frequent sump pump failures or find that your drainage system isn’t coping with heavy rain or melting snow, a professional assessment will help.
Another red flag is when the grading around your home appears uneven or has shifted, causing water to pool near the foundation. Finally, if tree roots are encroaching on your drainage system or you suspect that they are, it’s time to bring in an expert.
Conclusion
To wrap up, protecting your home’s foundation from water damage is a big deal for ensuring long-term stability and avoiding costly repairs. There are countless benefits to securing solid drainage around your home, and various types of systems to choose from.
https://insideandoutpropertyinspectors.com/wp-content/uploads/2024/08/what-is-foundation-drainage_.jpeg10001500BJ Johnsonhttps://d39oyu4lp7snwz.cloudfront.net/wp-content/uploads/sites/54/2019/08/31171419/io-favicon-300x300.pngBJ Johnson2024-08-15 14:32:032026-10-23 11:31:14What is Foundation Drainage? Purposes, Types, and Tips
Solar deck lights are an excellent addition to any outdoor space because they bring both aesthetic appeal and practical benefits to the table. As the name suggests, they’re powered by the sun, making them energy-efficient and cost-effective.
Beyond being sun-powered, this post will explore the various advantages of solar deck lights, helpful tips to select the right ones for your space, and practical ongoing TLC so they light up your deck for as long as possible.
More About Solar Deck Lights
Solar deck lights are an easy way to enhance your outdoor living area by providing illumination without the need for electrical wiring.
They consist of small solar panels that absorb sunlight during the day, converting it into energy stored in rechargeable batteries. At dusk, these lights automatically turn on, creating a warm and inviting ambiance.
There are several types to choose from, including:
Post Cap Lights: These go on the top of deck posts, adding a decorative touch while providing downward lighting.
Recessed Deck Lights: These are embedded into the deck surface, offering subtle lighting that is both stylish and functional.
Rail Lights: These attach to the deck railing, illuminating the perimeter and enhancing safety.
String Lights: These add a festive feel to your deck, perfect for gatherings and parties.
With various styles and designs available, you can easily find solar deck lights that match your aesthetic preferences and functional needs.
Benefits of Solar Deck Lights
Solar deck lights have numerous advantages by combining practicality with aesthetic appeal. They’re a sustainable lighting solution that enhances your outdoor space. But even more than energy efficiency, they offer several other pros:
Cost Savings While the initial cost of solar deck lights can be higher than traditional lighting, they offer substantial long-term savings.
Easy Installation One of the standout benefits of solar deck lights is their easy installation. With no wiring required, most models come with basic hardware and straightforward instructions, making them an excellent at-home project.
Low Maintenance Solar deck lights require minimal upkeep. Occasional cleaning of the solar panels and periodic checks to ensure they are functioning are usually all that’s necessary.
Aesthetic Appeal Available in various styles and designs, solar deck lights can enhance the visual appeal of your outdoor space. They create a cozy and inviting atmosphere, allowing you to enjoy your deck even after the sun goes down.
Safety and Security Illuminating your deck with solar lights can prevent accidents by automatically increasing visibility at night.
Tips for Choosing a Style
To select the perfect deck lighting for your space, you’ll have a few major factors to consider. Before you start shopping, think about:
The size and layout of your deck and your primary lighting goals, whether for ambiance, security, or both. This will help determine the type and number of lights you need.
The quality of solar panels can vary – look for panels made from monocrystalline or polycrystalline materials. These are more efficient at converting sunlight into energy, ensuring better performance.
Brightness and lighting modes provided will also vary. Check the lumens rating to ensure the lights provide adequate brightness for your needs. Some solar deck lights offer adjustable brightness and multiple lighting modes.
Durability and weather resistance, especially if your area is prone to severe weather. Look for an IP rating of at least IP65, indicating resistance to dust and water, ensuring longevity and reliability.
Style and design that match your deck’s aesthetics. Whether you prefer a modern look or a more rustic style, there are solar deck lights for you.
Installation Tips
Installing solar deck lights is typically a straightforward process that most homeowners can handle on their own. While the process may vary slightly depending on the lights you select, follow these general steps to ensure a smooth installation.
1) Plan Your Layout: Determine where you want to place your lights based on your deck’s design and your lighting goals. Focus on areas that need more illumination for safety, like stairs and walkways, as well as spots where you want to create a cozy ambiance.
2) Gather Your Tools: Most solar deck lights come with the necessary hardware, but you might also need a drill, screwdriver, and measuring tape. Having all your tools ready will make the installation process easier.
3) Mark the Positions: Use a pencil to mark where each light will be installed. Ensure they are in even intervals for even lighting.
4) Install the Lights: Follow the manufacturer’s instructions for mounting the lights. Typically, this involves attaching brackets or screws to the deck surface or railing. Make sure each light is securely fastened.
5) Activate the Lights: Once installed, turn on the lights and ensure the solar panels are positioned to receive maximum sunlight. Some models may require an initial charging period before they function fully.
6) Test and Adjust: Test the lights at night to ensure they provide adequate illumination. Make any necessary adjustments to their placement or angle to optimize lighting.
When to Call a Professional
While solar deck lights are generally easy to install and maintain, there are situations where professional help might be necessary.
If you come across electrical issues, such as lights not turning on or flickering despite following troubleshooting steps, it could indicate a deeper problem that requires expert diagnosis.
Additionally, for more complex lighting setups or integrations with other outdoor lighting systems, a professional can ensure everything is good to go.
Finally, if your solar deck lights suffer significant damage from severe weather or other events, a professional can assess the extent of the damage and recommend the best course of action.
Other Recommended Maintenance
You’ll need to clean the solar panels periodically with a soft cloth and mild soap to remove dust and debris that can accumulate and reduce their efficiency.
It’s also important to check the rechargeable batteries every few months, as they can degrade over time; replace them if they no longer hold a charge effectively. Regularly inspect the lights for any signs of damage, like cracks or loose connections, and address any issues promptly.
During the winter months, especially in colder climates, consider storing your solar lights indoors to protect them from harsh weather, or at least ensure they are free from snow and ice buildup if left outside.
To conclude, solar deck lights can be a smart and stylish addition to any outdoor space. They offer a range of benefits, from energy efficiency and cost savings to easy installation and low maintenance.
With various styles and designs available, finding the perfect ones to suit your needs is easy. If you need guidance on selecting features for your home or want to schedule an in-depth examination, call Inside and Out Property Inspections in Jacksonville, FL, and surrounding areas.
https://insideandoutpropertyinspectors.com/wp-content/uploads/2024/06/solar-deck-lights.jpeg10001500BJ Johnsonhttps://d39oyu4lp7snwz.cloudfront.net/wp-content/uploads/sites/54/2019/08/31171419/io-favicon-300x300.pngBJ Johnson2024-06-06 12:14:522024-12-24 19:41:46The Benefits of Solar Deck Lights and Tips for Choosing Yours
Stucco is a popular choice for home exteriors, particularly in southern states where the hot climates create ideal conditions for this durable material. However, even the most resilient surfaces need a little TLC from time to time. If your stucco is looking a bit tired or you’re simply ready for a change, you might be wondering if you can paint it.
The good news is that painting your stucco exterior can not only give your home a fresh, updated look but also provide an extra layer of protection against the elements. But before you break out the brushes and rollers, there are a few key things to consider. From understanding the unique characteristics of stucco to choosing the right paint and prepping the surface, we’ll go through everything you need to know to get the job done.
What is Stucco?
Stucco is a cement-based plaster that goes on the exterior of a building. It’s made from a mixture of cement, sand, and lime. Typically, you apply stucco in three coats over a lath base. Stucco is known for its durability and weather-resistant properties, making it an ideal choice for homes in dry climates.
Reasons to Paint Stucco
There are several reasons why homeowners choose to paint their stucco exteriors:
Aesthetic appeal: Painting stucco allows you to change the color of your home’s exterior, giving it a fresh, updated look.
Additional protection: A new coat of paint provides an extra layer of protection against the elements, helping to preserve the integrity of the stucco.
Increased durability: Properly painted stucco can last up to 10 years or more, depending on the quality of the paint and the preparation process.
Is Painting Stucco a Good Idea?
The decision to paint your stucco ultimately depends on your personal preferences, the climate you live in, and the current condition of your stucco.
In dry climates, such as Arizona, New Mexico, Nevada, and Texas, painting stucco can be a great way to enhance its durability and improve the overall appearance of your home’s exterior.
Preparing to Paint Stucco
Before you begin painting, it’s crucial to properly prepare the stucco surface. This involves the following steps:
Thorough cleaning: Clean the stucco surface to remove any dirt, debris, or loose material. You can use a pressure washer for this, but be cautious not to damage the stucco.
Repair any damage: Inspect the stucco for cracks, chips, or other damage. Repair these issues before painting to ensure a smooth, even surface
Allow the surface to dry: After cleaning and repairing, allow the stucco to dry completely. Then, you’re safe to proceed with the painting process.
Choosing the Right Paint
When it comes to painting stucco, acrylic latex paint is generally the best option. This type of paint is flexible and can withstand the textured surface of stucco. It’s important to select a high-quality paint to ensure longevity and optimal protection.
Step-by-Step Guide to Painting Stucco
1)Apply a primer: Once the stucco is clean, dry, and repaired, apply a primer to the surface. This will help the paint adhere better and provide a more even finish.
2)Begin painting: Using a brush, roller, or sprayer, apply the first coat of acrylic latex paint to the stucco. Work in sections, ensuring even coverage.
3)Allow the first coat to dry: Let the first coat of paint dry completely before applying the second coat. This typically takes a few hours, depending on the weather conditions.
4) Apply the second coat: Once the first coat is dry, apply the second coat of paint, following the same process as before.
An Example of Stucco That Could Use Some Repair
Other Recommended Maintenance
While you’re painting your stucco, it’s important to keep in mind a few other maintenance tasks that can help protect your home’s exterior. One key area to pay attention to is your home’s landscaping. When planning your garden or adding new plants near your foundation, be sure to leave a small gap between the greenery and your stucco walls. This space will help prevent moisture from seeping into your stucco and deter pests from making their way inside.
Another maintenance task to consider is inspecting and repairing any cracks or damage to your stucco before painting. You can fix small cracks with a stucco patching compound, while larger issues may require the help of a professional. By addressing these problems before applying a new coat of paint, you’ll ensure that your stucco looks seamless and is properly protected against the elements.
Lastly, don’t forget about the importance of cleaning your stucco before painting. Use a pressure washer or a garden hose with a gentle nozzle to spruce it up. This step will help the new paint adhere properly and create a smooth, even finish. If you notice any stubborn stains or mildew, consider using a stucco cleaner specifically designed to tackle these issues.
When Do I Call a Professional?
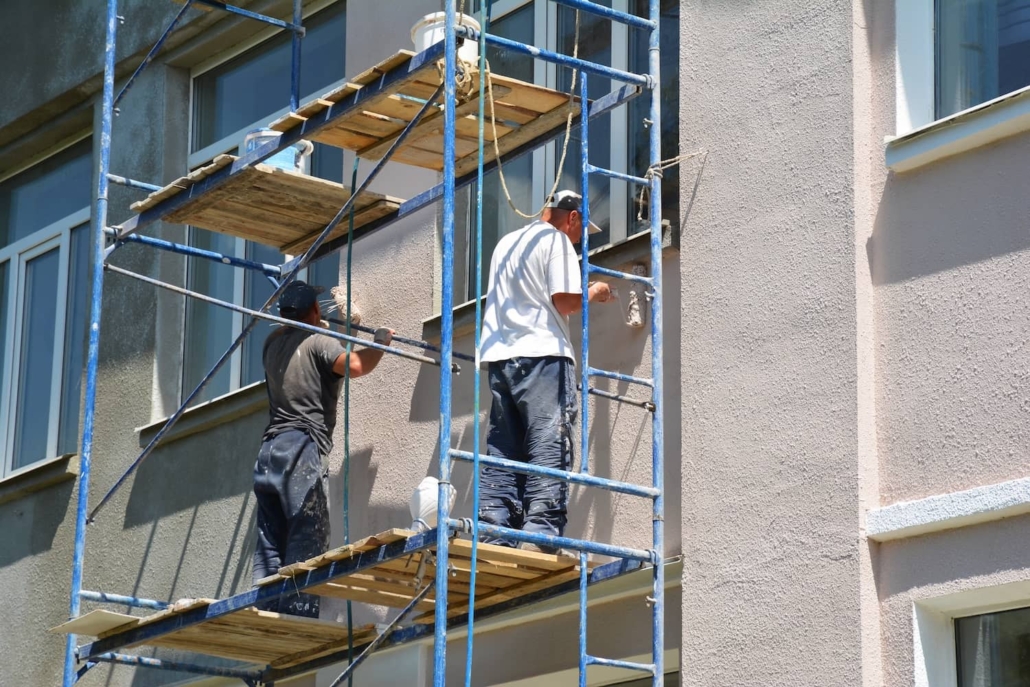
While painting stucco can be a rewarding DIY project, there are situations where it’s best to call in a professional. First and foremost, if your stucco has extensive damage or requires significant repairs, it’s wise to hire an expert. Professionals have the knowledge and skills necessary to properly assess the damage and make the appropriate fixes before painting begins. This ensures that your stucco surface is structurally sound and ready for a new coat of paint.
Another scenario where professional help may be necessary is when dealing with hard-to-reach areas. If your home has multiple stories or feature areas that are difficult to access safely, it’s best to leave the painting to the pros. Professional painters have the equipment, experience, and safety training needed to navigate these challenging spaces effectively. By hiring a professional in these situations, you can have confidence in the finished job.
If you’re unsure about tackling aprojecton your own, don’t hesitate to reach out to professionals for guidance.
https://www.youtube.com/watch?v=_vDcSBDcBW4
Conclusion
Painting your stucco exterior is a fantastic way to give your home a fresh, updated look while also providing an extra layer of protection against the elements. Following the proper preparation steps, selecting the right paint, and applying it with care, you can achieve a beautiful, long-lasting result. The key to success lies in the details! Take the time to properly clean and repair your stucco surface before painting. Equally important, don’t hesitate to call in professional help when needed.
As you plan out your project, keep in mind that painting your stucco is just one part of maintaining a healthy, safe, and attractive home. If you have questions about the condition of existing stucco or want to schedule an in-depth home inspection before getting started, reach out to Inside and Out Property Inspectors in Jacksonville, FL, and surrounding areas for expert service.
https://insideandoutpropertyinspectors.com/wp-content/uploads/2024/03/can-you-paint-stucco.jpeg10001500BJ Johnsonhttps://d39oyu4lp7snwz.cloudfront.net/wp-content/uploads/sites/54/2019/08/31171419/io-favicon-300x300.pngBJ Johnson2024-03-07 16:01:392026-09-17 13:39:15Can You Paint Stucco?
Your home’s siding endures sun, wind, rain, and temperature swings year after year. This critical outer layer takes the brunt of environmental wear to protect what’s inside. When selecting siding, you need an exterior armor that can stand the test of time without becoming a maintenance hassle. Among popular siding options, vinyl brings versatility and durability at an affordable price point. Known for fuss-free upkeep and longevity matching costlier choices, vinyl enriches your home’s curb appeal for decades to come. But how long can you expect vinyl siding to last?
In just a moment, we’ll cover the inside scoop on the average lifetime of vinyl siding, what impacts its lifespan, tips for maximizing its staying power, and when to involve trained professionals. With the right maintenance approach, your vinyl siding could defend your home’s beauty and value for a surprising length of time! Let’s see how.
The Benefits of Vinyl Siding
Vinyl siding contains PVC resin, the same durable, weather-resistant material utilized for pipes, gutters, and decking. This versatile composite mixes in color pigments and molds into panels mimicking wood grain, stucco, brick, and stone textures. Unlike real wood or masonry, vinyl shrugs off moisture, resists rotting and insect infiltration, and never requires painting or staining.
Specialized insulation backing can boost energy savings too. This perfect fusion of custom aesthetics, extreme durability, and fuss-free upkeep explains vinyl’s dominance among today’s siding choices. Protecting your home in style while minimizing maintenance has clear appeal.
What’s the Average Lifespan?
When installed correctly and maintained properly, vinyl siding lasts an average of 20-40 years before a full replacement becomes necessary. For perspective, that equals the time to grow a tree from a sapling to maturity. This impressive lifespan surpasses many other siding materials when accounting for regular upkeep expenses.
Under certain conditions, vinyl siding may begin deteriorating prematurely—low-quality materials, improper installation, excessive sun exposure, poor ventilation, or dark color choices can shorten its staying power. Make it a habit to inspect for signs of early wear or damage. Proactive care is key to enjoying vinyl’s maximum durability.
Signs Your Vinyl Siding Needs Attention
While vinyl siding ages slowly, you should keep an eye out for red flags indicating your exterior needs help. Subtle fading or discoloration, especially on sun-exposed areas, signals overdue cleaning and resealing. Visible cracks, holes, and gaps around panel edges provide pathways for moisture intrusion and pest infiltration requiring sealing. Buckling or warping panels point to stressed connections and possible future detachment that should be addressed.
Persistent dirt or mold/mildew buildup indicates improper maintenance and ventilation needing correction. Brittle, punctured, or loose sections demonstrate advanced weathering necessitating replacement. If you spot isolated vinyl damage, spot repairs often work well. But if multiple regions across your home’s siding show issues, full replacement becomes the wiser, more cost-effective solution long-term.
Acting early at the first signs of trouble allows minor repairs. Waiting until problems compound leads to premature failure. Regularly inspect and address concerns promptly to maximize your siding’s lifespan.
Other Recommended Maintenance
To maximize your vinyl siding’s lifespan, make maintenance a priority. Wash it annually with mild detergent to remove dirt, mildew, and debris. Inspect for any loosening, gaps, or damage, especially after severe weather. Reseal edges and repaint when needed to protect from moisture and sun exposure. Ensure surrounding trees don’t rub against the siding. With this diligent care, your vinyl siding will keep your home beautifully protected for over two decades in many cases.
When to Call a Professional
While DIY works for minor vinyl siding repairs, extensive damage often requires professional expertise. Siding contractors have the skills to properly match new panels, integrate repairs seamlessly, meet codes, and follow the manufacturer’s replacement guidelines correctly. For complex siding issues, a specialist makes sure the job is done right.
Conclusion
All things considered, your home’s exterior siding plays a critical role in protecting your most valuable investment from the elements. When well-maintained, vinyl siding provides customized curb appeal and fuss-free durability for over 20 years on average.
Stay proactive against potential damage by washing and inspecting it annually, acting quickly on any signs of wear. With diligent care, vinyl siding forms a resilient barrier against weathering to maintain your home’s structure and aesthetic appeal over the long haul. If you have questions about the condition of your home’s exterior or want to schedule an in-depth inspection, don’t wait! Call Inside and Out Property Inspectors, or schedule online, in Jacksonville, FL, and surrounding areas today.
https://insideandoutpropertyinspectors.com/wp-content/uploads/2024/03/how-long-does-vinyl-siding-last.jpeg10011500BJ Johnsonhttps://d39oyu4lp7snwz.cloudfront.net/wp-content/uploads/sites/54/2019/08/31171419/io-favicon-300x300.pngBJ Johnson2024-03-01 13:37:592024-03-01 13:37:59How Long Does Vinyl Siding Last?