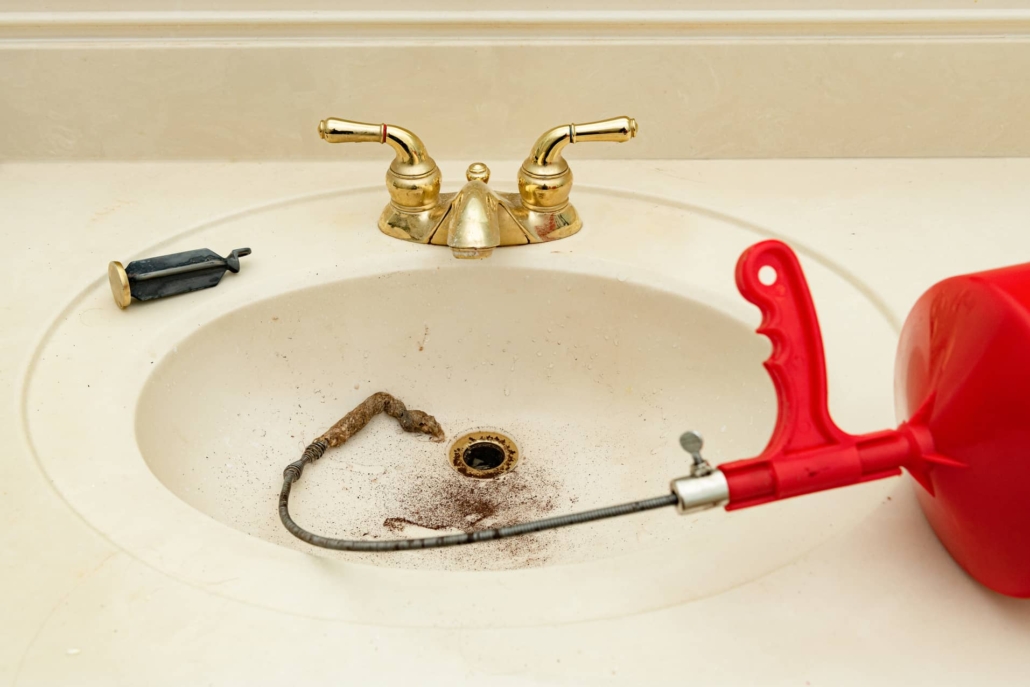
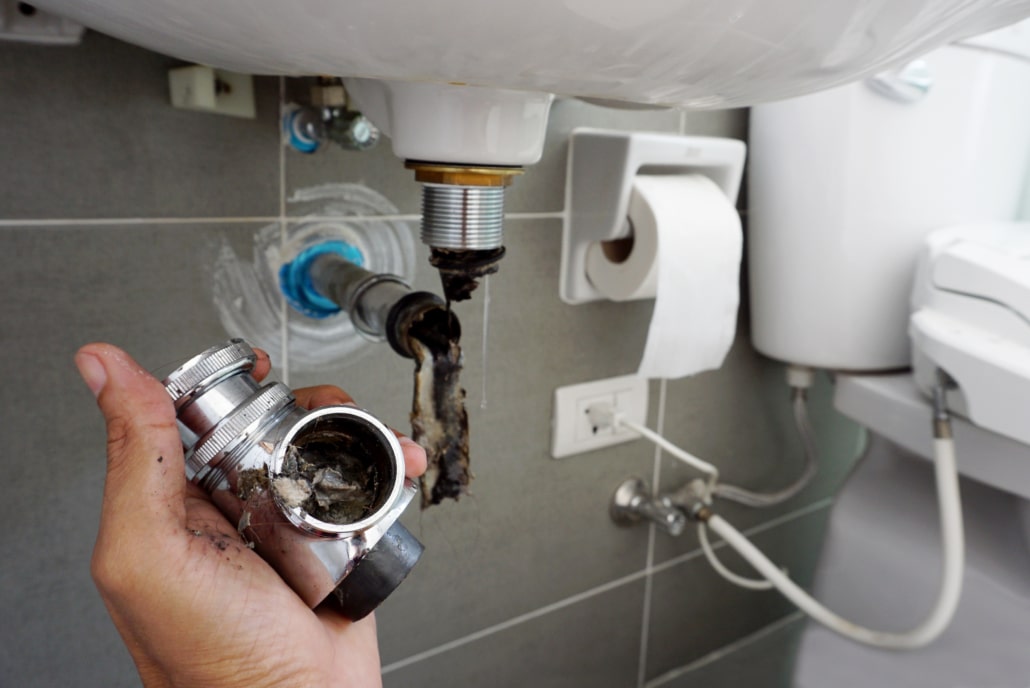
Coffee for many is a morning staple. It is the smell many want in the morning and the taste to start their day off right. When we run coffee in our machines, grounds are left over. What do we do with them? Some people think putting them down the sink makes it smell better. Can coffee grounds go down the sink? Unfortunately, no, as they don’t dissolve in water and can cause clogs in the drainage system.
Let’s take a look.
What Happens With the Coffee Grounds in The Sink?
As mentioned above, they don’t dissolve in water and can accumulate in pipes, leading to blockages. This can result in slow-draining sinks or even complete backups, requiring expensive repairs.
What Else Should Not Go In The Sink?
Apart from coffee grounds, there are several other items that you should never dispose of in the sink. These include:
Grease or cooking oil: These substances can solidify in pipes, causing major blockages.
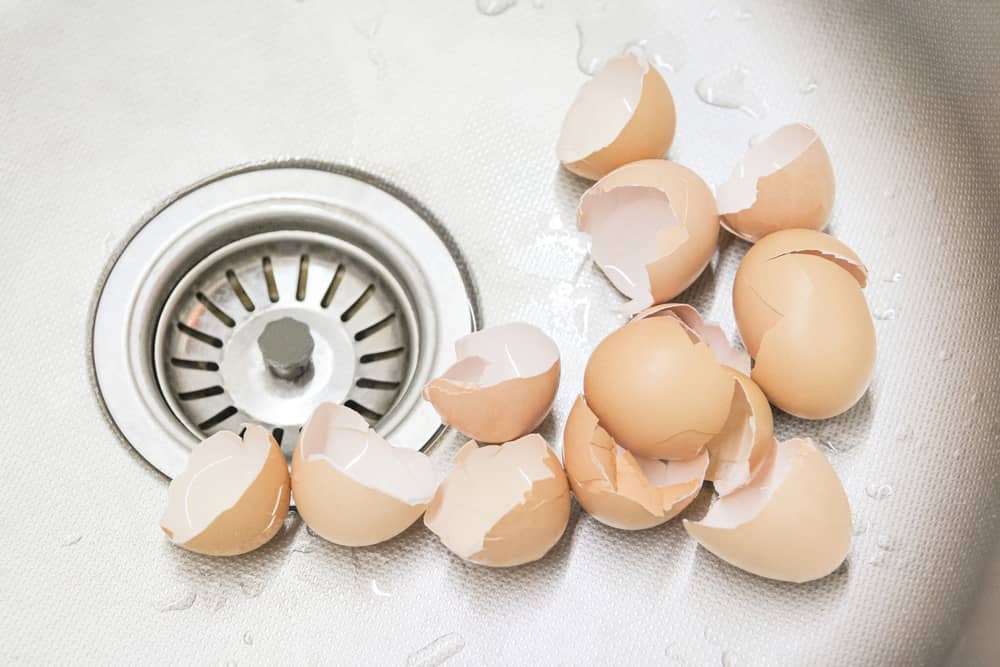
Eggshells: The thin membrane lining inside eggshells can stick to pipes and create obstructions.
Rice, pasta, and bread: These starchy foods can absorb water and expand, leading to pipe blockages over time.
Fibrous vegetables, such as celery and potato peels: The long, stringy fibers can wrap around pipes and impede drainage.
Putting the wrong things down the sink can have serious consequences for your plumbing system. Clogs can develop, resulting in slow drainage, foul odors, and even sewage backups. In some cases, the pipes may burst or leak due to increased pressure caused by blockages. This can lead to extensive water damage and costly repairs.
Other Ideas For The Coffee Grounds
Instead of disposing of coffee grounds down the sink, there are several eco-friendly alternatives you can consider:
Composting: Coffee grounds make an excellent addition to compost piles or bins. They can enrich the soil with organic matter, improve drainage, and act as a natural fertilizer.
Gardening: Coffee grounds can be sprinkled around acid-loving plants like azaleas, rhododendrons, and blueberries. They provide essential nutrients and help maintain the desired pH level in the soil.
Cleaning: Coffee grounds can be used as an abrasive cleaner for pots, pans, and even as a natural scrub for exfoliating your skin.
https://www.youtube.com/watch?v=aXhi-71KK6k
Other Recommended Maintenance
Now that you know why you don’t put coffee grounds down the sink, let’s take a look at a few other areas of maintenance. One of those is drain cleaner in the garbage disposal. Some people say that drain cleaner is okay, but the problem is there are harsh chemicals used to make it. Thus, it can eat away at the pipes and cause major damage.
Lastly, garbage disposals don’t need a GFCI. They only need a dedicated circuit that is 15 or 20 amp and it should be a circuit that is separate from the dishwasher. This is so the dishwasher circuit is not on overload.
When to Call Inside and Out Property Inspectors?
If you have accidentally put the wrong things down the sink and are experiencing persistent plumbing issues, it is advisable to call Inside and Out Property Inspectors so we can recommend a master plumber. They have the expertise and proper tools to clear stubborn blockages safely and efficiently, preventing further damage to your plumbing system.
Conclusion
To maintain a healthy plumbing system and avoid costly repairs, it is crucial not to put coffee grounds and other inappropriate items down the sink. Also, by responsibly disposing of coffee grounds and using eco-friendly alternatives, you can protect your pipes and contribute to a more sustainable environment. If in doubt or facing severe plumbing problems, always consult a professional for assistance. Contact Inside and Out Property Inspectors in Jacksonville, FL, and surrounding areas to get your home inspection done today.
https://insideandoutpropertyinspectors.com/wp-content/uploads/2023/08/coffee_grounds_25.jpeg9361404BJ Johnsonhttps://d39oyu4lp7snwz.cloudfront.net/wp-content/uploads/sites/54/2019/08/31171419/io-favicon-300x300.pngBJ Johnson2023-08-15 01:02:012026-09-17 13:38:21Can Coffee Grounds Go Down The Sink?
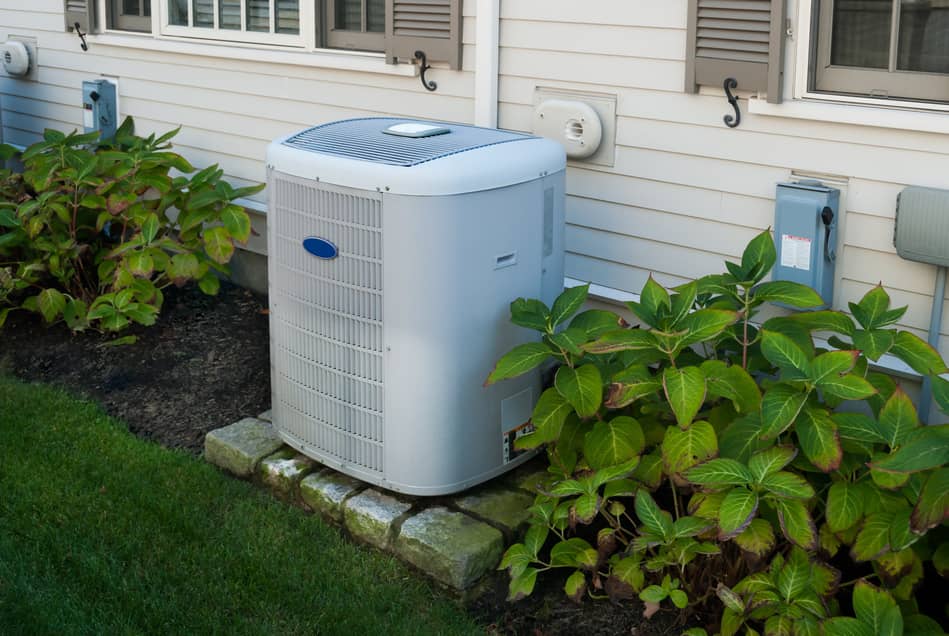
When it comes to owning a home, there are a variety of maintenance and cleaning needs. Additionally, you will want to ensure that everything in your home is working properly. Make sure that you have an understanding of how every system in your home functions. This will save you time and money as you work through your maintenance checklist. Also, ensure that the conditions in your home are conducive to keeping the home safe and free from mold. Humidity will promote mold growth, so ensure your air conditioner is working to dehumidify your home as it runs. Do air conditioners dehumidify? Yes, it will remove moisture from the air that gets sucked into the AC unit as it cools the air down.
Let’s take a look below at some more details regarding dehumidifying and cooling your home.
What Does It Mean To Dehumidify?
Dehumidifying your home means removing moisture from the air. The air conditioner will act as a dehumidifier while it runs in your home. The air conditioner will not completely remove all moisture from your home, but it will remove some. If your home shows a high moisture reading, then you will want to invest in an additional dehumidifier. Run your air conditioner at a temperature that is consistent with the outdoor air. Consequently, this allows the unit to reduce the moisture from the air as it sucks it into the unit and blows the warm air out.
How Does It Work In An Air Conditioner?
Let’s take a look at how the air conditioning system works to remove excess moisture from your home.
Liquid refrigerant – When the ac unit kicks on it will push refrigerant through the pipes within the unit. Excess heat is then removed.
Evaporator – The cold air will then be pushed through to each room by the evaporator in the system.
Liquid refrigerant – The liquid refrigerant is then converted to gas once it passes through the expansion valve.
Evaporator coils – The evaporator coils cool the refrigerant once the refrigerant is pushed through the evaporator coils.
AC fans – The internal fans in the AC unit then push the cool air from the evaporator coils through the air ducts in the home.
Liquid refrigerant – The refrigerant then absorbs the hot air from the home and converts it to a hot gas.
Compressor – Next, the refrigerant is pushed into the compressor where it becomes a high-temperature and high-pressure gas.
Condenser coils – The gas is then pushed through the condenser coils and the heat that was absorbed is released through the outside unit.
When Should I Purchase A Dehumidifier?
If you aren’t sure when you will need to purchase a dehumidifier to dehumidify the air, it should be considered under the following circumstances. Also, read up on how a dehumidifier works with your central air conditioners.
Personal preference – If the environment in your home does not feel like the humidity levels are where they need to be, you will want to purchase a dehumidifier. Consider determining the type of environment that you want the rooms that you spend your time in to feel like.
Budget – An AC unit’s cost is expensive compared to a dehumidifier. Purchasing a dehumidifier will go a long way toward reducing the humidity in the home. Dehumidifiers are portable and inexpensive.
Location – If you live near water, then the moisture levels in your home will be exponentially high. Installing a dehumidifier will help keep the moisture levels in your home from getting out of hand.
https://youtu.be/sBKU88MwoD4
Other Recommended Maintenance
Now that you are aware of how an air conditioner dehumidifies your home, you can read up on whether or not your ceiling fans help the ac unit. Placing your ceiling fans on the correct rotation allows you to assist your ac unit with maintaining the airflow and moisture control in your home.
Next, read up on what you need to consider when you replace your HVAC unit. Homeowners should not rush into replacing their HVAC unit without researching how long the new one could last. Also, research the size of the HVAC unit to ensure that it fits your home’s needs.
Lastly, as you install your new ac unit or work to repair your current unit, keep in mind that carbon monoxide should be a non-issue. Any electrical system like an HVAC unit will not emit carbon monoxide.
L
When Do I Call A Professional?
When it comes to your HVAC unit, you will want to make sure that it is working properly. Keeping the humidity levels in your home at a stable level will allow you to keep mold and mildew from growing in your air ducts and home. Call on your local home inspection team to inspect your HVAC unit and determine that everything is working properly. Also, your home inspection team can recommend a reputable HVAC system service technician to test your system.
Conclusion
Hiring the right professional HVAC service technician is necessary to determine that your system is set to remove excess moisture from your home. Not only is the goal of the HVAC unit to provide your home with the right air temperatures, but it also wants to maintain indoor air quality. Dehumidifying your home will need assistance. The air conditioning unit will not be able to remove all of the moisture on its own. Call on your local home inspection team to determine where additional dehumidifiers could be used. Reach out to Inside and Out Property Inspectors in Jacksonville, FL, and surrounding areas to get your home inspection done today.
https://insideandoutpropertyinspectors.com/wp-content/uploads/2023/06/air_conditioner_25.jpeg11351702BJ Johnsonhttps://d39oyu4lp7snwz.cloudfront.net/wp-content/uploads/sites/54/2019/08/31171419/io-favicon-300x300.pngBJ Johnson2023-06-26 15:45:172026-09-17 13:45:11Do Air Conditioners Dehumidify?
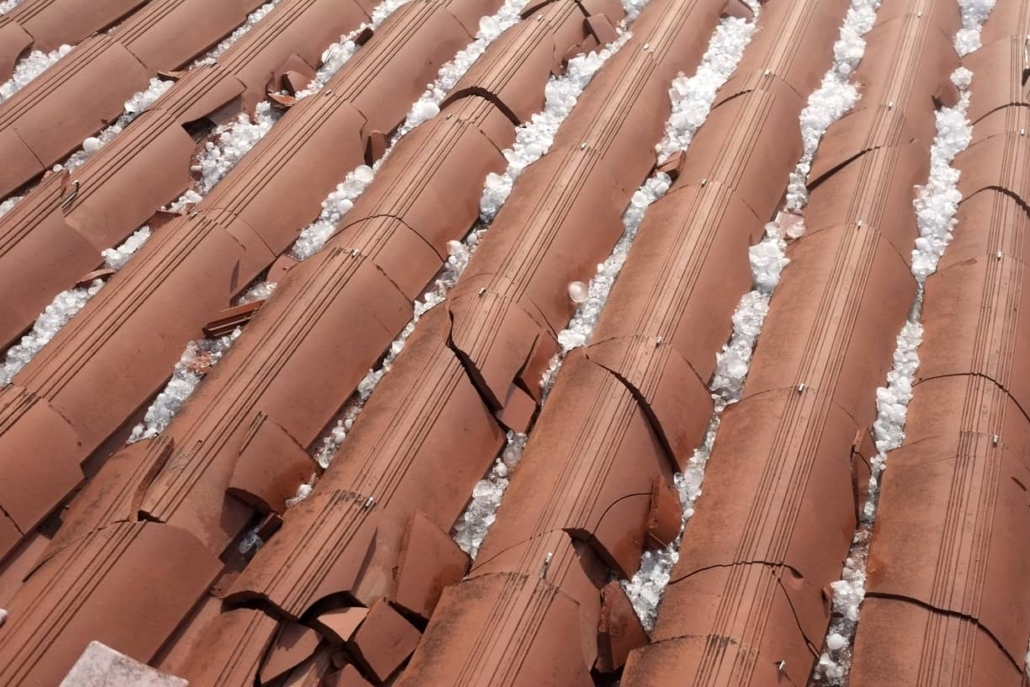
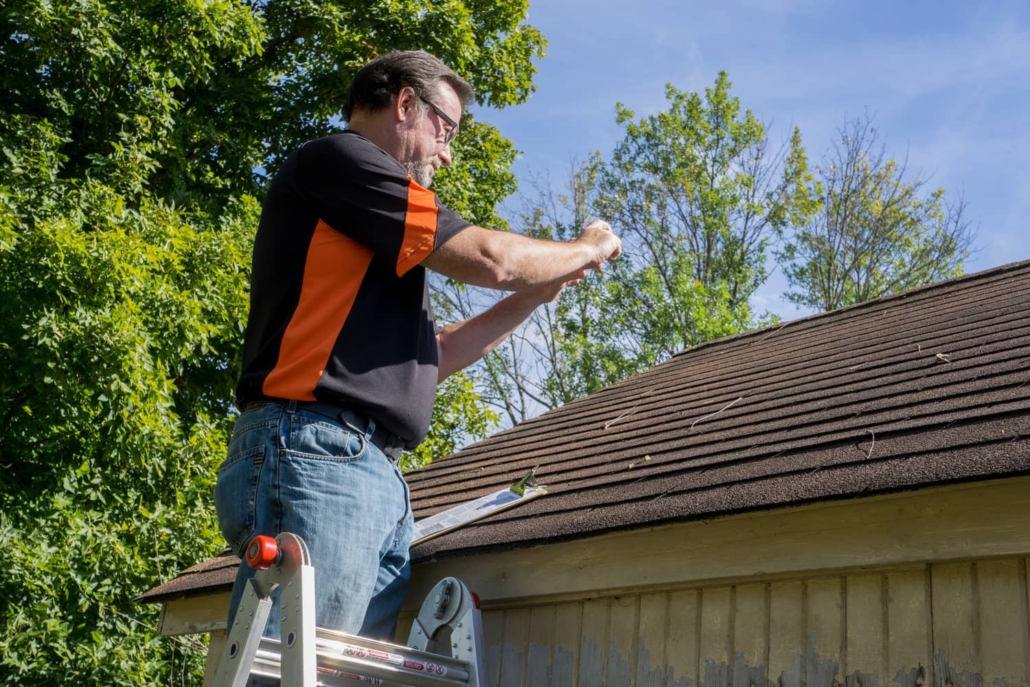
Imagine coming home from a long day at work and the skies start looking very threatening. You rush to pull your car into the garage and get inside where it is safe. As you get settled in your home you start hearing loud bangs. You look outside the window and there are large pieces of ice jumping around on your driveway. Immediately you realize it is a hail storm. Homeowners’ worst nightmares are acts of mother nature that cannot be predicted or changed. Once the storm is over you head outside to inspect the damages to your roof and the rest of the home. What does hail damage on a roof look like? Dents, dings, damaged shingles, bruising to your roof, and loose roof materials are all signs.
Let’s take a look below at some more specifics regarding hail damage on a roof.
How Does Hail Damage The Roof?
Believe it or not, hail can damage a roof in a variety of ways. Let’s take a look below at what those are.
Roof slope – Depending on how the roof is sloped on your home will determine the types of hail damage that it might incur.
Roof age – The older the roof, the less likely it will survive major damage caused by a hail storm.
Roofing materials – Hail can dent, ding, and even cause roofing materials to become loose and out of place.
Wind speed – The speed of the wind during a hail storm can cause substantial damage to the roof materials.
Wind direction – Depending on how your roof is situated and the direction in which the wind is coming from will determine how damaged the roofing materials will become.
Size of the hail – The size of the hail will also determine how bad the damage is. The larger the hail typically means the larger the damage.
Keep in mind that damage to your roof is generally cosmetic. You will want to hire a professional to take a closer look. If the hail is large, you will notice a loss of shingles, loss of granules, bruising to the shingle and even notice other structural changes.
What Does Hail Damage Look Like?
There will be some noticeable damages to your roof as a result of a hail storm. Let’s take a look below at what some of those damages look like.
Fiberglass mat exposure – The force of hail falling from the sky can loosen any shingle and make it slide away which will expose the fiberglass mat underneath.
Granule loss – As the hail dings the shingle, the granule material on the shingle will begin to disconnect and fall off the shingle.
Damage to the fiberglass mat – If the fiberglass mat is exposed you will notice damage to this protective layer. Damage to the mat could also cause damage to the roof sheathing underneath it.
Cracks in the shingle – Hail that causes cracks in the shingle is not good. Cracks and crevices in a roof allow water to get into the roof structure and attic space. This will promote mold growth and other damage to the roof.
Damage to the seal – If the hail damages the seal strip or weakens it at all, the shingles will be capable of blowing off the roof during the wind storm. Check for any loose shingles when the storm is over.
https://youtu.be/TZreBlAUU1U
Other Recommended Maintenance
Now that you understand what hail damage to a roof looks like, you can proceed with a roof inspection checklist. This allows you to look for any exposed nails, missing tiles, or flashing to name a few. If there are damaged shingles, they should be repaired or replaced immediately.
Next, check the ceilings to make sure there are no wet spots. Any wet spots are a sign that you have a roof leak. Check to see if there is damage to your shingles, flashing, or roof vent seals. You will need to call a professional to check for you.
Lastly, if you really want to know what kind of damage could occur to your roof after a hail storm, get to know what shingles are made of.
l
When Do I Call A Professional?
To get your roof inspected after a hail storm you should reach out to your local home inspection team. Also, consider hiring a local professionally licensed roofing contractor that understands the specifics regarding your roofing material. Together these professionals can come up with a solution and some reports for your insurance company. Keep in mind that your insurance company will want multiple estimates for roof repairs.
https://insideandoutpropertyinspectors.com/wp-content/uploads/2023/04/hail_damage_markings_25.jpeg10001500BJ Johnsonhttps://d39oyu4lp7snwz.cloudfront.net/wp-content/uploads/sites/54/2019/08/31171419/io-favicon-300x300.pngBJ Johnson2023-04-25 15:37:152026-10-22 01:50:15What Does Hail Damage On A Roof Look Like?
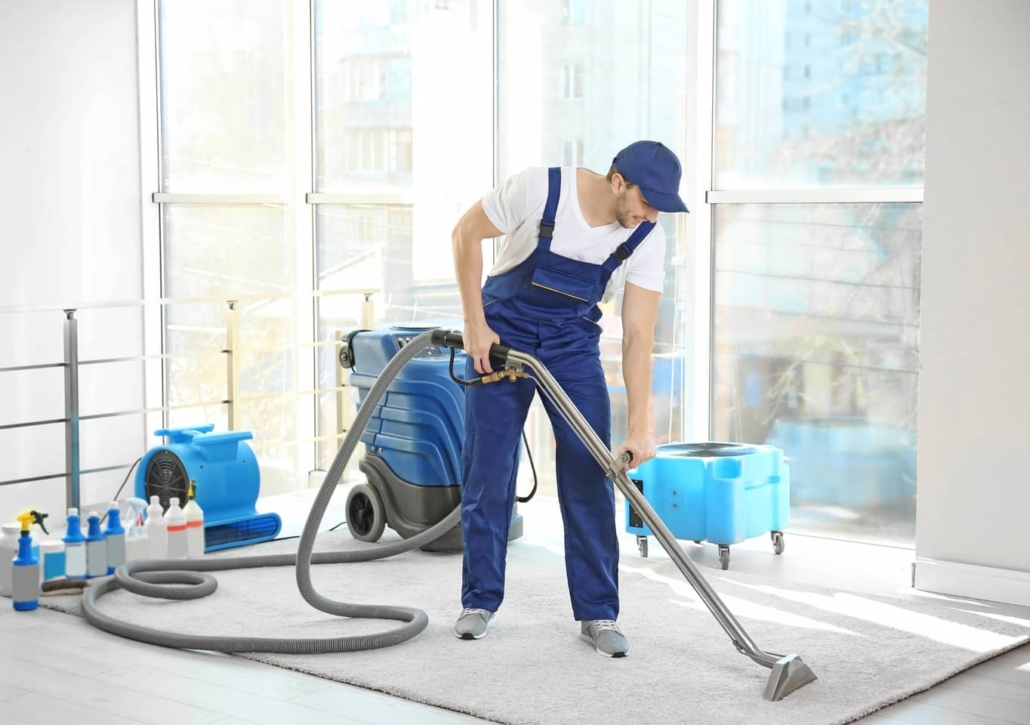
When you make the big decision of purchasing a home, you want to remind yourself that this investment requires upkeep and maintenance. Having pets that wander your carpet or spills that occur on the carpet could cause a few concerns. In most cases, homeowners do not think of the overuse of their carpets. Some homeowners will hire a carpet cleaning company once a year to clean the carpets. However, this doesn’t necessarily solve all of the issues. Luckily, if your carpet smells, a carpet cleaning company might help. Wondering how to get the smell out of carpet? There are a variety of ways to get this done, baking soda, and vinegar are always an option.
Let’s take a look below at how you can keep your carpet smelling fresh.
What Are The Steps?
Every home project requires a particular level of instructions or directions. Let’s take a look at how we can get the foul odors out of the carpet.
Sprinkle the Baking Soda – Baking soda has many uses in your home. As a natural odor absorber, it can be used in your closet, garbage, garbage disposal, or on your carpets. Spread the baking soda around your carpet.
Spread the Baking Soda – With your shoes on, walk around the carpet to spread the baking soda around the carpet. It is important to spread the baking soda around.
Let it settle in – Allow the baking soda to settle into the carpet for roughly 30 minutes. You want the baking soda to seep down to the base of the carpet. Not only will it soak up odors, but it will also grab excess moisture.
Suck it up – Grab your vacuum cleaner and vacuum up the baking soda.
Still smells – Repeat these steps until you no longer have a smell.
How Can I Keep My Home Smelling Fresh?
Luckily, if the baking soda trick doesn’t work, there are a few other tricks that you can pull off. Let’s take a look below at what those other options might be.
Essential oils – Masking the smells in your home with essential oils is a great way to naturally eliminate odors. If you don’t have an oil diffuser, just mix the correct amount of oil drops with water into a spray bottle. Then spray the mixture onto your carpet.
Fruit peels – Cut up the fruit peels for oranges, limes, or lemons, and grind them into your garbage disposal. This will create a fruity smell in your kitchen that can mask other odors in your home.
Crockpot – With the lid off and the crockpot on the “low” setting, mix baking soda and water and let the heat from the crockpot do the trick.
Vinegar and water – If you have a mildew smell coming from your carpet, mix 2 cups of warm water with 1 cup of distilled white vinegar. Gently spray the vinegar solution onto your carpet. Once the carpet dries, you will no longer smell the vinegar scent.
Keep in mind that you can also look to cleaning products such as hydrogen peroxide or carpet shampoo. You will want the area dry and if not, use a fan to air dry the carpet.
Other Recommended Maintenance
Now that you have an idea of how to get a smell out of your carpet, you can begin reading up on how to remove mold from your carpets. Mold is a likely proponent of your smelly carpet. Understanding how to remove the mold will determine if you need to replace the carpet or simply get it cleaned.
Next, while using a carpet cleaner or scrubbing away mold and stains, soap is likely to settle on the carpet. Removing the soap from the carpet is important. You will want to read up on how to clean soap out of your carpets. This will ensure that the carpet gets properly dried.
Lastly, the moment that you start cleaning your carpet, you will want to know how long it takes the carpet to dry. If you do not dry the carpet promptly, then you risk the carpet breeding mold and mildew. Consequently, if this occurs, you will be back to square one about getting smells out of your carpet.
When Do I Call A Professional?
Carpet cleaning services are fairly prevalent in most communities. If you do not have a local carpet cleaning service, it is possible that you could rent a carpet cleaning machine from your local hardware store. Once you have completed the recommended cleaning steps above, determine how effective they were. If you aren’t satisfied, reach out to your local home inspection team. They can inspect your carpet and other floors. Also, they can refer a reputable carpet cleaning company.
Conclusion
After you have attempted to get the smells out of your carpet keep a record of how many times this maintenance occurs. Consequently, this might be a situation where it is time to replace your carpet. In some cases, the padding underneath the carpet can get moldy and soggy and creates a constant smell. This would be a good time to get a home inspection. They can conduct a thorough inspection of your carpet and flooring. Reach out to Inside and Out Property Inspectors in Jacksonville, FL, and surrounding areas to get your home inspection done today.
https://insideandoutpropertyinspectors.com/wp-content/uploads/2023/03/baking_soda_and_fruit_peels_25.jpeg9601440BJ Johnsonhttps://d39oyu4lp7snwz.cloudfront.net/wp-content/uploads/sites/54/2019/08/31171419/io-favicon-300x300.pngBJ Johnson2023-03-16 15:23:382023-03-16 15:23:38How To Get Smell Out Of Carpet
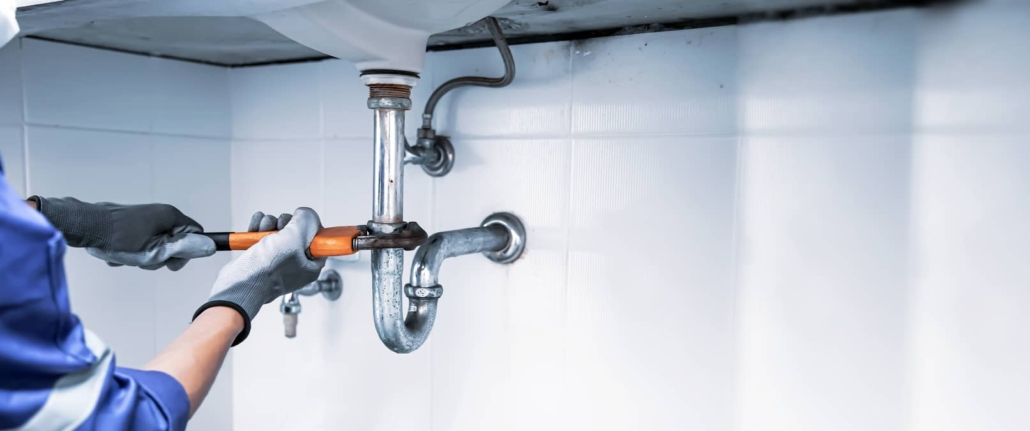
Owning a home requires you to complete a lot of maintenance and projects. One of those rare projects deals with clearing your sink drain and keeping the P-trap free and clear. If you don’t want your bathroom sink drain to clog, you will want to ensure that it is cleaned out on a regular basis. Ever wonder how to remove a drain from a bathroom sink? Believe it or not, there is a simple nine-step process to remove your sink drain.
Let’s take a look below at how to remove the drain from your bathroom sink.
Recommended Equipment?
If you need to remove the drain of your bathroom sink you will want specific tools. Let’s take a look at what those tools are.
Believe it or not, the steps to removing your bathroom sink drain are fairly easy. If you don’t have the tools or the patience to complete this project, reach out to your local professionally licensed master plumber. Let’s take a look below at what those steps are.
Place your bucket under the P-trap that is located under your sink.
Turn off the water for both of your hot and cold faucet lines.
Pull the stopper and then remove the spring clip attached to the pivot rod and then unscrew the pivot nut from the connected drain pipe under the sink.
Then remove the drain stop from the drain pipe.
Unclog the drain with your hair removal tool.
Now unscrew each section of the P-trap from the main drain pipe.
Use hot water and vinegar to rinse the drain pipe and clean it from any gunk that is remaining.
Pop the drain pipe from the sink to remove the drain pipe.
Clean the drain pipe and the sink.
Use a plumber’s putty and replace the drain pipe in the sink so that you have a tight seal.
Re-attach the plumbing below the sink and clean all areas that are still dirty.
Following these steps allows you to pop the drain stopper and remove the sink stopper to clean the stopper. If you want to remove the bathroom sink drain assembly, then unscrew the nut and take out the bathroom sink stopper so that the drain opens are keys.
How Much Does It Cost?
The good thing about removing a drain from your bathroom sink is that it is fairly simple to do. However, if you don’t have the tools or the energy to get this project done, you can call on a local master plumber. The average labor charge for a project like this is between $40 and $50 per hour.
Other Recommended Maintenance
Now that you know how to remove the drain from your bathroom sink, you can check on why the sink drain pipes might be leaking. Once you determine the issue, you can use a patch and clamp with some epoxy putty to stop the leak.
Next, while you are checking your plumbing, you can work on your kitchen sink. Make sure that the kitchen faucet is tight so that there are no leaks. Use the wrench that you used to remove the drain from your bathroom sink to tighten the kitchen faucet.
Lastly, if you have a clog in your sink drain and cannot remove the drain from your bathroom sink, consider pouring salt down the drain. Pouring salt down the drain and rinsing it with hot water allows the salt to emulsify and work to remove the clog in your bathroom sink drain.
When Do I Call A Professional?
If removing the drain from your bathroom sink becomes an issue, call on a local master plumber. Not only can they replace your bathroom sink drain, but they can also clean it and check all of the plumbing in your bathroom. Keep in mind, calling on your local home inspection team is also a great idea. Additionally, they can inspect your entire plumbing system. Also, they can refer a reputable Master Plumber.
Conclusion
When it comes to removing your bathroom sink drain, can be a fairly simple project. However, if you don’t have the tools or the strength to remove the drain, you will want to call a professional. Consequently, using a master plumber can allow you the opportunity to have all of your sink drains removed for cleaning. Also, call on your local home inspection team to inspect your entire plumbing system checked. Contact Inside and Out Property Inspectors in Jacksonville, FL, and surrounding areas to get your sewer scope inspection done today.
https://insideandoutpropertyinspectors.com/wp-content/uploads/2023/02/bathroom_sink_25.jpeg10081512BJ Johnsonhttps://d39oyu4lp7snwz.cloudfront.net/wp-content/uploads/sites/54/2019/08/31171419/io-favicon-300x300.pngBJ Johnson2023-02-23 20:03:422023-02-23 20:03:43How To Remove A Drain From Bathroom Sink
A running toilet or weak flush often comes down to one simple fix inside your tank. Learning how to adjust the water level in toilet mechanisms helps you stop water waste, lower utility bills, and protect your bathroom flooring from accidental overflows.
Whether you live in Jacksonville, Orange Park, or St. Augustine, toilet fill valves operate on basic mechanical principles. Adjusting the water line takes only a few minutes and standard household tools.
Understanding Your Toilet Tank Mechanism
Before turning any screws or adjusting clips, you must identify the type of fill valve inside your toilet tank. Most homes across Northeast Florida feature one of three standard designs.
Here are the primary fill valve types found in residential toilets:
Float Ball Valves: An older style featuring a long metal or plastic arm attached to a hollow plastic ball. The floating ball rises with the water level to shut off the valve.
Cylinder Float Valves: A modern, vertical design where a small plastic cylinder slides up and down the main fill valve shaft.
Floatless Fill Valves: Modern pressure-sensing valves that sit at the bottom of the tank without visible floating arms or cylinders.
How to Adjust Water Level in Toilet Tanks with a Float Ball
A float ball valve uses leverage to shut off incoming water. When the water level reaches the target height, the floating ball lifts the arm and closes the internal valve seal.
Follow these steps to adjust a float ball mechanism:
Remove the tank lid and set it safely on a towel.
Locate the long arm extending from the fill valve to the plastic float ball.
Check the water level relative to the overflow pipe. The ideal water level sits roughly one inch below the top of the open overflow tube.
Locate the adjustment screw where the float arm attaches to the top of the fill valve.
Turn the screw clockwise with a screwdriver to lower the float ball and reduce the tank water level.
Turn the screw counterclockwise to raise the float ball and increase the tank water level.
If your float arm lacks an adjustment screw, gently bend the metal arm downward to lower the water line or upward to raise it.
Flush the toilet to test the new water level and confirm the water stops filling at the correct mark.
How to Adjust Water Level in Toilet Tanks with Floatless Valves
Floatless fill valves use a diaphragm mechanism that senses water pressure at the bottom of the tank rather than relying on a visible float.
Follow these steps to adjust a floatless valve mechanism:
Turn off the main water supply valve located on the wall behind the toilet.
Remove the tank lid and locate the floatless valve body at the bottom of the tank.
Locate the plastic adjustment screw positioned on the top or side of the valve housing.
Turn the adjustment screw clockwise to lower the water level or counterclockwise to raise it.
Turn the water supply valve back on, allow the tank to fill, and test the flush depth.
Ideal Toilet Water Levels and Common Symptoms
Maintaining the correct water height keeps your toilet functioning efficiently while protecting your home from water damage.
Water Level Status
Tank Conditions
Common Symptoms
Too High
Water sits above or spills into the overflow pipe continuously
Running toilet noises, constant water waste, higher monthly utility bills
Too Low
Water sits more than 1.5 inches below the overflow pipe line
Weak flushes, double flushing required, frequent clogs in drain lines
Proper Level
Water rests steadily 0.5 to 1 inch below the top of the overflow pipe
Strong single flush, quiet operation, efficient water usage
Why Water Level Settings Matter in Northeast Florida
Proper toilet tank settings protect your home from specific environmental conditions common to Northeast Florida. Coastal air humidity, local water hardness, and home age all play a role in how your plumbing operates.
Here is why maintaining correct water levels is essential for local homeowners:
Hard Water Mineral Buildup: Municipal water across Jacksonville, Clay County, and surrounding areas contains minerals that leave crusty deposits on fill valves and flappers. Excessive water levels cause mineral crusting around overflow pipes, leading to permanent leaks.
Tank Condensation and Mold: In humid Florida climates, filling a tank with cold municipal water causes the exterior ceramic to sweat. Water dripping off high-filling tanks onto bathroom floors creates ideal conditions for subfloor rot and hidden mold growth.
Higher Water Costs: A toilet that runs constantly due to an overfilled tank can waste hundreds of gallons of water daily, drastically increasing monthly utility bills.
Drain Line Flow: Toilets require a full-volume flush to clear waste through long residential lateral pipes. A water level set too low leaves solid waste sitting in drain lines, increasing the risk of main line blockages.
[Visual Idea: Informational diagram demonstrating how toilet tank sweating creates moisture buildup on bathroom flooring in humid climates.]
Troubleshooting Persistent Toilet Tank Issues
If adjusting the fill valve float does not correct your water level, another component inside the tank may be worn out or damaged.
Here are common issues that cause water level problems:
Worn Flapper Valves: Over time, chlorine and hard water break down rubber flapper seals. A leaking flapper allows water to drain continuously into the bowl, forcing the fill valve to run indefinitely.
Cracked Overflow Tubes: A hairline crack in the plastic overflow pipe allows water to trickle down into the bowl regardless of your float settings.
Debris in the Fill Valve: Sand or mineral scale trapped inside the upper valve diaphragm prevents the seal from closing completely.
High Home Water Pressure: Excessive municipal water pressure can overpower old fill valve seals, forcing water past the shutoff mechanism.
Related Questions to Explore
How do inspectors evaluate plumbing safety during a general home inspection?
Inspectors test supply line pressure, assess shutoff valves, check drain speeds, and inspect visible supply lines and fixture connections. They look for active leaks, improper venting, and material degradation across all bathrooms and kitchens to catch plumbing defects early.
Why should home buyers consider a sewer scope inspection for older properties?
Standard visual checks only cover visible indoor pipes. A sewer scope inspection uses a specialized camera to examine underground lateral lines, spotting hidden tree root intrusions, cracked cast iron, low spots, and offset joints beneath the foundation or lawn.
What hidden hazards can undetected bathroom moisture cause over time?
Persistent moisture leaking beneath tiles or behind walls weakens the subfloor and creates ideal conditions for hidden mold growth. A targeted mold inspection identifies elevated spore levels and locates moisture pockets before rot damages structural framing or degrades indoor air quality.
How does thermal imaging help locate hidden plumbing leaks?
Infrared thermal imaging cameras detect subtle temperature differences across walls, ceilings, and floors. Because evaporating water cools surrounding materials, thermography pinpoints active leaks and saturated subflooring non-invasively without cutting into drywall.
When to Call a Professional
Adjusting a toilet water level is typically a simple home maintenance project. However, certain warning signs point to broader plumbing or structural issues that require professional evaluation.
You should contact a professional property inspector if:
You notice recurring water stains, soft floor tiles, or dark mold growth around the base of your toilets.
Adjusting the fill valve fails to stop your toilet from running or filling inconsistently.
You experience frequent drain backups across multiple bathroom fixtures in your home.
You are preparing to buy or sell a property and need a comprehensive evaluation of all plumbing, roof, electrical, and structural systems.
Thorough property inspections give you clear answers about your home systems, helping you protect your property investment and avoid unexpected repair costs.
Keeping Your Northeast Florida Plumbing Systems Safe
Learning how to adjust the water level in toilet tanks gives you an easy way to save water and prevent unnecessary plumbing issues. Taking time to inspect your fill valves, flapper seals, and water height ensures your home operates efficiently every day.
When buying a home, preparing for an insurance audit, or keeping up with routine property maintenance, expert guidance gives you complete confidence. Contact Inside & Out Property Inspectors INC. today to schedule a complete home inspection, 4-Point inspection, or sewer scope evaluation across Northeast Florida. Our experienced team identifies hidden safety risks early so you can keep your home secure, dry, and fully protected.
https://insideandoutpropertyinspectors.com/wp-content/uploads/2023/01/How-to-Adjust-Water-Level-in-Toilet-for-Florida-Homes.jpg10001500BJ Johnsonhttps://d39oyu4lp7snwz.cloudfront.net/wp-content/uploads/sites/54/2019/08/31171419/io-favicon-300x300.pngBJ Johnson2023-01-09 18:56:142026-09-03 17:05:24How to Adjust Water Level in Toilet for Florida Homes
Being a homeowner comes with many tasks and chores. The idea of maintenance is usually the last thing on a homeowner’s mind. Unfortunately, some things come up and you have to deal with them. For example, what do you do when something is gurgling in your pipes? In some cases, a toiler or even sink may be gurgling. How to fix a gurgling bathroom sink? Since there are a few reasons why this could occur, you will need to troubleshoot.
Let’s take a look at the best ways to determine what is causing a gurgling bathroom sink.
What Causes This
Dealing with a gurgling bathroom sink can be frustrating. Unfortunately, there are a lot of different reasons that could cause this to happen. Let’s take a look below at what those reasons might be.
Vent Pipe clogged – if your exterior vent pipe is blocked by debris like leaves and bird’s nests you will need to clear the line so that air can properly escape.
The bathtub drain is clogged – if your bathtub drain is clogged, a build-up of pressure can occur, creating a gurgling sound in other parts of your plumbing.
The garbage disposal is clogged – just like with your bathtub, if open areas of your plumbing get blocked, it can create trapping of air, which could cause gurgling.
A busted P-trap – when your P-trap is busted, this will cause your water to drain slowly due to a vacuum being created.
If any drain is clogged – the trapping of water and air in your plumbing will cause gurgling sounds to occur.
How Can I Fix It
Luckily there are a lot of ways to ensure that the gurgling goes away. Some of the obvious ways are simply clearing out any clogs. So, how can you best clean out a clogged pipe, let’s take a look.
Drain cleaner – do your best to use an environmentally friendly drain cleaner. Some drain cleaners can be harsh on your pipes. Consider using vinegar and baking soda with hot water to clear a clogged drain.
Use an auger or drain snake – purchase a drain snake or rent a drain auger from your local hardware store. This will allow you to get deeper access to your plumbing and see if you can remove the clog.
Consider a plunger – if the clog is small you can use a plunger with petroleum jelly to create a good suction seal. Push straight up and down on the plunger to suck out or loosen the clog in your pipes.
Replace the P-trap – replacing the P-trap could do the trick. In some cases, the P-trap can have a clog, and removing the P-trap to clean it or simply replacing it can solve the problem.
Flush out the main system – run hot water done your drain for 15 minutes and see if the clog gets loosened.
Air admittance valve or main vent blockage – when you flush the toilet and hear a gurgling sound in your sink, it is usually the case of a blocked main vent. The main vent or air admittance valve is typically on your roof and above the bathroom. Clear the blockage with an auger or try using a water hose to flush it through. If you don’t want to risk it, hire a master plumber to fix the clog.
Other Recommended Maintenance
Now that you are aware of how to fix a gurgling bathroom sink, this would be a great time to read up on how to get the hair out of your sink drain. This could be one of the reasons why your sink is gurgling.
Next, another item in your home that could be affected by a clog in your plumbing is the toilet. If you find that the toilet is overflowing, it could be due to a clogged drain, a blocked vent pipe, or a higher float.
Lastly, read up on the best way to keep sediment from building up in your water lines. This could be a big reason why your sinks are gurgling. Hire a professional master plumber to come out and clear your water lines from any debris or buildup.
When Do I Call A Professional
When it comes to any projects regarding plumbing you should read up on the best solutions to the issue. If you cannot find a solution that works for your issue, call on a master plumber. Also, reach out to your local home inspection team. They can inspect your entire plumber system by conducting a sewer scope of your pipes. This will create a list of concerns that a master plumber can then repair. Also, they can refer you to a reputable master plumber.
Conclusion
Whenever you are dealing with something regarding your plumbing, you should hire a master plumber. They can troubleshoot the entire reason why you are having an issue like a gurgling bathroom sink. If you want to learn more, call on your local home inspection team. They can inspect the plumbing system and determine what is wrong with your plumbing. Save money by getting the whole plumbing system inspected at one time. Contact Inside and Out Property Inspectors in Jacksonville, FL, and surrounding areas to get your sewer scope inspection done today.
https://insideandoutpropertyinspectors.com/wp-content/uploads/2022/12/unclog_your_bathroom_sink_25.jpeg9361404BJ Johnsonhttps://d39oyu4lp7snwz.cloudfront.net/wp-content/uploads/sites/54/2019/08/31171419/io-favicon-300x300.pngBJ Johnson2022-12-22 23:51:122022-12-22 23:51:12How To Fix Gurgling Bathroom Sink
Watching a house get built or remodeled can be rather exciting. As an outsider, you never really know how it is going to turn out. There are always a lot of questions such as, is the house going to be brick, wood shingles, vinyl siding, or stucco? Each style of the exterior gives each home a unique feel and look. Today, stucco appears to be the most popular choice for homeowners and builders. The material that is used is very strong and wind resistant. However, you will need to give it time to cure and settle. How long does stucco take to dry? Typically, it can take up to 90 days for all layers of stucco to finish drying.
Let’s take a look below to understand more about stucco.
What Is Stucco
Stucco is a very common exterior material used on homes in Florida, Texas, and most southern states. Also, it is seen in the Northwest on many homes. Stucco is a mixture of aggregates, binding material like concrete, and water. Stucco is a popular choice because it can be painted. Also, it provides a very decorative look to the home, which increases the aesthetics. Having a home that has great curb appeal increases its value.
What Are The Stucco Layers
Homes that are built using a stucco exterior will have three layers of stucco on them. Let’s take a look at what those layers are.
Scratch coat – the main layer of any stucco exterior.
Brown layer – this layer is the middle layer and goes on top of the scratch coat.
Stucco coat – the final layer of your stucco home. This layer can be painted or shaded to increase the home’s curb appeal. All layers must be dry before painting the stucco coat.
The magic number of days for a stucco job to dry is 90. After the 90 day mark, you can pressure wash and clean the stucco, and then paint it.
How Is The Drying Process Affected
Just like with any project, you need to keep an eye on the areas that could slow your project down. In some cases, environmental conditions can slow the drying process. Let’s take a look below at what those effects might be.
Humidity – the higher the humidity levels, the longer it takes for the stucco surface to dry. Too much moisture in the air is not a good thing.
Outside Conditions – if the air is dry, it will pull water from the stucco. This will dry the three layers the fastest, however, it could lead to cracking and make the curing stucco fragile. When the temperatures are cool, damp, and a little cloudy the stucco dries right. If the base coat of the stucco is too damp due to continued rain, the stucco will not dry properly.
Brown coat – if the brown coat is not mixed properly, it could slow the drying process. The brown coat must be mixed properly with a specific amount of water.
Temperature – the best range of temperatures for the stucco to dry is between 40-49 degrees Fahrenheit. If your home is built in the summer or fall, the stucco will usually have the best drying conditions. The brown coat must be applied at the same temperatures as the other two coats in order to dry properly.
Judging the right weather conditions is never an easy task. As stucco absorbs the water and becomes wet stucco it creates a chemical bond. Depending on the time of day, the drying time could take a little longer.
How Much Does It Cost
The cost of a stucco replacement will vary based on how much square footage the exterior of the home is. The national average for stucco is $8 to $12 per square foot. This typically includes labor and materials. Also, in some instances, the cost differential is simply based on where you live. If the conditions are right and the job is easier to complete, the price will be a little lower. You can expect to pay around $10,000 or more for a new stucco job.
Other Recommended Maintenance
Now that you are up to speed with how long it takes stucco to dry, you can determine your next steps when finding cracks in your stucco. If there is a crack in your stucco it is fairly easy to repair. Any crack less than 1/8 in. in size, can be fixed with Quikrete or a repair kit from a local hardware store.
Next, there might come a time where you are fed up with your stucco. Maybe there are too many cracks and the repairs would cost a lot. In this case you have decided to go with a rather inexpensive replacement called vinyl siding. Before you go and hire a vinyl siding installation company, consult your local home inspection team to see if you can install vinyl siding over the stucco.
Lastly, while you are looking into stucco repairs, the cracks are likely the cause of a shift in your foundation. Now is a great time to determine how severe those foundation repairs are. It might be possible to stay in the home during foundation repairs. However, consult your structural engineer to ensure that your family stays safe.
When Do I Call A Professional
Accomplishing a big project such as stuccoing your home is definitely something that should be left to the professionals. There are too many outlying factors that could slow down a do-it-yourself project. This could end up costing you a lot more money. If you aren’t sure who to call or if you need stucco replaced, call on your local home inspection team. They can come out and inspect the exterior of the home. Additionally, they can recommend a reputable stucco contractor.
https://insideandoutpropertyinspectors.com/wp-content/uploads/2022/12/Stucco_a_new_home_25.jpeg7451125BJ Johnsonhttps://d39oyu4lp7snwz.cloudfront.net/wp-content/uploads/sites/54/2019/08/31171419/io-favicon-300x300.pngBJ Johnson2022-12-07 14:32:162022-12-07 14:32:17How Long Does Stucco Take To Dry
Buying a home comes with a lot of responsibility. However, buying a home that meets your needs aesthetically is always tough. There are always homes that look great in some rooms, but other rooms need some fixing. If you purchase a home that has eyesores, the first thing you should do before moving in is have those fixed or covered up. In this case, hiding the vent pipe in your kitchen is key. How to hide the kitchen vent pipe? Use a false cabinet, paint over the pipe, cover it with a soffit, or construct a column over it will due.
Let’s take a look below at what all of this means for your vent pipe.
What Is A Vent Pipe For
The kitchen vent pipe is just as it sounds. It is a vent that is directly above your kitchen stove. The purpose of the vent pipe is to remove odors, heat, and smoke from the kitchen during cooking. Consequently, if the vent pipe is not hidden, it becomes an eyesore of metal just sitting out in the open. Also, make sure to clean the vent pipe often, so that it doesn’t become clogged with grease and dirt.
How Can I Conceal It
Believe it or not, there are a variety of ways to conceal your kitchen vent pipe. Oftentimes, it becomes the decision of the homeowner to determine which type of concealment works best for their home. Consider hiring an interior designer to assist with picking out decorative molding or trim. Let’s take a look below at the options.
Soffit or columns – installing a soffit or column over the kitchen vent pipe is easy to install. Once the pipe is boxed in, you can paint it or even put wood over the top of it. The soffit will be rounded while the column will be rectangular.
False cabinets – this look is simply taking the frame from one of your kitchen cabinets and installing it as if it were another cabinet. The front face could have doors or just the architectural look of the other cabinets. Simply cut an opening in the top and bottom of the cabinet so that it can encase your vent pipe. This will conceal the pipe and allow the kitchen decor to blend in.
Painting over – this option is only if no other option is available. In some cases, the layout of the kitchen and your cabinets do not allow you to cover the vent pipe. Consequently, you will need to paint the metal pipe the same color as the walls so that it blends on. Always use a glossy or satin finish paint that is made to affix to metal and sustain high heat temperatures.
Bulkhead – a bulkhead is a box that is created with drywall and installed across the top of the kitchen cabinets. This is a cumbersome item and is very bulky. Also, your kitchen will look outdated, no matter how you design the bulkhead.
Now that you have explored all of the options for concealing your vent pipe. Consider just updating the metal vent pipe. You might find that a newer shinier vent pipe that matches your stainless steel appliances can really make the kitchen attractive.
Other Recommended Maintenance
Now that you know about hiding the kitchen vent pipe, let’s take a look at a few other areas. One of those is whether it is a good idea to close the air vents in the home to cool the house. While we all like to save money and this seems like it will, it actually does not. If you close the vents, it can build up moisture, thus causing mold to form. It also can cause carbon monoxide gas to get into the home. The best thing to do is to leave the vents open so the air can circulate in the home.
Another area is removing paint from tiles. Sometimes accidents happen when we are painting and it gets on the tile. To get the paint off, you may need to scrape, wipe, and rub. You will need a damp cloth, a plastic scraper, and maybe even a heat gun to get the paint off.
Lastly, you may notice that your bathroom sink drain is clogged from hair The best thing to do is pour some baking soda into the drain and then some vinegar after. Let it sit for 5 minutes and it should loosen up the clog. Another idea is to use tweezers, or a snaking device or remove the drain entirely. You can help prevent this by using a drain stopper system. However, even if you have one, it may still happen.
When Do I Call A Professional
Anytime you are looking to update your kitchen or make changes to the current aesthetics, it is a great idea to call a professional. Hiring a general contractor will allow you to make the right choice for covering your kitchen vent pipe. If you aren’t sure who to call, reach out to your local home inspection team. They can assess your needs in the kitchen, make a recommendation and recommend a reputable general contractor to complete the project.
Conclusion
Hiring a general contractor to complete a specific project in your home can be rather difficult. Oftentimes, homeowners are not sure who to trust with their projects. Be sure to call on your local home inspection team. Not only can they recommend a great way to cover up your kitchen vent pipe, but they can also inspect your kitchen for other needs. Also, they can refer a reputable general contractor who will complete the project and save you money. Contact Inside and Out Property Inspectors in Jacksonville, FL, and surrounding areas to get your home inspection done today.
https://insideandoutpropertyinspectors.com/wp-content/uploads/2022/11/concealed_vent_pipe_25.jpeg11191678BJ Johnsonhttps://d39oyu4lp7snwz.cloudfront.net/wp-content/uploads/sites/54/2019/08/31171419/io-favicon-300x300.pngBJ Johnson2022-11-22 14:34:502022-11-22 20:18:04How To Hide Kitchen Vent Pipe
When it comes to owning a home, protecting your family and protecting your investment are key parts. Buying a home that is structurally sound and free of issues is what every home buyer looks for. When buying a home, make sure that your home inspection team covers all details of the home with regard to any fuel-burning appliances. Typically, fuel-burning appliances are where we see carbon monoxide possibly entering the home. Stoves, fireplaces, and gas-powered furnaces are the likely culprits. Does air conditioning have carbon monoxide? No, air conditioners are run via electricity and cannot emit carbon monoxide into your home.
Let’s take a look below at what carbon monoxide is and some ways it could enter your home.
What Is Carbon Monoxide
When it comes to carbon monoxide you would not realize if it were present in your air. This is due to carbon monoxide being an odorless, tasteless, and colorless gas. Homeowners would need to install a carbon monoxide detector to best protect their families from this toxic gas. For the most part, there are only a few appliances that have the potential to release carbon monoxide gas. Additionally, a running car will release carbon monoxide as it burns fuel.
What Is Carbon Monoxide Poisoning
Carbon monoxide poisoning is defined by the Center for Disease Control (CDC) as the effects caused to human health as a result of carbon monoxide inhalation. Those symptoms include but are not limited to the following:
Memory loss
Shortness of breath (Respiratory issues)
Headaches
Nausea
Fatigue
Chest pains
If any of these symptoms exist you should call the fire department right away. Do not discredit these symptoms as the possible flu or another sickness. Carbon monoxide poisoning is known to kill 430 people a year. Also, it has been recorded that over 50,000 people a year get sent to the hospital as a result of carbon monoxide poisoning.
How Can I Prevent It
Fortunately, as a homeowner, there are a few things that you can do to prevent carbon monoxide from building up in your home and causing some health issues. Let’s take a look below at some precautions that you can take.
Monitor gas-powered tools and cars – do not run your car idle in the garage, even if the door is open. Also, if you use gas-powered tools, gas stoves, or gas-powered grills, use them outside. Never start them inside your home. They could have carbon monoxide leaks.
Maintenance – be sure to properly maintain your HVAC unit. There is a possibility that if damaged, it could release carbon monoxide.
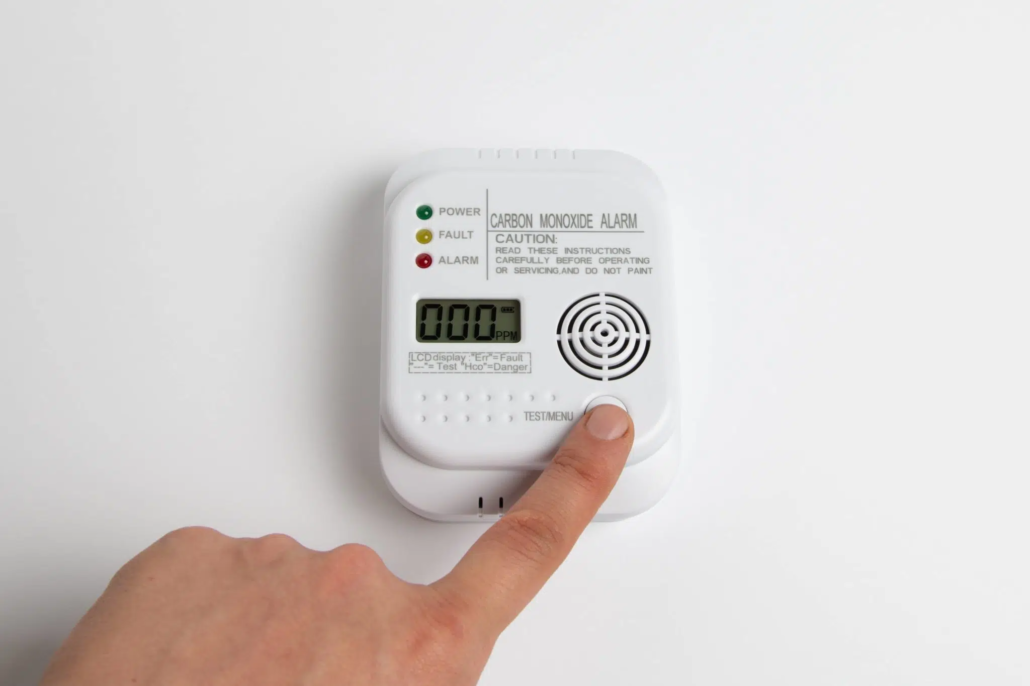
Carbon Monoxide detector – install a battery-operated carbon monoxide detector. They operate very similar to smoke detectors and can save your life. Place them in your bedrooms so that if there is a release of carbon monoxide into your home while you are sleeping, the detection system will awaken you so you can escape the poisonous gas.
Professional service – if you need repairs on appliances that are known to have the potential to release carbon monoxide, hire a professional. Do not attempt to make repairs on your own to the HVAC system or any other appliance that could release CO.
Air conditioning systems are likely not the source of carbon monoxide in your home. Air conditioners cannot produce carbon monoxide since they use electricity and not gas. In a furnace, gas is sometimes used and the heating system or heat exchanger could emit carbon monoxide.
https://youtu.be/OPyc3BbuiGs
Other Recommended Maintenance
Now that you have a better understanding of what carbon monoxide is and how it can enter your home, you can better protect your family. Your first goal is to get to fresh air. Opening a window will help, but likely will not completely get rid of carbon monoxide. Be sure to follow up with emergency services, so that they can test your home for carbon monoxide levels.
Next, keep an eye on your maintenance schedule. Make sure that any item in your home that is capable of releasing carbon monoxide into your home, is maintained. For example, your water heater might be powered by gas. To ensure that it isn’t releasing carbon monoxide into your home, you will want to make sure the water heater is maintained.
When it comes to the safety of your home, you should take every precaution necessary. Installing a carbon monoxide detection system is the best way to protect your family from the unknown. Hire your local home inspection team to come out and inspect all of the appliances with the potential for producing carbon monoxide. Also, they can recommend a quality carbon monoxide detection system.
Conclusion
Understanding that you will never truly know if carbon monoxide is pouring into your home should be enough reason to purchase a detection system. Your health and safety should be at the forefront of any decision regarding your family. Since carbon monoxide is odorless, tasteless, and colorless, you will want to take every precaution necessary to protect your family. If you aren’t sure the best way to do this. Reach out to Inside and Out Property Inspectors in Jacksonville, FL, and surrounding areas to get your home inspection done today.
https://insideandoutpropertyinspectors.com/wp-content/uploads/2022/11/carbon-monoxide.webp20482048BJ Johnsonhttps://d39oyu4lp7snwz.cloudfront.net/wp-content/uploads/sites/54/2019/08/31171419/io-favicon-300x300.pngBJ Johnson2022-11-08 16:25:192024-12-24 19:38:32Does Air Conditioning Have Carbon Monoxide