A flickering light bulb is relatively common and might seem like a harmless quirk – but have you ever wondered if it’s signaling a dangerous underlying problem? In some cases, ignoring this issue could lead to potential safety hazards or even expensive electrical repairs.
So you’re always prepared for this situation moving forward, this post will explain common causes behind flickering light bulbs and explore the potential dangers. We’ll also cover practical troubleshooting tips to help you address the flickering and know when it’s time to call an expert.
What Causes Light Bulbs to Flicker?
Several factors can cause a light bulb to flicker, ranging from minor issues to serious concerns:
Loose light bulb connections: This prevents a steady flow of electricity to the bulb.
Faulty light switches: They can intermittently cut power, causing flickering.
Voltage fluctuations: Inconsistent voltage in your home’s electrical system may cause lights to flicker, especially with outdated wiring that can’t handle modern electrical demands.
Outdated wiring: Old wiring may not be able to support the power needs of modern appliances and electronics, leading to flickering.
Overloaded circuits: When circuits are strained to provide power consistently, lights may flicker.
Risks of Flickering Light Bulbs
While a flickering light bulb seems like a minor inconvenience, it can indicate bigger problems that pose bigger risks. Ignoring the flickering could lead to:
Fire hazards: Loose connections or faulty wiring can generate heat and sparks, increasing the risk of electrical fires.
Electrical shock risks: The underlying issue causing the flickering may expose you to live wires, posing a shock hazard.
Damage to appliances and electronics: Inconsistent power from flickering can harm sensitive electronic components.
Reduced light bulb lifespan: Constant flickering can cause light bulbs to burn out more quickly, which means more frequent replacements.
Troubleshooting for Flickering Lights
If you notice a flickering light bulb, consider trying these simple troubleshooting:
Tighten loose connections: Gently tighten the light bulb and check the fixture’s connections to ensure a steady power flow.
Replace old switches: Faulty or worn-out light switches can cause intermittent flickering, so try replacing them with new ones.
Upgrade to compatible bulbs: Use high-quality light bulbs designed for your specific fixture to minimize flickering and ensure optimal performance.
Redistribute electrical loads: If multiple lights are flickering, try redistributing electrical loads evenly across circuits to prevent overloading.
Other Recommended Maintenance
To prevent flickering light bulbs and ensure electrical safety, consider a few key maintenance tasks. Regularly inspect your home’s wiring for signs of wear, damage, or outdated components that may need to be replaced to prevent flickering and other electrical issues.
If your home has an outdated electrical panel, upgrading to a modern one can help accommodate your current power needs and reduce the risk of flickering. Additionally, installing surge protectors throughout the home can safeguard your valuable electronics from potential damage caused by flickering or power surges.
When to Call a Professional
If you experience persistent flickering despite your efforts, there may be a more serious underlying issue.
Also, if you notice visible sparks or burning odors coming from outlets, switches, or fixtures, turn off the power immediately. Then, get help from an expert. Frequent circuit breaker trips or blown fuses could also indicate a severe electrical problem that needs professional assessment.
In any of these cases, it’s essential to have a licensed electrician address the issue. Attempting to diagnose and fix these serious issues yourself can be dangerous.
Conclusion
To summarize, don’t ignore that flickering light bulb – while it’s not always dangerous, it could be a warning sign of a serious electrical issue. It can be tempting to brush off the annoyance, but addressing it quickly is the best course of action.
Cleaning the gutters, while important to your home’s health, often feels daunting or even overwhelming. However, with the right tools, gutter cleaning can transform into a manageable, even satisfying job.
By the end of this post, we hope to send you off with the essential knowledge and tools to turn this tedious task into an efficient, safe experience. Let’s get our heads in the gutter!
Why Clean Your Gutters?
At first glance, gutter cleaning might seem like just another item on an endless to-do list, with or without tools. However, the reality is that gutters play a fundamental role. Neglected gutters can become a breeding ground for pests, lead to water damage, and even diminish your home’s overall value. Let’s break down these risks and the benefits of keeping your gutters clean.
Preventing Pests and Water Damage
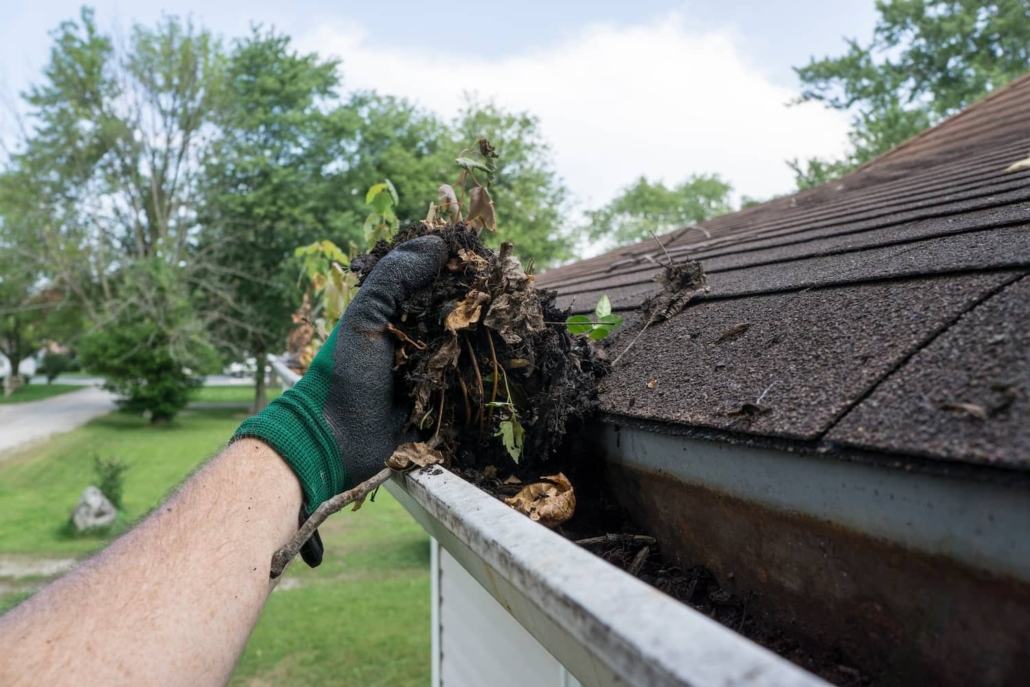
Clean gutters guide rainwater away from your home’s foundation, walls, and landscaping, preventing water damage and potential flooding. Clogged gutters, on the other hand, can overflow easily. This can cause water to seep into your home and create issues like mold, mildew, and structural damage.
Additionally, gutters clogged with leaves and debris provide the perfect nesting spot for pests such as mosquitoes, rodents, and birds. Regular cleaning removes these potential habitats, helping to keep pest infestations at bay.
Preserving Home Value
Lastly, your home’s exterior appearance is crucial for its curb appeal. Overflowing gutters can lead to staining on your siding and walkways, not to mention the potential for landscape erosion. Clean gutters ensure your home looks well-maintained, preserving or even increasing its value.
Know Your Gutter Needs
Every house is unique, and so are its gutters. The type of gutters you have, their design, and even the environment your home is in can significantly influence your cleaning strategy.
Gutter Variations
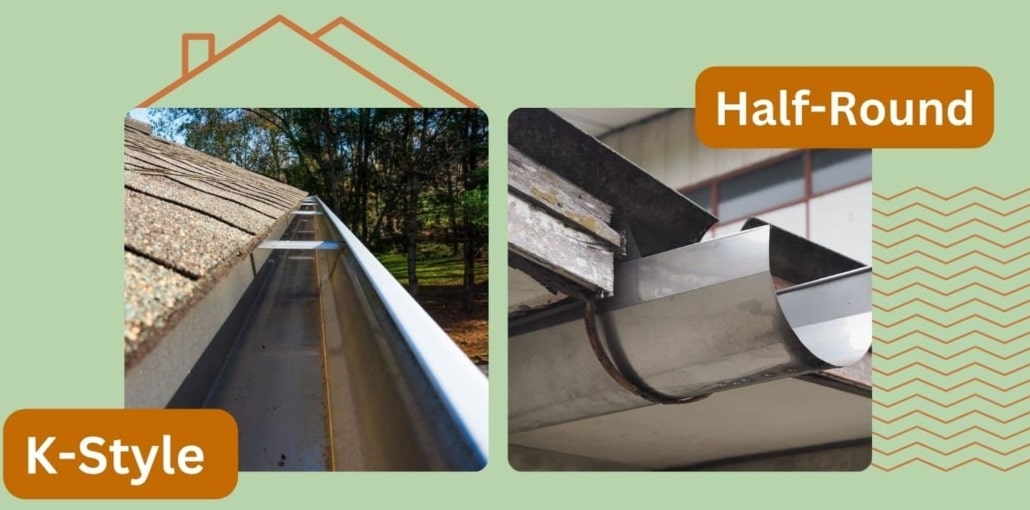
Gutters come in various materials and designs. Whether you have seamless aluminum gutters, vinyl, or even copper, each material has its considerations for maintenance. Similarly, whether traditional K-style or half-round, the design impacts how debris collects and how you should approach cleaning.
Environmental Factors
The surroundings of your home play a crucial role in determining your gutter cleaning needs. Homes under numerous trees might face more frequent clogging from leaves and twigs, requiring more regular cleaning.
On the other hand, areas with minimal tree coverage might not need as frequent gutter maintenance but should still adhere to routine checks.
Home Height and Accessibility
The height of your home affects the difficulty and safety of gutter cleaning. Higher homes may necessitate special equipment like longer ladders or telescopic tools to safely reach the gutters without risking injury.
Preventive Measures
Installing gutter guards can minimize the amount of debris that collects, though they’re not a substitute for cleaning. Also, knowing when to perform maintenance—typically in the fall and spring—can prevent severe issues before they start.
Tools to Simplify the Job
Gearing up with the right gutter cleaning tools is the secret to transforming this chore from a dreaded task into a smooth, efficient operation. Each tool makes the job easier and ensures your safety and the integrity of your gutters. Let’s zero in on the must-have tools that promise to make gutter cleaning as effortless as possible.
Telescopic Wand
Firstly, you can elevate your gutter cleaning game without ever leaving the ground. The telescopic wand extends your reach, allowing you to clear out debris with precision from a safe distance. Its adjustable length caters to different gutter heights, and the powerful water jet dislodges leaves and muck in no time.
Gutter Cleaning Scoop
The right scoop makes all the difference. Specifically designed to fit the contours of your gutters, this tool effortlessly scoops out build-up. It helps ensure you get every last bit of debris without damaging the gutter’s surface. It’s efficient, precise, and gentle on your gutters.
Heavy-Duty Gloves
Never underestimate the importance of a good pair of gloves. These shield your hands from sharp edges, dirt, and unexpected pests. Durable, waterproof, and puncture-resistant, they’re an essential safeguard during your cleaning mission.
Bucket with Hooks
A bucket might seem simple, but one equipped with hooks is a game-changer. Hang it directly from your ladder or the gutter itself to keep debris contained and minimize clean-up time. It’s all about keeping the process tidy and efficient.
Ladder Stabilizer
Safety is paramount, and a ladder stabilizer ensures just that. Widening your ladder’s footprint offers unmatched stability, reducing the risk of slips or falls. Use it to secure your ladder firmly, granting you peace of mind as you work.
Steps to a Clean Gutter
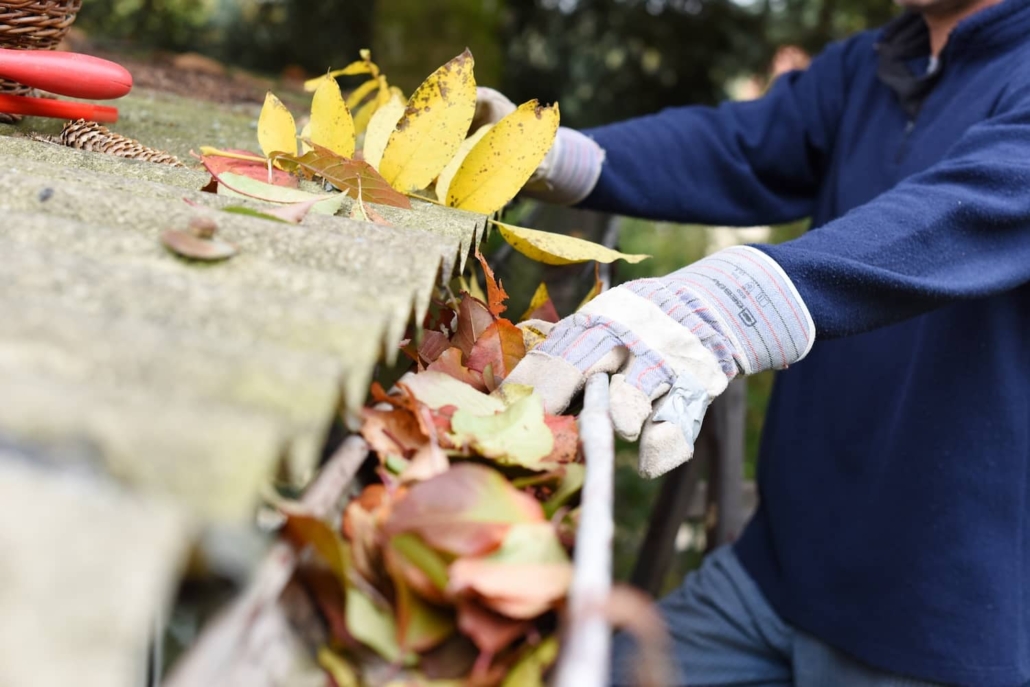
1) Safety First – Before you start, get your safety gear ready. Wear heavy-duty gloves to protect your hands and consider safety goggles to guard against flying debris. If you’re using a ladder, make sure it’s secure, and consider using a ladder stabilizer for added stability.
2) Inspect Your Gutters –Then, take a moment to inspect your gutters. Look for areas of heavy debris accumulation, potential gutter damage, or blockages in downspouts. This initial inspection can help you target your cleaning efforts more effectively.
3) Position Your Bucket – Next, hook your bucket onto your ladder or the gutter itself. This will be where you deposit the debris, keeping your work area clean and minimizing trips up and down the ladder.
4) Start With the Scoop – Using your gutter cleaning scoop, begin removing debris from the gutter. Start at one end and work your way to the other, scooping out leaves, twigs, and sludge. Deposit the debris into your bucket as you go.
5) Utilize the Telescopic Wand – Once the bulk of the debris is removed, use the telescopic wand. The high-pressure water stream is excellent for dislodging stubborn dirt and ensuring the gutters are thoroughly cleaned.
6) Flush the Gutters – After that, it’s time to flush the gutters with water. This not only ensures that the gutters are completely clean but also allows you to check for proper water flow and identify any leaks.
7) Check Downspouts – Ensure that downspouts are not clogged. If water isn’t flowing freely, you may need to use your telescopic wand or a plumber’s snake to clear blockages, ensuring water can drain away from your home effectively.
Final Look
Conduct a final inspection of your gutters and downspouts. Look for any missed debris, check for signs of damage, and ensure that water is flowing correctly through the system.
Other Recommended Maintenance
When it comes to gutter maintenance, consider these additional tasks. These efforts complement gutter upkeep and regular inspections for a well-rounded approach to home care.
Downspout Flushing – Even with clean gutters, clogged downspouts can cause water to back up and potentially damage your home. Make downspout flushing a part of your routine gutter maintenance to ensure water can flow freely away from your home’s foundation.
Seal Inspections – Check the seals around windows, doors, and any vents or external pipes. Compromised seals can allow water to enter your home, leading to mold, mildew, and other moisture-related problems. Regular sealing helps maintain your home’s energy efficiency and prevents water damage.
Trimming Trees and Shrubs – Keep trees and shrubs trimmed and away from your home’s exterior. Overhanging branches can damage your roof and gutters, and dense foliage can contribute to dampness and pest infestations.
Inspecting and Cleaning Siding – Keep an eye on your home’s siding for any signs of damage, wear, or algae growth. Clean siding not only boosts curb appeal but also extends its lifespan and supports the overall structural integrity of your home.
When to Call a Professional
If your home’s gutters are hard to reach, the situation might demand equipment and safety measures beyond what you possess. Professionals are equipped to handle these scenarios safely and efficiently.
Additionally, if you find severe gutter damage or require specialized cleaning methods beyond simple debris removal, a professional’s skill set will ensure the job is done correctly. Their experience can also offer long-term savings by identifying and addressing minor issues before they escalate into major problems.
In summary, mastering gutter cleaning is all about equipping yourself with the right tools and knowledge. With the essentials outlined in this guide, you’re now ready to transform gutter cleaning from a dreaded chore into an efficient task.
However, knowing when to call in the professionals is just as important as the tools in your hand! To have an expert take a look at your gutters or to schedule an inspection of the whole house, reach out to Inside and Out Property Inspectors in Jacksonville, FL, and surrounding areas.
https://insideandoutpropertyinspectors.com/wp-content/uploads/2024/03/gutter-cleaning-tools.jpeg10011500BJ Johnsonhttps://d39oyu4lp7snwz.cloudfront.net/wp-content/uploads/sites/54/2019/08/31171419/io-favicon-300x300.pngBJ Johnson2024-03-26 19:34:082024-12-24 19:45:37Tools You Need for the Easiest Gutter Cleaning Experience
Stucco is a popular choice for home exteriors, particularly in southern states where the hot climates create ideal conditions for this durable material. However, even the most resilient surfaces need a little TLC from time to time. If your stucco is looking a bit tired or you’re simply ready for a change, you might be wondering if you can paint it.
The good news is that painting your stucco exterior can not only give your home a fresh, updated look but also provide an extra layer of protection against the elements. But before you break out the brushes and rollers, there are a few key things to consider. From understanding the unique characteristics of stucco to choosing the right paint and prepping the surface, we’ll go through everything you need to know to get the job done.
What is Stucco?
Stucco is a cement-based plaster that goes on the exterior of a building. It’s made from a mixture of cement, sand, and lime. Typically, you apply stucco in three coats over a lath base. Stucco is known for its durability and weather-resistant properties, making it an ideal choice for homes in dry climates.
Reasons to Paint Stucco
There are several reasons why homeowners choose to paint their stucco exteriors:
Aesthetic appeal: Painting stucco allows you to change the color of your home’s exterior, giving it a fresh, updated look.
Additional protection: A new coat of paint provides an extra layer of protection against the elements, helping to preserve the integrity of the stucco.
Increased durability: Properly painted stucco can last up to 10 years or more, depending on the quality of the paint and the preparation process.
Is Painting Stucco a Good Idea?
The decision to paint your stucco ultimately depends on your personal preferences, the climate you live in, and the current condition of your stucco.
In dry climates, such as Arizona, New Mexico, Nevada, and Texas, painting stucco can be a great way to enhance its durability and improve the overall appearance of your home’s exterior.
Preparing to Paint Stucco
Before you begin painting, it’s crucial to properly prepare the stucco surface. This involves the following steps:
Thorough cleaning: Clean the stucco surface to remove any dirt, debris, or loose material. You can use a pressure washer for this, but be cautious not to damage the stucco.
Repair any damage: Inspect the stucco for cracks, chips, or other damage. Repair these issues before painting to ensure a smooth, even surface
Allow the surface to dry: After cleaning and repairing, allow the stucco to dry completely. Then, you’re safe to proceed with the painting process.
Choosing the Right Paint
When it comes to painting stucco, acrylic latex paint is generally the best option. This type of paint is flexible and can withstand the textured surface of stucco. It’s important to select a high-quality paint to ensure longevity and optimal protection.
Step-by-Step Guide to Painting Stucco
1)Apply a primer: Once the stucco is clean, dry, and repaired, apply a primer to the surface. This will help the paint adhere better and provide a more even finish.
2)Begin painting: Using a brush, roller, or sprayer, apply the first coat of acrylic latex paint to the stucco. Work in sections, ensuring even coverage.
3)Allow the first coat to dry: Let the first coat of paint dry completely before applying the second coat. This typically takes a few hours, depending on the weather conditions.
4) Apply the second coat: Once the first coat is dry, apply the second coat of paint, following the same process as before.
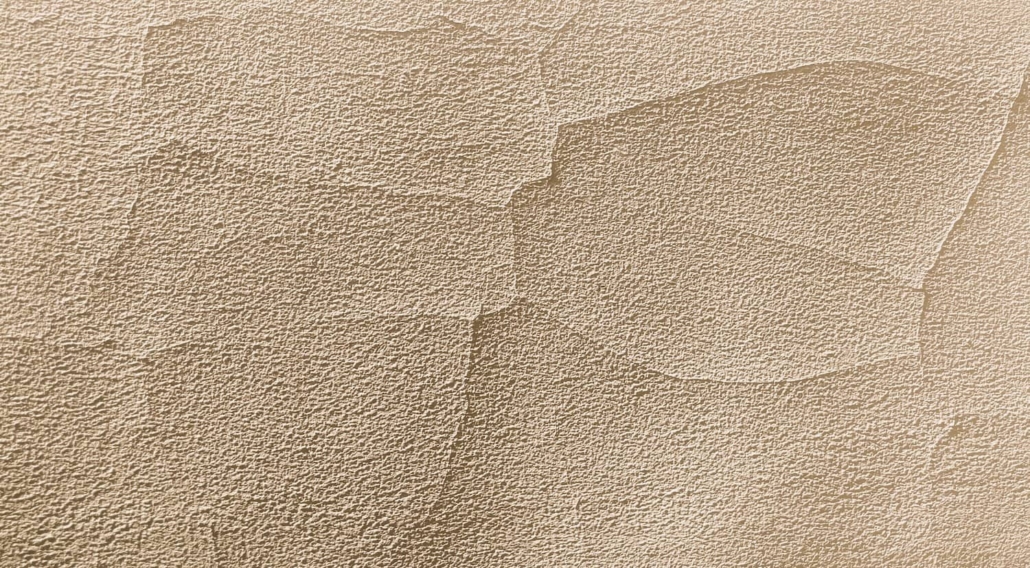
An Example of Stucco That Could Use Some Repair
Other Recommended Maintenance
While you’re painting your stucco, it’s important to keep in mind a few other maintenance tasks that can help protect your home’s exterior. One key area to pay attention to is your home’s landscaping. When planning your garden or adding new plants near your foundation, be sure to leave a small gap between the greenery and your stucco walls. This space will help prevent moisture from seeping into your stucco and deter pests from making their way inside.
Another maintenance task to consider is inspecting and repairing any cracks or damage to your stucco before painting. You can fix small cracks with a stucco patching compound, while larger issues may require the help of a professional. By addressing these problems before applying a new coat of paint, you’ll ensure that your stucco looks seamless and is properly protected against the elements.
Lastly, don’t forget about the importance of cleaning your stucco before painting. Use a pressure washer or a garden hose with a gentle nozzle to spruce it up. This step will help the new paint adhere properly and create a smooth, even finish. If you notice any stubborn stains or mildew, consider using a stucco cleaner specifically designed to tackle these issues.
When Do I Call a Professional?
While painting stucco can be a rewarding DIY project, there are situations where it’s best to call in a professional. First and foremost, if your stucco has extensive damage or requires significant repairs, it’s wise to hire an expert. Professionals have the knowledge and skills necessary to properly assess the damage and make the appropriate fixes before painting begins. This ensures that your stucco surface is structurally sound and ready for a new coat of paint.
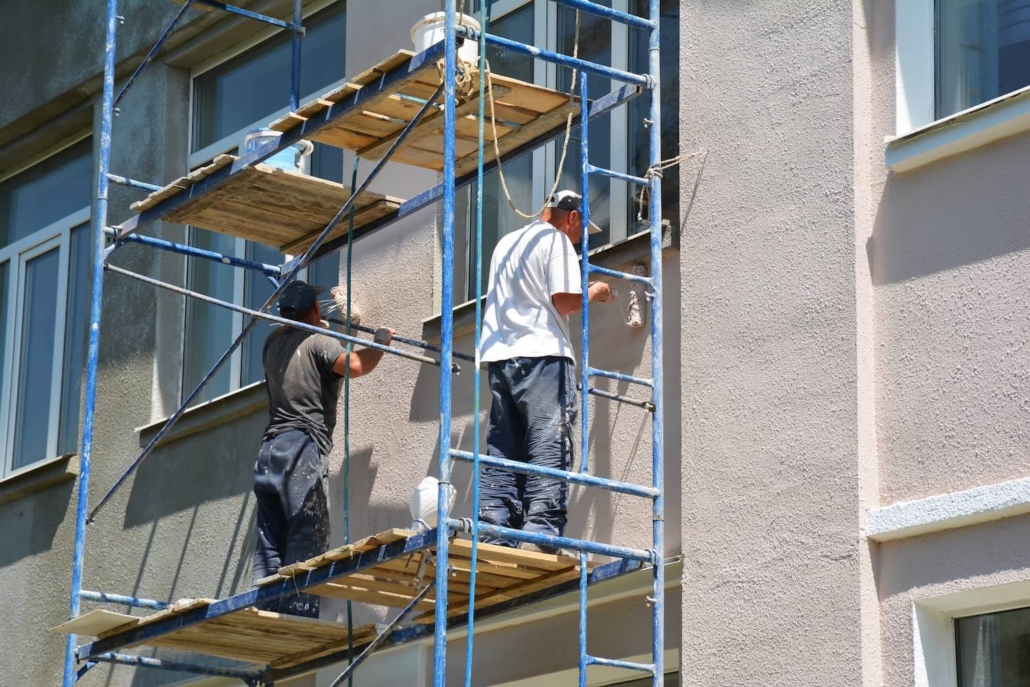
Another scenario where professional help may be necessary is when dealing with hard-to-reach areas. If your home has multiple stories or feature areas that are difficult to access safely, it’s best to leave the painting to the pros. Professional painters have the equipment, experience, and safety training needed to navigate these challenging spaces effectively. By hiring a professional in these situations, you can have confidence in the finished job.
If you’re unsure about tackling aprojecton your own, don’t hesitate to reach out to professionals for guidance.
https://www.youtube.com/watch?v=_vDcSBDcBW4
Conclusion
Painting your stucco exterior is a fantastic way to give your home a fresh, updated look while also providing an extra layer of protection against the elements. Following the proper preparation steps, selecting the right paint, and applying it with care, you can achieve a beautiful, long-lasting result. The key to success lies in the details! Take the time to properly clean and repair your stucco surface before painting. Equally important, don’t hesitate to call in professional help when needed.
As you plan out your project, keep in mind that painting your stucco is just one part of maintaining a healthy, safe, and attractive home. If you have questions about the condition of existing stucco or want to schedule an in-depth home inspection before getting started, reach out to Inside and Out Property Inspectors in Jacksonville, FL, and surrounding areas for expert service.
https://insideandoutpropertyinspectors.com/wp-content/uploads/2024/03/can-you-paint-stucco.jpeg10001500BJ Johnsonhttps://d39oyu4lp7snwz.cloudfront.net/wp-content/uploads/sites/54/2019/08/31171419/io-favicon-300x300.pngBJ Johnson2024-03-07 16:01:392026-09-17 13:39:15Can You Paint Stucco?
Your home’s siding endures sun, wind, rain, and temperature swings year after year. This critical outer layer takes the brunt of environmental wear to protect what’s inside. When selecting siding, you need an exterior armor that can stand the test of time without becoming a maintenance hassle. Among popular siding options, vinyl brings versatility and durability at an affordable price point. Known for fuss-free upkeep and longevity matching costlier choices, vinyl enriches your home’s curb appeal for decades to come. But how long can you expect vinyl siding to last?
In just a moment, we’ll cover the inside scoop on the average lifetime of vinyl siding, what impacts its lifespan, tips for maximizing its staying power, and when to involve trained professionals. With the right maintenance approach, your vinyl siding could defend your home’s beauty and value for a surprising length of time! Let’s see how.
The Benefits of Vinyl Siding
Vinyl siding contains PVC resin, the same durable, weather-resistant material utilized for pipes, gutters, and decking. This versatile composite mixes in color pigments and molds into panels mimicking wood grain, stucco, brick, and stone textures. Unlike real wood or masonry, vinyl shrugs off moisture, resists rotting and insect infiltration, and never requires painting or staining.
Specialized insulation backing can boost energy savings too. This perfect fusion of custom aesthetics, extreme durability, and fuss-free upkeep explains vinyl’s dominance among today’s siding choices. Protecting your home in style while minimizing maintenance has clear appeal.
What’s the Average Lifespan?
When installed correctly and maintained properly, vinyl siding lasts an average of 20-40 years before a full replacement becomes necessary. For perspective, that equals the time to grow a tree from a sapling to maturity. This impressive lifespan surpasses many other siding materials when accounting for regular upkeep expenses.
Under certain conditions, vinyl siding may begin deteriorating prematurely—low-quality materials, improper installation, excessive sun exposure, poor ventilation, or dark color choices can shorten its staying power. Make it a habit to inspect for signs of early wear or damage. Proactive care is key to enjoying vinyl’s maximum durability.
Signs Your Vinyl Siding Needs Attention
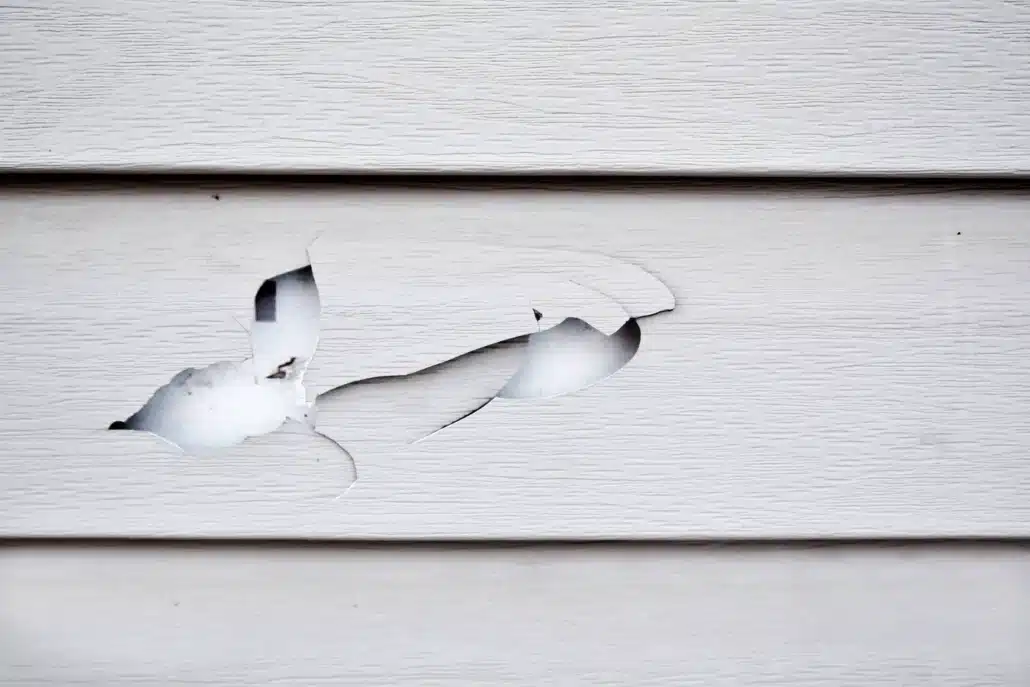
While vinyl siding ages slowly, you should keep an eye out for red flags indicating your exterior needs help. Subtle fading or discoloration, especially on sun-exposed areas, signals overdue cleaning and resealing. Visible cracks, holes, and gaps around panel edges provide pathways for moisture intrusion and pest infiltration requiring sealing. Buckling or warping panels point to stressed connections and possible future detachment that should be addressed.
Persistent dirt or mold/mildew buildup indicates improper maintenance and ventilation needing correction. Brittle, punctured, or loose sections demonstrate advanced weathering necessitating replacement. If you spot isolated vinyl damage, spot repairs often work well. But if multiple regions across your home’s siding show issues, full replacement becomes the wiser, more cost-effective solution long-term.
Acting early at the first signs of trouble allows minor repairs. Waiting until problems compound leads to premature failure. Regularly inspect and address concerns promptly to maximize your siding’s lifespan.
Other Recommended Maintenance
To maximize your vinyl siding’s lifespan, make maintenance a priority. Wash it annually with mild detergent to remove dirt, mildew, and debris. Inspect for any loosening, gaps, or damage, especially after severe weather. Reseal edges and repaint when needed to protect from moisture and sun exposure. Ensure surrounding trees don’t rub against the siding. With this diligent care, your vinyl siding will keep your home beautifully protected for over two decades in many cases.
When to Call a Professional
While DIY works for minor vinyl siding repairs, extensive damage often requires professional expertise. Siding contractors have the skills to properly match new panels, integrate repairs seamlessly, meet codes, and follow the manufacturer’s replacement guidelines correctly. For complex siding issues, a specialist makes sure the job is done right.
Conclusion
All things considered, your home’s exterior siding plays a critical role in protecting your most valuable investment from the elements. When well-maintained, vinyl siding provides customized curb appeal and fuss-free durability for over 20 years on average.
Stay proactive against potential damage by washing and inspecting it annually, acting quickly on any signs of wear. With diligent care, vinyl siding forms a resilient barrier against weathering to maintain your home’s structure and aesthetic appeal over the long haul. If you have questions about the condition of your home’s exterior or want to schedule an in-depth inspection, don’t wait! Call Inside and Out Property Inspectors, or schedule online, in Jacksonville, FL, and surrounding areas today.
https://insideandoutpropertyinspectors.com/wp-content/uploads/2024/03/how-long-does-vinyl-siding-last.jpeg10011500BJ Johnsonhttps://d39oyu4lp7snwz.cloudfront.net/wp-content/uploads/sites/54/2019/08/31171419/io-favicon-300x300.pngBJ Johnson2024-03-01 13:37:592024-03-01 13:37:59How Long Does Vinyl Siding Last?
When it comes to water temperature in your home, the Goldilocks principle often applies: not too hot, not too cold, but just right. Enter the world of tepid water—a term that might not make daily conversation but is certainly a daily comfort. So, what is tepid water?
In the following sections, we’ll dig into the use cases for tepid water, how it’s different from other temperature ranges, and what exactly makes water tepid. From nuanced differences and purposes to essential maintenance tips for your home’s water system, we’re sure to pique your curiosity and provide practical insights.
How Does Tepid Compare to Room Temperature?
When we talk about tepid water, it’s often confused with room-temperature water. However, there’s a subtle, significant difference that’s worth understanding. Room temperature water is typically described as water that sits at the ambient temperature of the surrounding environment—usually between 68°F to 72°F (20°C to 22°C). It’s the water you’d expect to sip from a glass that’s been sitting on your counter.
On the other hand, tepid water is slightly warmer. It’s a term more commonly used in contexts where water interacts with the body or in various processes where a specific temperature range is optimal. Hovering between 85°F and 105°F (29°C to 40°C), it’s intentionally warmer than the ambient room temperature but not to the extent that it would be uncomfortable or dangerous to the touch.
Why Does it Matter?
The temperature of the water we use can have different effects on tasks. For instance, tepid water is often recommended for first aid treatments because it’s warm enough to relax muscles and soothe discomfort without causing additional harm to an injury. In cooking or baking, certain recipes may call for tepid water to activate yeast without killing it, which is critical for the success of your bread or pastries.
When you’re looking to mix tap water to achieve that tepid sweet spot, you’ll generally be combining more hot water than cold. Most modern water systems can easily provide water at this temperature, but it’s essential to be mindful of your specific settings, as perceptions of warmth can vary from person to person.
Every Day Uses for Tepid Water
More than a middle ground between hot and cold, tepid water is a versatile player in daily life, serving purposes that go beyond mere temperature preference. Due to its gentle warmth, tepid water is often the go-to choice for a variety of common tasks. Understanding its uses can help you make the most of this often-overlooked resource.
Personal Care and Comfort
Starting with personal hygiene, tepid water is ideal for washing hands and bathing. It’s warm enough to remove oils, dirt, and bacteria effectively while being gentle on the skin. Consequently, this reduces the risk of drying out or irritating sensitive skin types. For those with conditions like eczema or rosacea, tepid water can help avoid flare-ups that hotter temperatures might provoke.
First Aid and Health
In first aid, tepid water is best for cleaning wounds. It’s also the recommended temperature for compresses to reduce swelling or to soothe headaches. The lukewarm nature is gentle on inflammation, providing relief without the shock that cold water might introduce.
Culinary Applications
Next, the kitchen! Tepid water plays a critical role in culinary arts, particularly in baking. It’s the perfect temperature to proof yeast, ensuring that it remains active for bread making. Tepid water also helps in emulsifying ingredients when cooking! This is because it combines more readily with fats and oils, leading to smoother sauces and dressings.
Plant Care
Water in this temperature range is also a friend to your houseplants. Watering with tepid water is less of a shock to their systems, especially for tropical plants. Cold water can shock the roots and slow growth, but tepid water assimilates more naturally to the plant’s needs.
Cleaning and Maintenance
When it comes to cleaning, tepid water is a powerhouse. It dissolves cleaning products more effectively than cold water, allowing for better interaction with dirt and grease. Whether you’re mopping your floors or wiping down countertops, tepid water enhances the cleaning process without the potential damage or energy consumption of hot water.
Comfort for Pets
Lastly, our pets can also benefit. Whether it’s for bathing or providing drinking water, a moderate temperature can make these activities more pleasant and less stressful for our furry companions.
Other Recommended Maintenance
To ensure consistent access to tepid water, regular checks and maintenance of your water heating system are essential. A good starting point is to familiarize yourself with your water heater’s thermostat. Most models allow you to adjust the temperature setting easily. While the default setting is often around 120°F, which is above the tepid range, dialing it down slightly can help save energy and reduce the risk of scalding, all while providing quick access to tepid water when needed.
It’s also worth investing in annual maintenance by a professional plumber annually. They can assess the condition of your water heater, check for sediment buildup, and ensure the system operates efficiently. Sediment in the tank can impact water temperature control and reduce the efficiency of your system, leading to higher utility bills and a shorter lifespan for the appliance.
Furthermore, installing mixing valves can be a wise move. These valves automatically adjust the mix of hot and cold water to deliver water at a safe, consistent temperature. This can be particularly beneficial for households with children or the elderly.
In areas with hard water, consider a water softener. This helps prevent mineral buildup in your pipes and on your heating elements, which can affect water temperature consistency. Conversely, a de-scaling treatment might be necessary if the buildup is already an issue.
When to Call a Professional
When tepid water is no longer a reliable comfort in your home, it’s a clear sign to call in a professional. If adjusting your water heater’s thermostat doesn’t yield the expected warm, yet comfortable touch of tepid water, a plumber’s expertise is necessary. This could point to an issue with the heater’s elements, thermostat failure, or a more complex problem within your system.
Leaks around your water heater or plumbing fixtures require immediate professional attention. Even minor leaks can quickly escalate, leading to water damage and the potential for mold growth. Professionals can repair the leak and investigate to remedy the root cause, preventing recurrence.
While DIY can be tempting, the installation of mixing valves and water softeners is best left to the experts. Professional plumbers will ensure that your system is correctly sized, properly installed, and in compliance with local regulations.
The lifespan of a water heater is limited, and if yours is approaching its expected life, a professional can help. From the most efficient replacement options to the installation process, an expert is always helpful.
Conclusion
In conclusion, tepid water is a moderate and comfortable temperature range between hot and cold. It finds its use in various aspects of our daily lives, such as personal hygiene, first aid, baby care, and pet care. Understanding the uses and benefits of tepid water ensures a safer and more enjoyable experience for homeowners.
However, if you encounter any issues with your water temperature or quality, it is crucial to seek professional help to address the underlying problems effectively. While you are taking a look at your water, it is a great time to reach out to Inside and Out Property Inspectors in Jacksonville, FL, and surrounding areas and get an expert home inspection done today.
https://insideandoutpropertyinspectors.com/wp-content/uploads/2024/02/what-is-tepid-water.png7341500BJ Johnsonhttps://d39oyu4lp7snwz.cloudfront.net/wp-content/uploads/sites/54/2019/08/31171419/io-favicon-300x300.pngBJ Johnson2024-02-23 11:50:282024-02-23 11:50:28What is Tepid Water?
Water pipes are an integral part of any residential or commercial building’s plumbing system. They are responsible for the distribution of water throughout a property, ensuring that clean water is accessible at various points such as sinks, showers, and outdoor faucets. Sometimes air can get in the water pipes. We will learn in this article about where water pipes are located, identifying air in the pipes, and what causes air in water pipes.
What Are Water Pipes?
Water pipes are cylindrical tubes designed to transport water from the main supply to various fixtures and appliances within a building. These pipes can be made from various materials including PVC, copper, galvanized steel, and PEX.
Where Are Water Pipes Located?
Typically, water pipes are located within walls, beneath floors, and above ceilings. In some cases, they can also be found in the ground outside buildings, connecting the municipal water supply to the internal plumbing system.
How to Identify Air in Water Pipes?
Air trapped in water pipes usually manifests as irregular water flow, loud noises such as banging or whistling when a tap is turned on, sputtering at the outset of water flow, or vibrations in the pipes. This may help you find and give you ideas about what the causes of air in water pipes may be.
What Causes Air in Water Pipes?
Air in the water pipes can be caused by a few things:
Water Supply Turnoff: Shutting off the main water supply can sometimes allow air to enter the system.
System Repairs or Modifications: Any repairs or changes to the plumbing can introduce air into the pipes.
Faulty Valves or Seals: Compromised valves or seals may suck air back into the pipes when water pressure drops.
High Water Velocity: High speeds of water flow can create vacuum pockets that trap air.
Improperly-Sized Pipes: Oversized or undersized pipes can cause air chambers to form.
Why Air in Water Pipes Needs to Be Removed
Air in water pipes needs to be removed because it can lead to inconsistent water pressure. It can also lead to potential pipe damage due to water hammer, noise disturbance, and inefficient water heating.
Steps to Remove Air From Water Pipes Yourself
If you figure out what the causes of air in your water pipes are, you can remove the air yourself. Take a look below at the steps.
Turn Off Water Main: Locate the main shut-off valve and turn off your water supply.
Open Highest Faucet: Go to the highest level in your home and open the faucet.
Open Lowest Faucet: Find the lowest faucet in your home, often this is an outdoor hose bib or basement sink, and open it as well.
Turn On Water Supply: Reopen the main valve to allow water to push the air out through the open faucets.
Close Faucets: Once water flows consistently without sputtering, close the lowest faucet followed by the highest one.
How to Protect Your Plumbing?
Regular maintenance such as inspecting for leaks, proper insulation, and checking water pressure can extend the lifespan of your water pipes. It can also prevent issues like airlocks. To protect your plumbing, avoid chemical drain cleaners. Additionally, reduce water pressure if it’s too high, and soften hard water to minimize mineral buildup. Also, never allow your pipes to freeze. These are all good ways to make sure you protect your pipes.
Maintaining Pipes in Your Home
Now that you are aware of how air has gotten into your water pipes you can begin reviewing other possible plumbing issues in older homes. Once you purchase an older home, it is a great idea to read up on all of the possible issues that could arise. This allows you to save money towards any big repair needs down the road.
Next, there are other areas in your home where you might notice air bubbles in your water lines. The toilet is often a place that has an issue with too much air, based on the water pressure and the need to swap out old equipment. Be sure to understand why your toilet bubbles when the shower is running. This could be a result of air in your water lines.
Lastly, if you notice a problem with your bathroom smelling like sewage, you should immediately investigate this. Checking all drains and other possible causes during a sewer scope inspection is key. As you work to get the air out of your water pipes, you might also get rid of any clogs or bacteria build-up that has caused this foul smell.
When to Call a Professional
If you’ve attempted to remove the air and are still experiencing problems, it may be time to call a licensed plumber. Also, if you’re uncomfortable performing these steps yourself, reach out to a professional. It can be difficult to figure out the solution, especially if it is something a little more technical. A professional can help solve the issue.
Check out the video below about getting the air out of the water pipes in your house.
https://insideandoutpropertyinspectors.com/wp-content/uploads/2023/07/water_droplets_25.jpeg10001500BJ Johnsonhttps://d39oyu4lp7snwz.cloudfront.net/wp-content/uploads/sites/54/2019/08/31171419/io-favicon-300x300.pngBJ Johnson2024-02-21 02:54:262024-02-21 02:54:26What Causes Air In Water Pipes?
For homeowners with shrubs, drip irrigation offers an efficient way to keep plants healthy while conserving water. But how long should you run drip irrigation for shrubs? The ideal duration depends on several factors like soil type, climate, and the water needs of your plants.
In this post, we’ll cover the benefits of drip irrigation, how it works, and considerations for setting your system’s runtime when watering shrubs. You’ll learn general time recommendations based on your conditions. We’ll also discuss signs your shrubs need more or less water. With the right drip irrigation schedule, you can nurture robust root systems, prevent disease, and reduce your water usage.
What is Drip Irrigation?
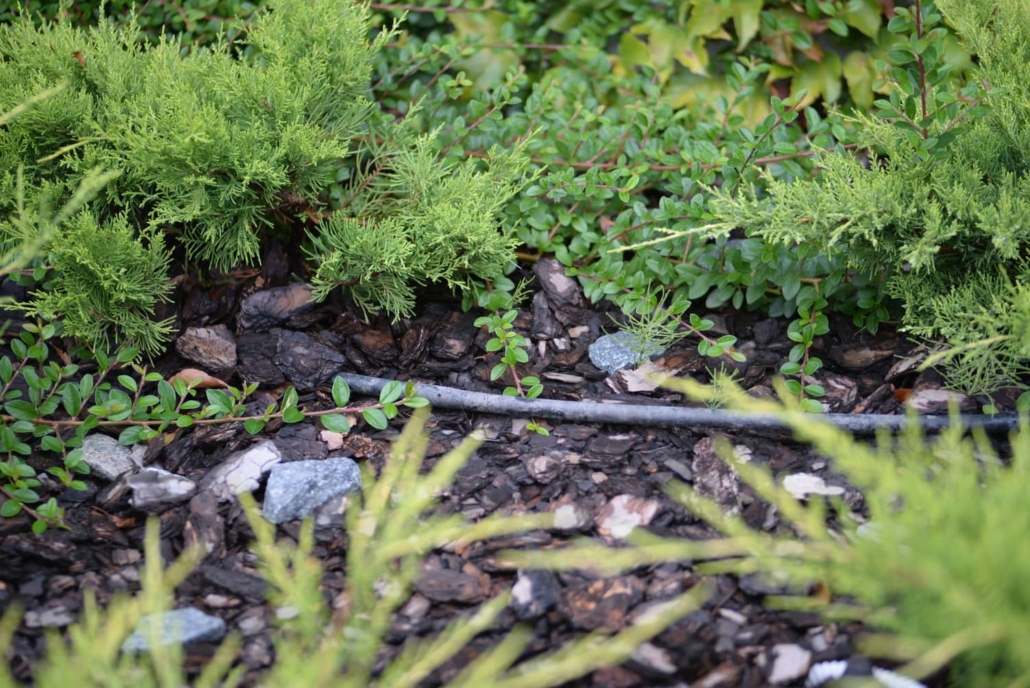
Drip irrigation is a water-saving system that gives plants a drink right where they need it – at the roots. This targeted approach sets it apart from sprinklers that spray everywhere. With drip irrigation, water flows through flexible plastic tubing laid out along garden beds and borders. Small outlets called emitters are installed in the tubing. They release water slowly, drop by drop, onto the soil.
You can place emitters next to each shrub or plant. Or space them evenly to cover entire rows. The flow rate is measured in gallons per hour, so it’s easy to control how much water is applied. Unlike sprinklers, drip irrigation delivers a steady, gentle stream of moisture. This allows soil to absorb water without any runoff or puddles. Foliage stays dry, which reduces disease.
Deep watering encourages plants to grow extensive root systems. This makes them more drought-tolerant. Drip irrigation can be automated with timers and sensors for convenience.
Gardeners love drip systems because they’re affordable, customizable, and up to 90% more water-efficient than sprinklers. They excel at nourishing trees, shrubs, flowerbeds, and vegetable rows with exactly what each plant needs.
Optimizing Your Drip Irrigation Schedule
When creating a watering schedule for shrubs, focus on deep, infrequent irrigation to promote robust root growth. Frequent shallow watering leads to weak, short roots unable to withstand drought.
Aim to run drip irrigation for shrubs just once or twice per week. The optimal duration depends on:
Soil Type – Sandy soils need more frequent watering with shorter runtimes. Clay soils stay moist longer and require less frequent, deeper watering. Loams strike a balance between the two.
Weather Conditions – Hot, dry, windy weather causes faster moisture evaporation from soil and plant leaves. Irrigate more often during droughts or heat waves. Reduce watering in humid climates.
Plant Varieties – Native plants and drought-tolerant varieties need less frequent watering than exotic shrubs unaccustomed to your climate.
Season – Plants have higher water needs during hot summer months compared to cooler spring and fall. Reduce watering in winter when growth slows.
Emitter Flow Rate – Faster watering with higher flow emitters allows you to shorten runtimes. Go longer for slower, more targeted applications.
General Drip Irrigation Runtime Guidelines
Sandy soil: 30-45 minutes, 1-2 times per week
Loam soil: 60 minutes, 1 time per week
Clay soil: 90 minutes, 1 time every 1-2 weeks
Check soil moisture before each watering, and aim to supplement with occasional deep soaking during dry seasons!
Cost Considerations
Installing a drip irrigation system requires an initial investment, but you’ll reap ongoing savings from water efficiency. Here are the main factors that impact the cost:
System scale – Larger landscapes need more tubing, emitters, and connector parts which adds expense. But costs per square foot decrease with size.
Materials – Tubing, connectors, and emitters are available in a range of price points. Opt for UV-resistant tubing for longevity.
Automation – Smart timers, WiFi control, moisture sensors, and valves increase automation but also cost. They can optimize watering and prevent overwatering, saving resources.
Installation – Hiring an irrigation specialist is recommended unless you’re experienced. Professional installation averages $300-$800 but ensures proper layout and function.
Maintenance – Occasional filter cleaning, emitter replacement, and inspections help sustain system health and water savings. Annual costs are low.
Expect to invest $200-$800 for parts in a small DIY drip system. Professionally installed systems for whole gardens with automation can cost $2,000-$5,000. The expenses tend to pay for themselves over a few years through water savings. Plus, healthy shrubs and gardens are priceless!
When to Call a Professional
Installing drip irrigation can be straightforward, but complex landscapes often benefit from an experienced irrigation specialist. Their skills and know-how prevent rookie mistakes. Large yards requiring expansive tubing layouts with dozens of emitters call for pro design and placement. Precise spacing and zoning ensure even coverage across diverse plantings.
Additionally, sloping or multilevel terrain calls for an expert eye. They can account for elevation changes and prevent runoff. Maximizing efficiency and automating watering requires specialized expertise. Advanced controllers, moisture sensors, and smart valves integrate seamlessly when installed by professionals.
Even smaller, simple drip system installations often develop leaks or coverage gaps. Proactive maintenance from experts optimizes performance. And you skip the hassle and headaches of DIY.
Finally, careful system design, leak prevention, and efficiency maximize the benefits of drip irrigation. For complex installations or advanced features, irrigation specialists earn their keep.
Other Recommended Maintenance
Aside from smart watering, a few extra care tips keep your shrubs looking their best. Each spring, spread a fresh layer of compost or mulch around shrub beds. This boosts moisture, nutrients, and healthy bacteria in the soil. Apply 2-3 inches of mulch but avoid piling it against the stems. Bark, leaves, straw, or rocks will all work.
Also, prune overgrown shrubs after blooming or during winter dormancy. Pruning opens up tangled branches for better growth and shape. Group shrubs with the same lighting and watering needs together. For example, azaleas, hydrangeas and camellias all thrive on moderate watering and partial shade. Drought-lovers like junipers need less than others in the garden.
Check leaves, stems and roots for signs of problems. Treat pests and diseases early before they get worse, and clear out dead annuals after frost so bugs have fewer places to overwinter!
https://www.youtube.com/watch?v=fSyCL-nXc9g
Conclusion
When it comes to scheduling when to run drip irrigation for shrubs, the optimal duration leads to healthy plants. Run times that are too long cause waste and disease, and too short leaves shrubs stressed and dry.
Aim for deep weekly soakings based on your soil and climate. Sandy soils may need 30-45 minutes. Loams and silty soils 1 hour. Heavy clay even less frequently. Adjust as needed based on weather, plant types, and the season. Automated timers set to water before dawn are ideal. With the right schedule matched to your conditions, drip irrigation keeps shrubs vibrant with no hassle.
https://insideandoutpropertyinspectors.com/wp-content/uploads/2023/07/drip_irrigation_25.jpeg9281392BJ Johnsonhttps://d39oyu4lp7snwz.cloudfront.net/wp-content/uploads/sites/54/2019/08/31171419/io-favicon-300x300.pngBJ Johnson2024-02-15 15:44:532024-12-24 19:41:38How Long to Run Drip Irrigation For Shrubs
Downspouts are crucial components of your home that help prevent water damage. Many homeowners know they’ll need downspouts, but wonder how many their gutter system will need. The ideal downspout configuration depends on several factors like climate, gutter size, roof area, and slope.
This article will explore the rights and wrongs of downspout placement so you can make informed decisions about your home’s water management system. With the help of a professional installer, you can customize your downspouts to fit your roof and protect your home.
What is a Downspout?
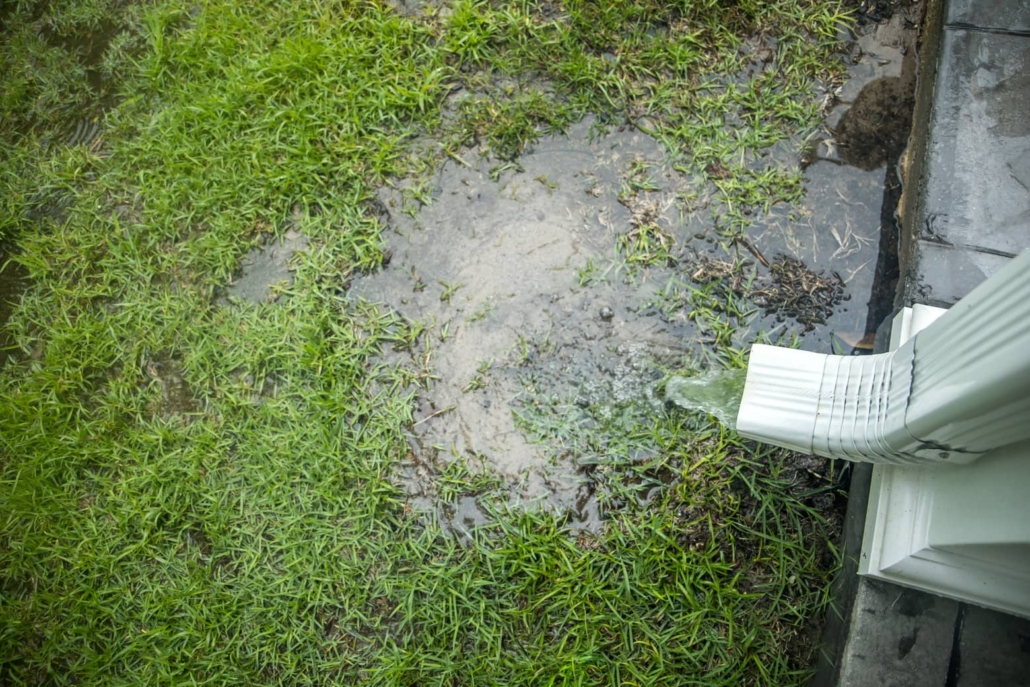
Downspouts are vertical drainage pipes that carry rainwater from your gutters down the exterior walls of your home. Also called leaders or conductor pipes, they redirect water away from your home’s foundation. Without effective downspouts, gutters can overflow and lead to flooding, soil erosion, basement leaks, and damage to siding and landscaping. Downspouts are typically made of galvanized steel, copper, aluminum, or plastic. They come in various shapes like round, square, or rectangular.
Strategically placed spouts are crucial for an efficient gutter system. They help prevent rain gutter overflow and guide water at least 5 feet away from your home’s foundation. They also reduce pressure on gutters from pooled water and debris buildup. Investing in properly positioned downspouts protects your biggest asset, saves on costly foundation repairs, and boosts curb appeal.
Determining the Ideal Amount
Installing the optimal number of downspouts is crucial for properly managing rainwater and preventing damage to your home. There are several key factors to consider when determining how many downspouts your gutter system requires:
Roof Square Footage – The total roof area dictates how much rainwater runoff needs to be effectively drained. Larger roofs require more downspouts, while smaller roofs may only need a minimum of 2-3 spaced evenly. Most standard two-story homes between 1500-3000 square feet need at least 4-5.
Climate and Average Rainfall – Homes in regions with frequent heavy rainfall need more than those in drier climates. Space downspouts closer together at 20-30 foot intervals in wetter regions to handle larger water volumes.
Gutter Type and Size – Larger box gutters or K-style gutters have greater water capacity than standard half-round gutters. Bigger gutters require fewer downspouts to effectively drain water. Consult your contractor.
Roof Pitch and Slope – Steeper-angled roofs allow water to run off faster. More gently sloped roofs cause water to drain slower, requiring more spouts to compensate.
Optimal Downspout Placement
Once you’ve determined the ideal number of downspouts needed, proper placement around your home’s perimeter is crucial for optimal performance. Follow these key guidelines when positioning new or existing downspouts:
Space Evenly Around Entire House – The spouts should be spaced at regular intervals around all sides to prevent overflow. Standard spacing is 30-40 feet apart for most homes.
At Endpoints of Gutter Runs – Install downspouts at the endpoint of every gutter run to drain all connected sections. Runs over 30 feet should have downspouts at both ends.
Near Roof Valleys and Inside Corners – Position downspouts at roof valleys or inside corners where water naturally accumulates to prevent heavy concentration.
Angle Away From Foundation – Direct downspouts at least 5-10 feet away from your foundation depending on yard slope. Use extenders if more distance is required.
Avoid Outer Corners and Peaked Edges – Don’t place downspouts at vulnerable outer corners or peaked roof edges where wind/rain can detach them.
Drain Toward Hardscapes – Ideal to direct downspouts toward driveways, patios, or French drains for efficient runoff.
Other Recommended Maintenance
Properly positioning your downspouts is one crucial maintenance task for optimal gutter performance, but it’s not the only one. Here are some other important maintenance tips to help your gutters function efficiently:
Cleaning gutters at least twice per year, and more often if you have overhanging trees, is essential. Pay special attention to removing debris around downspouts so water can flow freely. Installing gutter guards or covers can also minimize debris buildup and reduce cleaning frequency.
Checking for leaky joints or seams is also recommended during cleaning. Reseal any leaky spots to prevent water overflow and damage. Rusty downspouts or gutters may need replacement – consult a pro about spot repairs versus full replacement.
Downspout extenders should drain 5-10 feet or more from your foundation. Check that existing extenders are at a proper angle or install new ones if necessary. Keep the surrounding soil graded so water flows away from your home.
Finally, trimming overgrown trees and shrubs near your roofline helps prevent leaves and debris accumulation in gutters. Maintaining vegetation minimizes falling debris that can clog downspouts.
When to Call a Professional
If you need to install a completely new gutter system, always hire a pro. They have the expertise to determine the optimal gutter type, size and number of downspouts specific to your home’s requirements. Professionals also have the equipment and skills to properly install gutters for maximum effectiveness and longevity.
For existing gutters, call a pro if you notice any signs of damage like peeling paint, rust spots, leaks, or sagging areas. They can assess if spot repairs or full replacement are good ideas. Trying DIY repairs often leads to bigger problems.
If your gutters overflow frequently or you suspect your downspouts are improperly positioned, have an expert evaluate them. They can confirm if realigning downspouts or adding more will improve performance.
To determine how many downspouts your existing gutters need, or where new ones should go, consult a gutter pro. Their years of experience give them an expert eye for optimal downspout placement customized to your home.
For specialty needs like copper gutters, gutter heating cables or custom covers, you’ll need a professional’s expertise. Don’t compromise on quality to save money.
Final Thoughts
Essentially, the positioning and quantity of your home’s downspouts can play a crucial role in effectively managing rainwater runoff. Improperly placed spouts can lead to flooded gutters, water accumulation by the foundation, and damage to siding and landscaping. Determining the ideal number depends on factors like your roof size, climate, gutter type, and pitch.
Once you’ve calculated the right amount, strategic placement around the roof perimeter is key for optimal performance. Spouts should be evenly spaced, located at gutter endpoints, and angled safely away from your home. To get an expert’s eyes on your downspouts or to schedule a complete home inspection, reach out to Inside & Out Property Inspectors in Jacksonville, FL, and surrounding areas.
https://insideandoutpropertyinspectors.com/wp-content/uploads/2023/02/how-many-downspouts-needed.jpeg10001500BJ Johnsonhttps://d39oyu4lp7snwz.cloudfront.net/wp-content/uploads/sites/54/2019/08/31171419/io-favicon-300x300.pngBJ Johnson2024-01-30 18:52:202024-01-30 18:52:21How Many Downspouts Do I Need?
Ever glanced at your sewer bill and felt your eyebrows leap toward the heavens? You’re not alone. Many homeowners are finding their sewer costs mysteriously climbing, without an apparent change in household habits. It begs the question: why is this essential service taking such a hefty toll on our wallets? The sewer system is a part of our everyday life unless we have a septic. It is important to keep it functioning well as it carries wastewater to the treatment area. Let’s learn about when a sewer bill is high, what might be causing it, but also how to spot an issue before it’s too late.
Why Is It Important to Know About the Sewer?
Understanding the intricacies of sewer-related expenses can be a daunting task for many homeowners. However, with a clear understanding of the costs involved and knowledge of how to maintain your sewer system efficiently, you can navigate these expenses more effectively.
Average Sewer Bill Cost Per Month
The average sewer bill for homeowners typically falls within the range of $20 to $60 per month. This figure, however, is subject to significant variation based on factors such as location, usage, and the rate structure set by the local municipality. In Florida, the average monthly cost for sewer services can range between $20 and $80. This variation largely depends on the specific locality and individual usage levels.
Why Is My Sewer Bill So High?
A high sewer bill can be attributed to several factors. Increased water usage, leaks in the system, or even billing errors could be potential culprits. If you notice a sudden spike in your sewer bill, it’s crucial to investigate and identify the cause.
Signs of a Sewer in Trouble
Certain signs indicate that your sewer system might be in trouble:
Unusual Noises: Skeletons shouldn’t be the only things rattling in your home. Gurgling pipes could indicate a backup.
Foul Odors: A whiff of something foul could mean your sewer line is waving a red flag.
Water Woes: Puddles in your yard or slow drains inside your home? These are classic SOS signals from your sewer system.
What to Do When Your Sewer Bill is High?
If your sewer bill is higher than usual, start by reviewing your water usage. Look for any significant changes that could justify the increase. If your water usage hasn’t changed drastically, consider checking for leaks in the system or getting a professional inspection done.
Ways to Find Out What Is Causing Issues with Sewer
Identifying what’s causing issues with your sewer involves a few steps.
You can monitor your water meter for unusual activity which might indicate a leak.
Conducting dye tests in toilets can also help detect leaks.
Inspecting pipes for corrosion or blockages can reveal issues, and video inspections can provide deeper insights into the state of your sewer system.
Average Sewer Repair Costs
Sewer repair costs can vary widely. Minor fixes might only cost a few hundred dollars, while major repairs or full replacements can run into the thousands. It’s important to get a professional estimate for any repair work.
Ways to Maintain The Sewer
Maintaining your sewer system involves being cautious about what goes down the drains, using strainers to catch debris, performing regular drain cleaning, and avoiding planting trees near sewer lines. Regular maintenance can prevent costly issues in the future. Ideas are:
Regular Check-Ups: An ounce of prevention is worth a pound of cure. Regular inspections can save you a ton of trouble.
Mindful Flushing: Your toilet isn’t a trash can. Flush wisely.
Plant Placement: Keep trees and larger plants away from sewer lines—their roots crave chaos.
Other Information To Know
Now that you know about high sewer bills, let’s take a look at other areas of maintenance.
One of those is knowing where the water meter is located. This is important as it controls the amount of water that flows into your home. Also, if you monitor it, you can find out the amount of water that is being used in the home and hopefully prevent future issues.
Another is when the city is responsible for sewer lines. The city is responsible for when they start at the main underground sewer pipe and are past your property boundaries. This is the main sewer line. On the other hand, the lower lateral and upper lateral sewer lines are the responsibility of the homeowner.
Lastly, it is important to know how deep the sewer lines are buried. Residential lines are usually buried 5-6 feet deep, while in colder areas it is 4-8 feet. On the other hand, city lines are buried 12 feet deep.
When Do I Call a Professional?
If basic troubleshooting doesn’t resolve the issue or if you notice signs of significant damage, it’s time to call a professional plumber or sewer service. They also have the expertise to diagnose and fix complex sewer problems. The sewer is nothing to mess with and you want to know if it is something you or the city are responsible for.
Check out the video below about a woman and her high sewer bill.
Conclusion
Being informed about your sewer system and taking proactive measures can help keep costs down and extend the life of your infrastructure. By monitoring your usage, performing regular maintenance, and acting swiftly when issues arise, you can effectively manage your sewer expenses. It’s important to keep up with the maintenance and also know what you or the city are responsible for. While taking a look at your sewer bill, this is a great time to call Honor Services as they are your best home inspection company in Brevard County, FL.
https://insideandoutpropertyinspectors.com/wp-content/uploads/2024/01/reisdential_sewer_line_23.webp563751BJ Johnsonhttps://d39oyu4lp7snwz.cloudfront.net/wp-content/uploads/sites/54/2019/08/31171419/io-favicon-300x300.pngBJ Johnson2024-01-19 14:10:382024-01-19 14:10:38Why Is My Sewer Bill So High?
When it comes to selling a home every homeowner wants to get the most money out of their investment. In some cases, there can be a huge upside when the windows are brand new. The words “brand new” give the buyer a sense of excitement about their new home purchase. Anytime that you can provide the potential buyer with the idea that one less project is needed makes the home buyer happy. Is it worth replacing windows before selling a house? Not necessarily. It is recommended that you update the weather stripping and caulking.
Let’s look below at when and why you should replace the windows in your home.
Assess the Condition and Value of Your Current Windows
When contemplating selling a house, assessing the condition of your windows and determining if it’s worth replacing them is a pivotal step. This analysis will not only inform potential buyers of the home’s state of repair but also contribute to the overall energy efficiency and aesthetic appeal that can sway purchasing decisions.
Conduct a Thorough Window Assessment
Begin with a meticulous examination of your windows. Here’s what to look for:
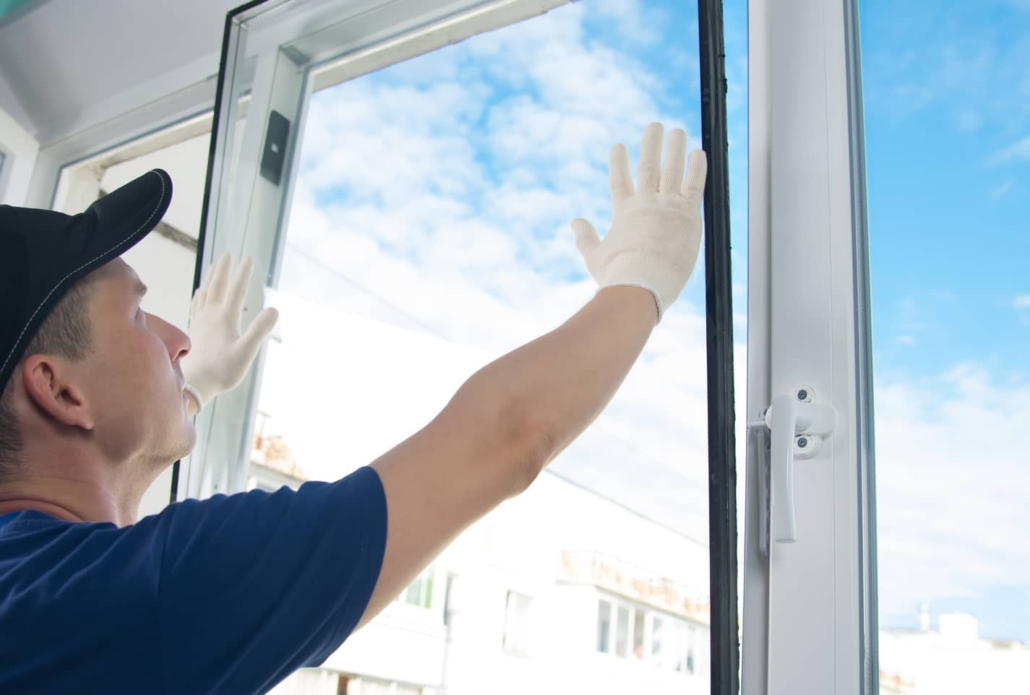
Signs of Wear: Check for drafts, condensation between panes, and difficulty in operation, which all suggest poor performance.
Structural Integrity: Inspect for decay in wooden window frames, cracks in the glass, or compromised seals. Any of these could impact both insulation and security.
Aesthetic Condition: Look for peeling paint, water stains, or outdated styles that detract from your home’s appeal.
Gauge Energy Efficiency
Energy efficiency is a key selling point in today’s market. Buyers are increasingly conscious of both their carbon footprint and the long-term cost savings associated with efficient homes. Energy Star-certified windows, for instance, can be a significant draw for buyers looking to reduce their energy bills.
Understand the Market
Real estate markets vary widely, and what’s expected in one neighborhood might be less important in another. In areas prone to extreme weather, for instance, the quality of windows can be a make-or-break feature for buyers. Research local trends and consult with real estate agents to understand how much value new windows might add to your home.
Cost-Benefit Analysis
Replacing windows can be a substantial investment. To decide whether it’s worth it, compare the costs of replacement to the potential increase in property value. Remember, while new windows may not cover their costs entirely at sale, they could expedite the selling process by making your home more attractive to buyers.
To Replace or Not to Replace
The decision to replace windows before putting your house on the market is not one-size-fits-all. Several factors must be weighed to determine whether this home improvement will translate into a worthwhile return on investment when you sell. Here’s how to clarify whether window replacement is the right move for your home sale.
Evaluate the Current State
Reflect on the thorough window assessment conducted earlier. If your windows show significant signs of wear, compromise the structural integrity of your home, or have a dated appearance that detracts from your home’s overall look, these issues might negatively impact a buyer’s perception of your property.
Consider the Energy Efficiency Factor
Energy efficiency upgrades can be a strong selling point. If your existing windows are not energy-efficient and you live in an area where energy conservation is a priority for buyers, investing in new windows could be a strong selling point that adds to your home’s market value.
Balance Costs and Returns
Weigh the costs of full replacement against potential returns. If the window issues are cosmetic, a less expensive repair might suffice. However, if the windows are functionally obsolete, this could be a deterrent for buyers looking for a move-in ready home.
Market Expectations
Understand what is standard in your area. If you’re in a high-end market where buyers expect homes to be turnkey, new windows could be necessary to compete. Conversely, if you’re in a seller’s market or an area where buyers are likely to renovate post-purchase, investing in new windows may not provide a significant return.
Buyer Incentives
Consider the alternative of offering an allowance for window upgrades in the sale price, which can be an attractive option for buyers. This allows them to choose their preferred style and may be a more cost-effective solution for the seller.
Consult with Professionals
Before making a decision, consult with a local real estate agent and a window installation professional. They can provide insights into the local market and the potential increase in sale price that new windows might bring.
Ultimately, while it is generally worth it, replacing windows before selling a house should be based on a combination of practical considerations and a strategic assessment of the housing market. If new windows will significantly enhance the curb appeal, functionality, and energy efficiency of your home, thus making it more attractive to buyers and likely to sell faster and at a higher price, then replacement is a sound investment. If not, then simple repairs and a good cleaning may suffice.
Cost Considerations for Window Repair or Replacement
When deciding whether to repair or replace windows before selling your home, it’s essential to have a grasp of the potential costs involved. Here’s a breakdown of the financial aspects to consider:
Average Cost of Window Repair or Replacement
Minor repairs such as replacing weather stripping, re-caulking, or repainting window frames are generally affordable, often ranging from $100 to $300 per window. These repairs can mitigate issues like drafts and improve the overall appearance of the windows without a significant investment.
The cost of replacing windows can vary widely based on the window type, material, and installation fees. On average, homeowners might expect to spend anywhere from $300 to $1,000 per window for vinyl replacement windows, which are a cost-effective and popular choice. Wood or fiberglass windows can cost significantly more, potentially ranging from $600 to $2,000 per window.
Energy-Efficient Windows
If you opt for Energy Star-certified windows, the initial cost might be higher; however, these can offer long-term savings on energy bills and entice energy-conscious buyers. The additional investment might range from 10% to 15% more than standard windows but could be offset by energy savings over time.
Return on Investment (ROI)
While new windows can enhance your home’s value, they usually do not recoup 100% of the investment upon sale. The ROI for window replacement averages around 70%, which means for every $1,000 spent on new windows, you could expect to increase the home’s selling price by about $700. However, this figure can fluctuate based on your area’s housing market and buyer expectations.
Additional Factors
The Scale of Replacement: The cost will also depend on whether you’re replacing all windows or just a few. Quantity discounts may apply for larger jobs.
Custom Windows: Custom shapes and sizes will increase costs, so standard window sizes are more budget-friendly.
Installation Costs: Professional installation is crucial for window performance and typically accounts for a significant portion of the replacement costs. It’s worth getting multiple quotes to ensure competitive pricing.
Potential Rebates: Some energy-efficient upgrades qualify for rebates or tax credits, which can reduce the overall cost.
Ballpark Figures
For a modest-sized home, repairing windows could cost between $200 and $600 for basic fixes, while full replacement with standard, energy-efficient models could range from $3,000 to $10,000 or more, depending on the number and type of windows. It’s advisable to obtain at least three quotes from reputable contractors to get an accurate estimate for your specific situation.
Other Recommended Maintenance
Ensuring your home is presented at its best is key to achieving a successful and profitable sale. A well-maintained structure and facade are as critical as the condition of your windows. Address any exterior issues such as chipped paint, damaged siding, or missing roof tiles. A pristine exterior boosts curb appeal and indicates to potential buyers that the home is cared for inside and out.
Inside, tackle any basic repairs that could undermine the perceived value of your home. Fix leaky faucets, ensure all appliances are in working order, and oil any creaky hinges. These small adjustments contribute to the overall impression of a home that has been maintained diligently.
Servicing your home’s heating, ventilation, and air conditioning system is another crucial step. A functional and efficient HVAC system is a hidden complement to new windows, reinforcing the message of energy efficiency and comfort.
Good lighting is also paramount; it highlights your home’s best features, complements the new windows, and sets a welcoming ambiance. Replace any non-working bulbs and consider updating dated fixtures to modernize and brighten your space. Attending to these maintenance aspects shows a commitment to your home’s condition and can significantly sway a buyer’s perception, potentially making the difference between a house that lingers on the market and one that sells promptly at a desirable price.
When to Call a Professional
Deciding when to call a professional is an important step in preparing your home for sale. For window repairs or replacements, a professional should be consulted if you encounter issues beyond basic cosmetic fixes. This includes problems like foggy windows, which indicate a failed seal, windows that are difficult to open or close, or signs of rot or water damage on wooden window frames. These conditions often require specialized skills and tools to ensure the job is done correctly and safely.
For other home maintenance tasks, such as servicing your HVAC system, dealing with electrical work, or addressing significant plumbing issues, professional expertise is not just recommended, it’s essential. These systems can be complex and, if not handled properly, can lead to costly damage or pose safety risks.
Additionally, if you’re unsure about the structural integrity of your home or if you’ve discovered potential mold or pest infestations, it’s time to bring in experts. They can assess the situation accurately and provide solutions that will stand up to scrutiny during a home inspection.
In summary, for any task that goes beyond your knowledge, could affect your home’s safety, or might impact its value, enlist the services of a professional. This ensures that all work is up to code, completed efficiently, and presents your home in the best light for prospective buyers.
In a competitive real estate market, presenting your home at its finest can make all the difference. This being the case, the investment of replacing windows before selling the house is usually worth it. By carefully considering the condition of your windows and addressing other key maintenance issues, you set the stage for a successful and lucrative home sale.
Remember that while the charm is in the details, the confidence comes from the foundations. Don’t overlook the power of first impressions; ensure your windows and home maintenance speak of quality and care. When tasks exceed your expertise, calling in professionals is a smart investment in your home’s marketability. For guidance on the condition of your current windows or an inspection of any other home components, reach out to Inside and Out Property Inspections today.
https://insideandoutpropertyinspectors.com/wp-content/uploads/2024/01/windows-and-real-estate.jpeg10001500BJ Johnsonhttps://d39oyu4lp7snwz.cloudfront.net/wp-content/uploads/sites/54/2019/08/31171419/io-favicon-300x300.pngBJ Johnson2024-01-18 21:04:312024-12-24 19:40:56Is It Worth Replacing Windows Before Selling A House?