
Buying or owning a home in Northeast Florida comes with a lot of excitement. From enjoying coastal breezes to settling into established neighborhoods, there is plenty to love. However, if your home was built between 1965 and 1973, you may face a hidden safety concern. Having aluminum wiring in house systems during this era was common across Jacksonville, Orange Park, and surrounding areas.
While aluminum carries electricity just like copper, single-strand aluminum wiring creates distinct safety hazards over time. As this wiring ages, it increases the risk of electrical fires and creates challenges for home insurance. Understanding how single-strand aluminum wiring works, why it causes problems, and what steps you can take will help keep your Northeast Florida home safe and insurable.
What Is Single-Strand Aluminum Wiring?
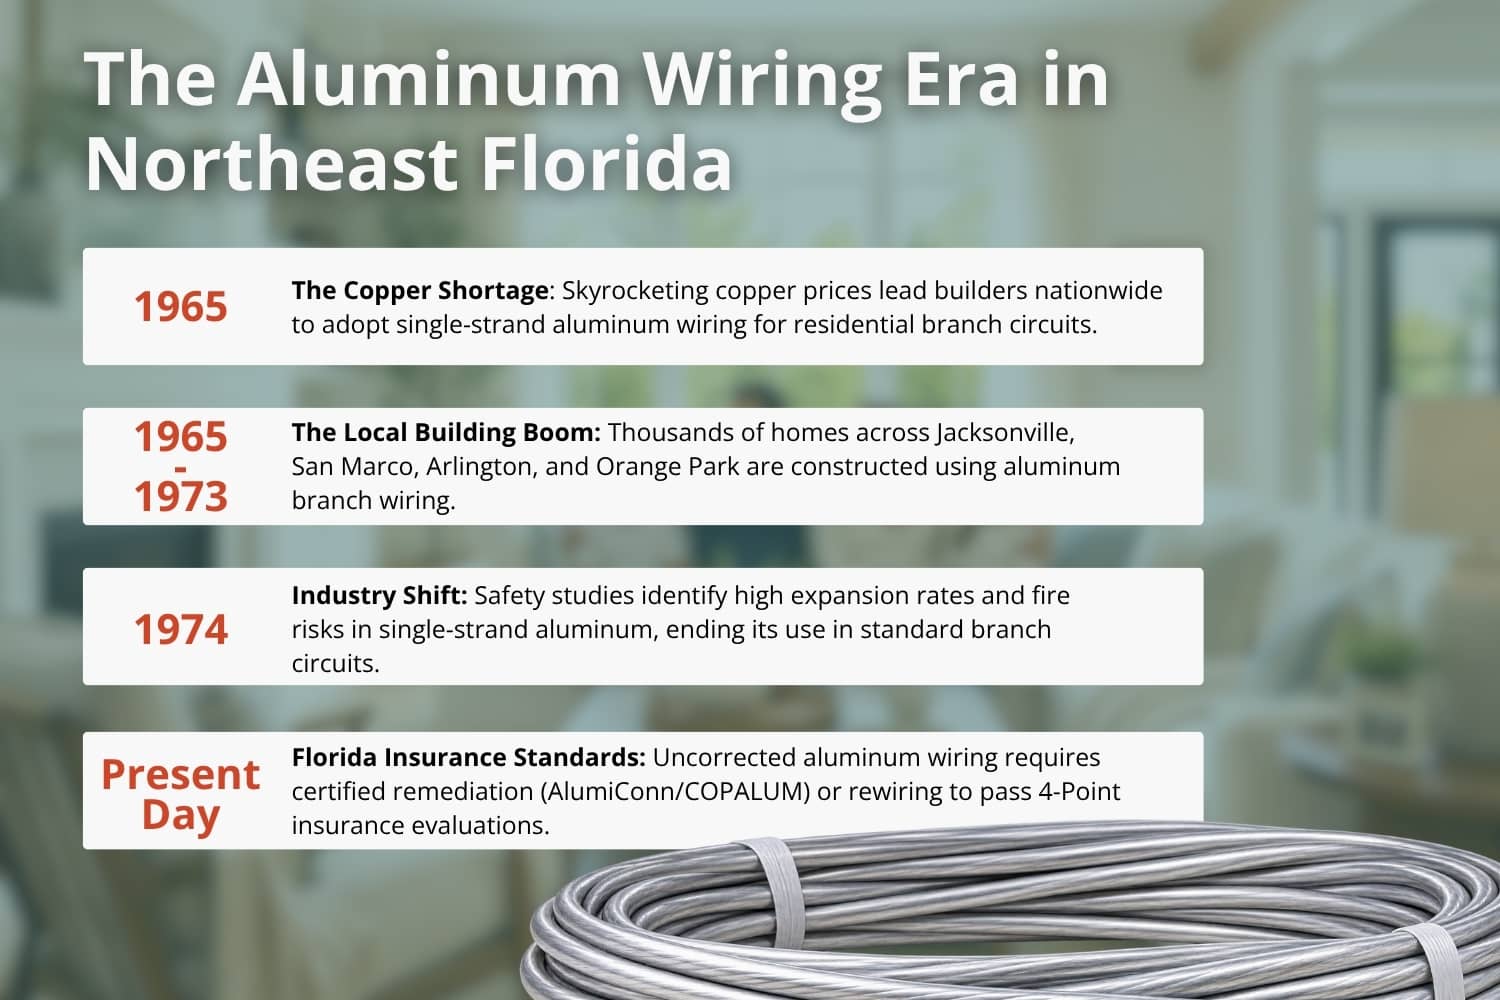
Single-strand aluminum wiring is a type of branch circuit wiring used in residential homes during the mid-1960s to the early 1970s. Builders used it as a low-cost alternative to copper during a time when copper prices soared. Branch circuits feed electricity directly to standard wall outlets, light switches, and light fixtures.
In Jacksonville neighborhoods established during that building boom, such as Arlington, San Marco, and parts of Westside, thousands of homes were wired using single-strand aluminum. While the metal conducts electricity well enough, it reacts very differently to heat and pressure compared to copper.
It is important to note that multi-strand aluminum wiring is still used safely today for main power feed lines and heavy appliance circuits. The primary safety concern centers entirely on single-strand branch wiring connected to everyday switches and outlets.
Why Having Single-Strand Aluminum Wiring in House Systems Creates Safety Risks
Single-strand aluminum wiring causes safety problems because of how the metal behaves inside electrical boxes over time. Unlike copper, aluminum expands and contracts rapidly when electric current flows through it.
Here are the main reasons why single-strand aluminum wiring creates hazards in homes:
High Thermal Expansion: Aluminum expands much more than copper when heated. Every time you turn on a light or plug in a vacuum, the wire warms up and expands. When turned off, it cools down and shrinks. This constant movement causes connections at switch terminals and outlet screws to loosen over time.
Oxidation and Rust: When aluminum meets oxygen, it forms aluminum oxide. Unlike copper oxide, which still conducts electricity, aluminum oxide acts as an insulator. This buildup creates electrical resistance, which generates excess heat inside wall boxes.
Metal Creep: Aluminum is a softer metal than copper. Under the constant pressure of a screw terminal inside an outlet, the wire gradually reshapes and flattens out. This process, known as creep, leads to loose electrical connections.
Electrical Arcing: Loose wires combined with high resistance cause electricity to jump across gaps. This jump is called an arc. Arcing creates extreme temperatures that easily melt plastic outlets, ignite wall insulation, or cause hidden fires behind drywall.
Over time, these combined issues turn simple everyday electrical use into a serious fire hazard hidden behind your walls.
How Aluminum Wiring Compares to Copper Wiring
To see why single-strand aluminum needs extra attention, it helps to compare its physical traits directly with copper wiring.
Up to 55 times more likely to reach fire conditions
Insurance Status
Accepted by all insurance carriers
Requires special inspections or approved repairs
These stark differences explain why insurance companies treat single-strand aluminum as a high safety risk and why proper evaluation is essential for your home.
Signs You May Have Aluminum Wiring in House Installations
You cannot always see the wires behind your walls, but several signs suggest your home might have single-strand aluminum wiring.
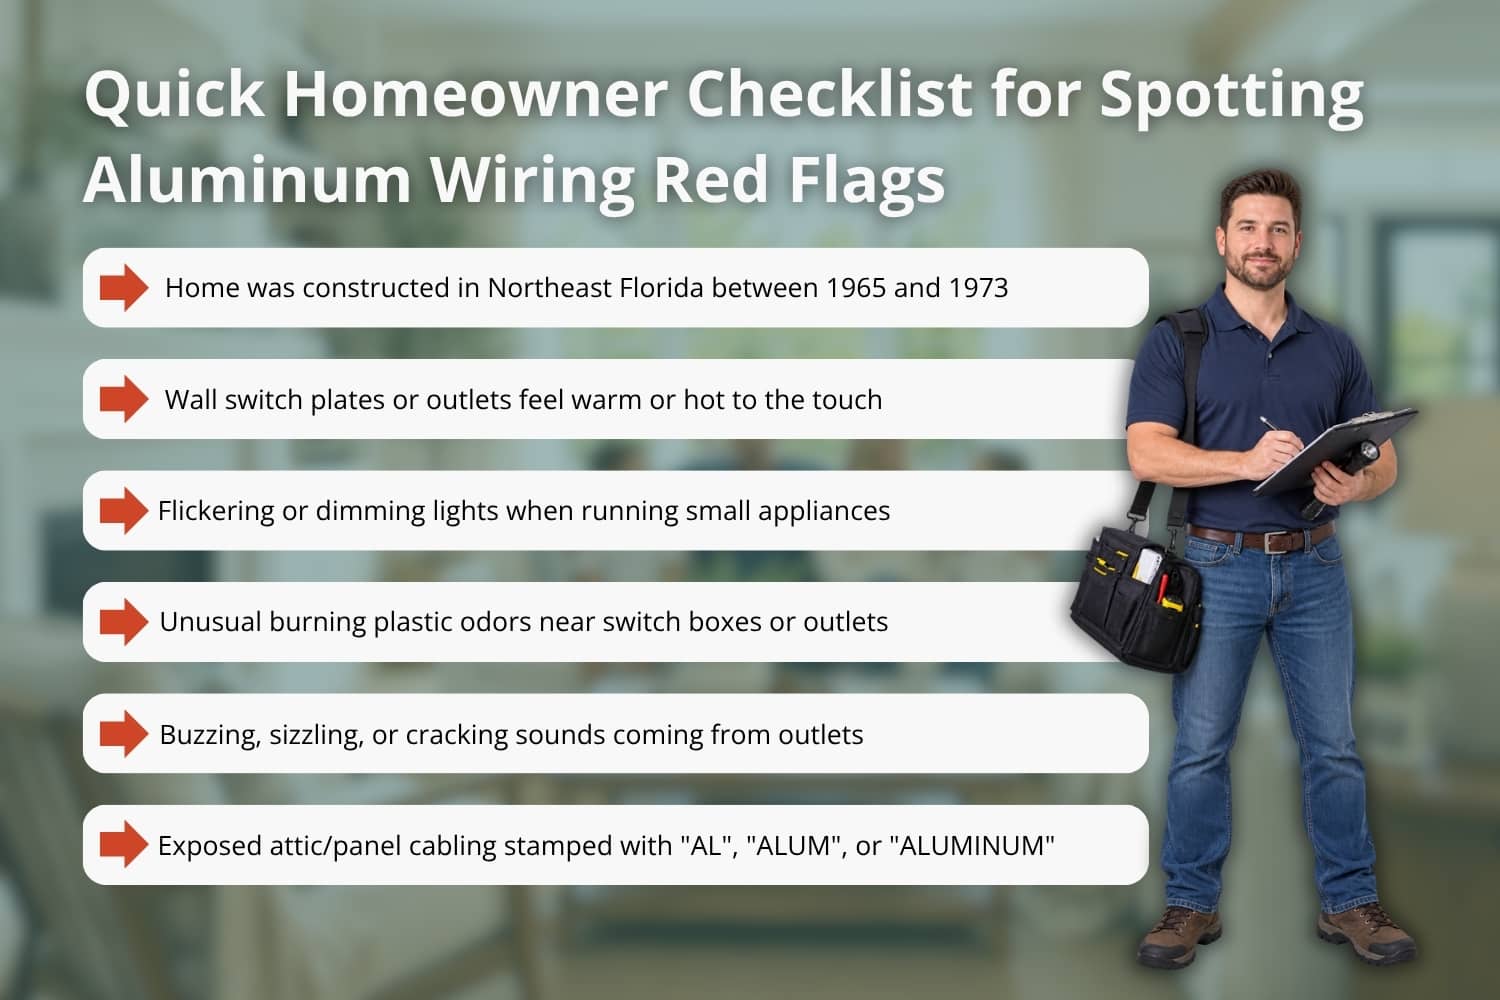
First, check the age of your house. If your Jacksonville home was constructed between 1965 and 1973, there is a strong chance aluminum branch wiring was used. Second, check for these warning signs around your home:
Wall switch plates or outlet covers that feel warm or hot to the touch.
A strange burning plastic smell near light switches or wall plugs.
Lights that flicker or dim randomly when small appliances turn on.
Outlets or switches that stop working for no obvious reason.
A soft buzzing or sizzle sound coming from inside switch boxes.
Static or interference on audio equipment and televisions.
If you open your main electrical panel or look at exposed wiring in the attic, you may see stamped markings on the plastic wire jacket. Look for letters such as AL, ALUM, or ALUMINUM stamped every few feet along the outer sheath.
Florida Home Insurance Challenges with Aluminum Wiring
Securing home insurance in Florida requires extra effort, and having aluminum wiring in house circuits makes it even more challenging. Insurance companies across Duval County, St. Johns County, and Clay County closely review electrical systems before issuing policies.
Most Florida home insurance carriers require a specialized 4-Point Inspection for homes older than 20 years. During this 4-Point inspection, the inspector examines four critical systems: the roof, plumbing, HVAC, and electrical wiring.
If single-strand aluminum wiring is present, many insurance carriers will refuse coverage until the system is evaluated by a licensed professional or repaired using approved remediation methods. Insurance companies view uncorrected aluminum wiring as a high risk for electrical fires. Leaving it unaddressed can result in policy denial, non-renewal, or significantly higher premium rates.
How Home Inspectors Find Aluminum Wiring Risks
A standard visual home inspection offers a great start, but thorough property inspectors use advanced technology to spot hidden electrical hazards without damaging your walls.
During a professional inspection, your inspector will remove panel covers, inspect branch wiring connections, and look for signs of overheating. They will also verify whether any past repairs were done using proper, safety-tested methods or dangerous DIY fixes.
Using a Thermography Inspection (thermal imaging) adds an extra layer of protection. Infrared cameras detect hidden temperature differences behind walls, inside switch boxes, and across breaker panels. Because loose aluminum connections generate heat long before they smoke or spark, thermal imaging spots hot spots invisible to the human eye. This gives you clear answers about your electrical safety before a small issue turns into a real emergency.
Safe Fixes for Aluminum Wiring in House Systems
If your home has aluminum branch wiring, you do not always need to tear down your drywall to replace every single line. Modern engineering provides safe, approved solutions that bring your home up to safety standards without a total teardown.
Here are the primary ways to address single-strand aluminum wiring safely:
1. Complete Home Rewiring
Replacing all single-strand aluminum branch wiring with modern copper wire is the permanent solution. While this is the most costly and invasive option, it eliminates the risk and provides total peace of mind. It also makes getting home insurance fast and straightforward.
2. COPALUM Crimp Connectors
The COPALUM connector method uses a special crimping tool to attach a short piece of copper wire (a pigtail) to the end of the aluminum wire. The copper tail then connects safely to standard wall outlets and switches. This system creates a cold-weld connection that prevents oxidation and loosening. It requires an electrician certified specifically for this specialized system.
3. AlumiConn Connectors
AlumiConn lug connectors offer another widely approved method for pigtailing. Each wire enters its own separate port with a mechanical screw coated in a special antioxidant gel. This prevents the aluminum and copper wires from touching directly, stopping galvanic corrosion and keeping connections secure.
4. CO/ALR Devices
In smaller projects, replacing outlets and switches with devices specifically labeled CO/ALR (meaning Copper/Aluminum Revised) helps improve safety. These devices use materials designed to expand and contract at rates similar to aluminum. However, this is usually considered a temporary fix rather than a full system remediation for insurance purposes.
Warning: Never use standard twist-on wire nuts (even wire nuts filled with antioxidant grease) to connect aluminum wire directly to copper wire. Standard wire connectors loosen quickly and represent a major fire hazard.
Related Questions to Explore
What other electrical and structural issues do insurance companies look for during an inspection?
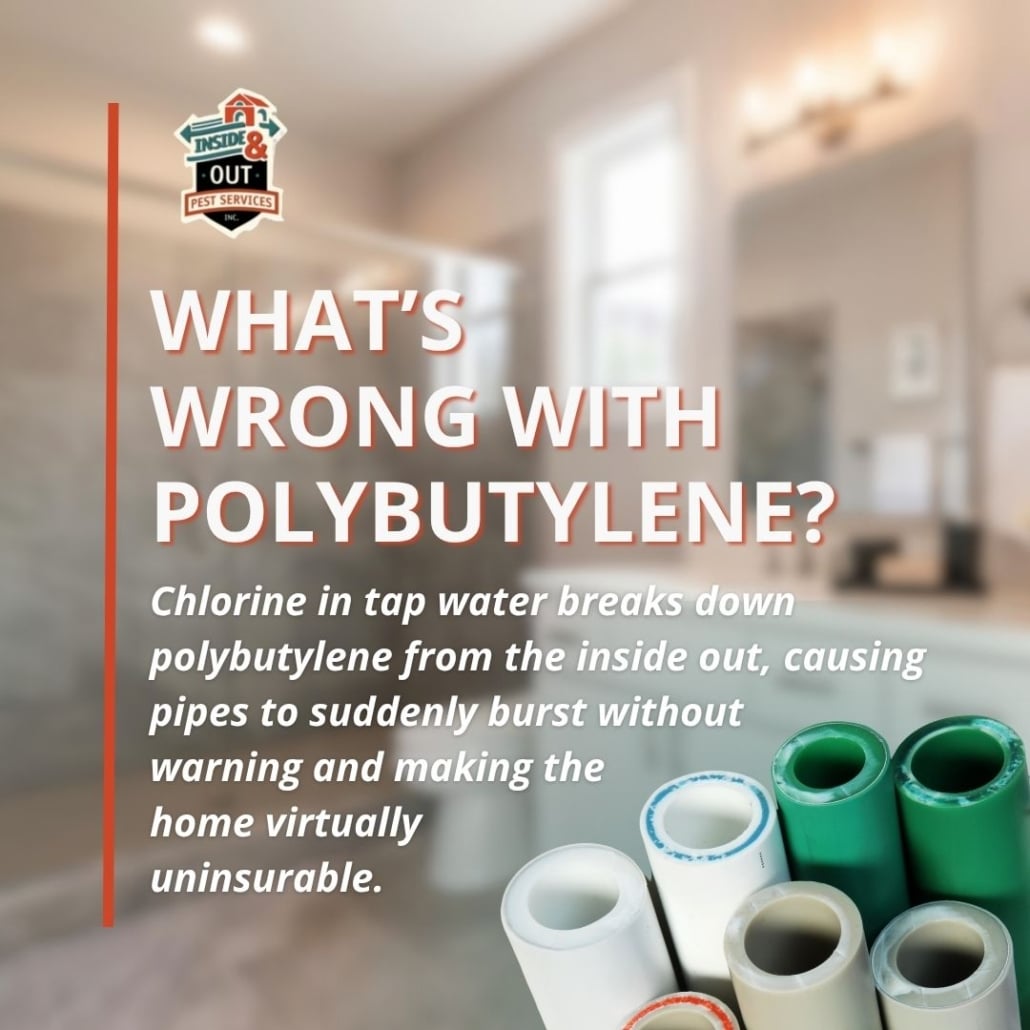
Beyond wiring, insurance providers often require a 4-point inspection to evaluate the age and condition of the roof, heating and cooling system, and plumbing lines. Outdated electrical panels, polybutylene pipes, or older roofs can trigger similar insurance hurdles.
How can inspectors detect hidden home defects without tearing open walls?
Thermal imaging inspections use infrared technology to detect subtle temperature changes behind walls and ceilings. This non-invasive tool helps spot missing insulation, hidden plumbing leaks, moisture intrusion, and dangerous electrical hot spots early.
What additional specialized inspections should home buyers consider in Northeast Florida?
Standard home inspections cover major structural and mechanical systems, but specialized checks offer deeper protection. Adding sewer scope inspections checks main drain lines for blockages, while mold inspections and wind mitigation assessments help identify hidden environmental hazards and qualify buyers for insurance discounts.
How does moisture impact older homes in Jacksonville?
Coastal humidity and heavy rainfall can degrade exterior cladding over time. Professional stucco inspections and moisture testing help detect trapped water behind walls that leads to wood rot, structural framing damage, or poor indoor air quality.
When to Call a Professional
Dealing with electrical safety is never a DIY job. If you live in or are planning to purchase an older home in Jacksonville, St. Augustine, or surrounding Northeast Florida communities, scheduling a professional inspection is the safest first step.
You should contact a professional property inspector if:
You are buying or selling a home built between 1965 and 1973.
Your home insurance company is requesting a 4-Point Inspection or an electrical certification.
You notice warm switch plates, flickering lights, or burning plastic odors near outlets.
You want to evaluate previous electrical work to ensure it meets modern safety standards.
Professional inspectors deliver clear, detailed reports that give you the exact information you need to make smart home repairs and protect your property investment.
Ensuring Electrical Safety in Your Northeast Florida Home
Understanding the risks associated with single-strand aluminum wiring in house setups gives you the power to take smart, proactive steps. While uncorrected aluminum wiring presents real fire hazards and insurance challenges, modern remediation techniques make these systems safe and insurable once again.
If you are buying a home, preparing for an insurance review, or simply looking for peace of mind in your current house, expert guidance makes all the difference. Contact Inside & Out Property Inspectors INC. today to schedule a detailed home inspection, 4-Point inspection, or thermal imaging assessment across Northeast Florida. Our team helps you spot hidden issues early so you can keep your home safe, comfortable, and fully protected.
https://insideandoutpropertyinspectors.com/wp-content/uploads/2026/09/Jacksonville-Guide-to-Aluminum-Wiring-in-House-Risks.jpg10001500BJ Johnsonhttps://d39oyu4lp7snwz.cloudfront.net/wp-content/uploads/sites/54/2019/08/31171419/io-favicon-300x300.pngBJ Johnson2026-09-02 13:26:352026-09-02 13:26:35Jacksonville Guide to Aluminum Wiring in House Risks
A rental inspection checklist is the single most important document in any tenancy. Without it, landlords cannot prove tenant-caused damage, and tenants cannot protect their security deposit from unfair deductions. This guide explains what a thorough rental inspection checklist covers, when to use it, and how a professional property inspection fits into the process.
Why a Rental Inspection Checklist?
A rental inspection checklist is a written record of a property’s condition that is completed before a tenant moves in and again when they move out. Both parties complete the walkthrough together, note the condition of every room and system, and sign the document. Each party keeps a copy.
The checklist serves two primary purposes.
It protects tenants from being charged for damage that existed before they moved in.
It protects landlords by providing documented proof of any new damage that occurs during the tenancy, which supports security deposit deductions or billing for repairs.
Without a signed move-in checklist, security deposit disputes frequently favor tenants because landlords cannot prove the pre-tenancy condition of the property.
When to Conduct Rental Inspections
Most landlords conduct inspections at three points in a tenancy:
Move-in inspection: Conducted after cleaning and before the tenant brings belongings in. Both landlord and tenant walk through the entire property together, note any pre-existing damage or wear, and sign the form. This typically takes 30 to 60 minutes for an average rental unit.
Periodic or mid-lease inspection: Some landlords conduct one or more inspections during the lease term, typically with 24 to 48 hours of written notice to the tenant (check local landlord-tenant law for your jurisdiction’s requirements). The purpose is to identify maintenance issues before they worsen and confirm that the property is being maintained appropriately.
Move-out inspection: Conducted after the tenant vacates. The landlord compares current conditions to the move-in checklist. Damage that was not present at move-in and exceeds normal wear and tear can be charged against the security deposit.
The timing of move-out inspections varies by state. Some jurisdictions allow landlords to inspect before move-out to give tenants a chance to make repairs themselves. Check your state’s landlord-tenant statutes before scheduling.
What the Checklist Should Cover Room by Room
A thorough rental inspection checklist goes through every room and documents the condition of every surface and component. Here is the standard scope:
Every Room and Common Areas
Before focusing on specific rooms, walk through every shared space and bedroom to evaluate the structural surfaces and basic fixtures.
Feature to Inspect
What to Document and Check
Walls
Holes, stains, scuffs, unauthorized paint colors, or water damage
Easily accessible, clearly labeled, and completely free of visible issues
Exterior
Documenting the outdoor spaces and entry points ensures the entire perimeter of the property is secure and well-maintained.
Feature to Inspect
What to Document and Check
Entry Doors
Secure locks, functional weatherstripping, and overall door condition
Patio or Balcony
Overall structural integrity and surface condition
Parking
Assigned parking space condition and accessibility
For each item, the checklist should include a space to rate the condition (Good, Fair, Poor) and a notes field for any specific damage. Photographs should supplement the written record.
What Counts as Normal Wear and Tear vs. Damage
This distinction determines what can be legally charged against a security deposit. Most states define normal wear and tear as deterioration that results from ordinary use of the premises, not from misuse or negligence.
Normal wear and tear typically includes minor scuffs on walls from furniture, small nail holes from picture hanging, carpet wear in traffic areas, faded paint from sunlight, and minor scratches on hardwood floors.
Tenant-caused damage typically includes large holes in walls, unauthorized paint colors, broken fixtures or hardware, pet stains or odors, missing blinds or curtain rods, burn marks, and significant carpet stains.
The checklist does not create the legal distinction, but it provides the evidence needed to apply it. Without a signed checklist documenting the starting condition, disputes become much harder to resolve.
Photographing the Property
Written descriptions alone are often insufficient. Supplement the checklist with timestamped photographs of every room, focusing on any areas of existing wear or damage. Take photos of all four walls, the floor, the ceiling, and any fixtures or appliances. Email the photos to yourself or the tenant immediately after the inspection to create a time-stamped record.
At move-out, repeat the same photographic documentation for direct comparison.
The Role of a Professional Property Inspection
A rental inspection checklist is a tool for condition tracking for tenants or landlords. It is separate from, and not a substitute for, a professional home inspection. If you are purchasing a rental property, managing multiple units with aging systems, or dealing with a tenant dispute involving concealed damage, a professional inspection provides a level of expertise and documentation that goes beyond what either party can capture in a walkthrough.
A professional inspector evaluates structural conditions, plumbing system integrity, electrical safety, HVAC function, and roofing condition. These systems affect long-term property value and carry liability that a self-conducted inspection cannot address.
Related Questions to Explore
Is a rental inspection checklist legally required? Requirements vary by state. Some states mandate written move-in inspection reports, and failure to provide one may limit a landlord’s ability to make security deposit deductions. Even in states where it is not required, using one is strongly recommended for both parties. Check your state’s landlord-tenant statutes for specific rules.
Who should be present during a rental inspection? Ideally, both the landlord and the tenant should complete the walkthrough together. This allows them to agree on condition descriptions in real time, reducing the likelihood of disputes later. If the tenant cannot attend, they should be given 24 to 72 hours to return the checklist with their own notes.
What happens if the landlord and tenant disagree about the condition at move-out? The signed move-in checklist is the reference point. Items documented as damaged at move-in cannot be charged as new damage. If parties still disagree, small claims court is the typical resolution mechanism. Detailed checklists, timestamped photos, and communication records all become essential evidence.
Can a landlord charge for cleaning the rental at move-out? Only if the cleaning needed exceeds what would be required to restore normal wear and tear. If a tenant leaves the property in the same basic state of cleanliness as at move-in, a deduction is not appropriate. However, costs for professional cleaning due to heavy soiling or pet odors can typically be charged.
How long should a landlord keep rental inspection records? At a minimum, keep them through the full statute of limitations for potential claims, which varies by state but is typically two to five years. Maintaining these records for as long as you own the rental property is an even better practice, as condition questions can arise years into a tenancy.
Get a Professional Inspection Before Disputes Start
If you have acquired a rental property or are converting a home to a rental, a professional inspection gives you a documented baseline of every system and structural element before any tenant moves in. That documented baseline is significantly more defensible than a landlord’s self-conducted checklist when disputes arise.
Inside and Out Property Inspections provides rental property inspections that cover structural, mechanical, and safety systems in detail. Whether you are purchasing a rental property, establishing condition records before a new lease, or evaluating damage after a difficult tenancy, our inspectors deliver clear, actionable reports.
Conclusion
The U.S. Department of Housing and Urban Development maintains tenant resources and landlord guidance that includes model condition report forms applicable to federally assisted housing programs.
See our full inspection services or call to schedule. For buyers considering a property with tenants already in place, our standard purchase inspections evaluate all the same systems.
Call us, schedule online, or get a free quote with us today!
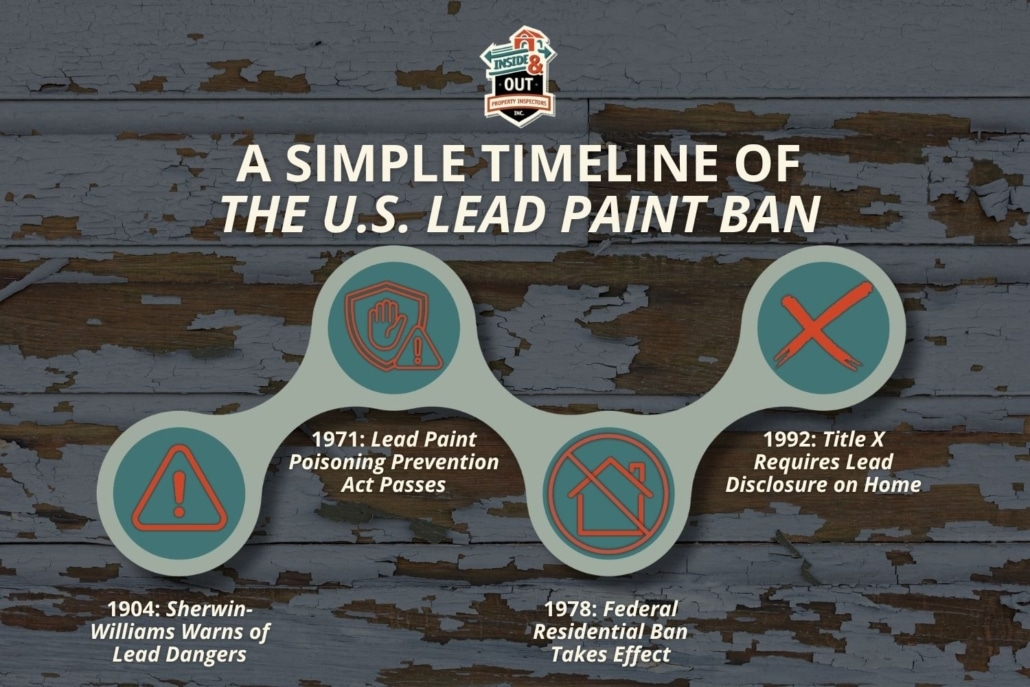
Lead paint stopped being used in U.S. residential homes in 1978, when the Consumer Product Safety Commission banned its sale for use in houses, childcare facilities, and schools. The ban came after decades of research confirming that lead is a serious neurotoxin with no safe exposure level, especially for young children.
But the 1978 ban did not make lead paint disappear. It only stopped new lead paint from being sold. Every home built before that year should be treated as a potential lead hazard until tested. At Inside & Out Property Inspectors, we see this come up regularly during home inspections across Jacksonville, St. Augustine, and Northeast Florida, and many buyers are caught off guard by what it means for older homes. This post covers the full story: when and why lead paint was banned, where it still exists, and what your rights and options are as a buyer or homeowner.
When Did Lead Paint Stop Being Used in the U.S.?
Lead paint for residential use was officially banned in the United States in 1978. The Consumer Product Safety Commission issued the ban, prohibiting the manufacture and sale of lead-based paint for use in homes, schools, and childcare facilities.
The federal ban was the end of a long process, not a sudden decision. Some states and cities acted earlier. New York City banned lead paint for indoor residential use as far back as 1960. The state of New York followed with a statewide ban in 1970.
Federal action came in two stages:
Lead-Based Paint Poisoning Prevention Act of 1971
Full residential ban in 1978
The cutoff year of 1978 is the one every home buyer, seller, and inspector needs to know. Any home built before 1978 is potentially subject to lead paint rules, disclosure requirements, and inspection considerations.
Why Was Lead Paint Banned?
Lead had been used in paint for thousands of years. It made paint more durable, helped it dry faster, and produced vivid pigmentation. By the early 20th century, it was in nearly every can of house paint on the shelf.
The problem is that lead is a neurotoxin. By the 1940s, medical research in the U.S. had confirmed that lead caused physical and neurological damage in children. The evidence continued to build over the following decades, making the public health case for a ban impossible to ignore.
What Lead Does to the Body
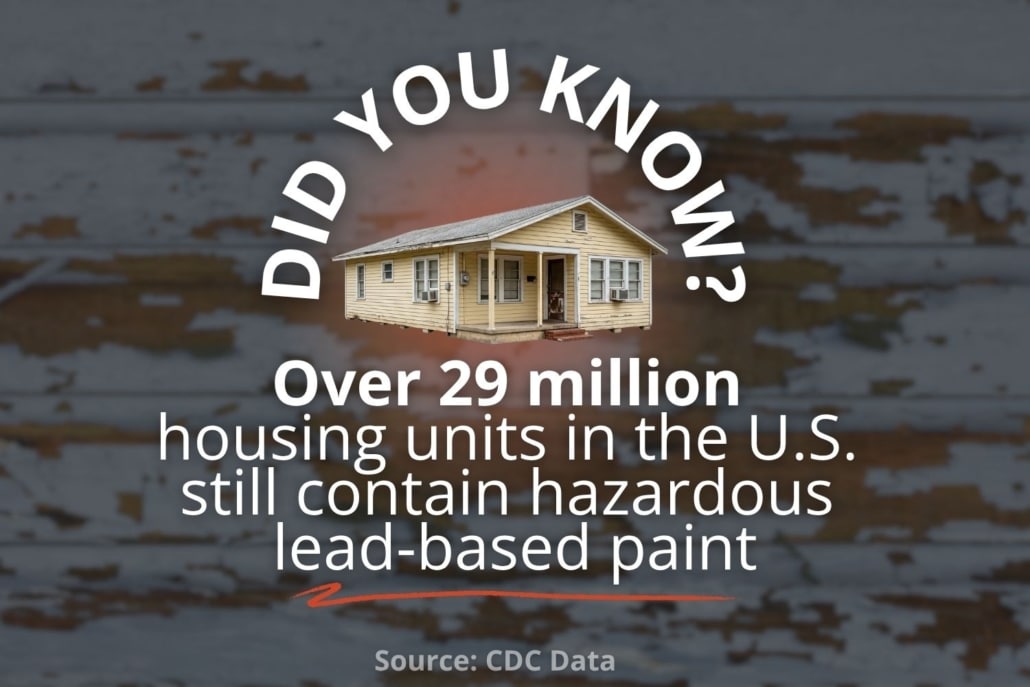
Lead exposure is harmful through ingestion or inhalation of lead dust or paint chips. According to the CDC, approximately 29 million housing units in the U.S. still have lead-based paint hazards, with about 2.6 million of those homes having children living in them.
In children, lead exposure can cause:
Learning disabilities and developmental delays
Lower IQ
Behavioral problems
Damage to the brain, kidneys, and nervous system
Adults are not immune. High lead levels have been linked to high blood pressure, kidney damage, and reproductive problems. There is no established safe level for children.
The Legislative Timeline:
Year
Event
1960
New York City bans lead paint for indoor residential use
1970
New York State bans lead paint statewide
1971
The Lead-Based Paint Poisoning Prevention Act was passed federally
1978
Consumer Product Safety Commission bans lead paint for residential use nationwide
1992
The Residential Lead-Based Paint Hazard Reduction Act (Title X) was passed, creating disclosure requirements
1996
EPA and HUD Lead-Based Paint Disclosure Rule takes effect
The Disclosure Rule, which came out of Title X, is the one that affects most home sales today. It requires sellers, landlords, and real estate agents to disclose any known information about lead-based paint before the sale or lease of most housing built before 1978. Buyers have a 10-day window to conduct a lead inspection before committing to a contract.
Lead Paint Is Still in Millions of Homes
The 1978 ban stopped new lead paint from being applied. It did not require anyone to remove existing lead paint. That distinction matters a lot.
Homes built before 1978 are still coated in layers of paint that may include lead. The older the home, the more likely it is, and the higher the concentration may be. Homes built before 1940 are considered especially high-risk.
Where Lead Paint Hides in Older Homes
Lead paint tends to concentrate in certain areas and on certain surfaces:
Windows and doors: friction and impact surfaces where lead dust is constantly generated as paint wears
Door frames and trim: common application points in older construction
Baseboards and stair railings: painted surfaces with high traffic and wear
Exterior siding: particularly on older wood-frame homes
Interior walls: often under multiple layers of newer paint
In many cases, lead paint that is covered by layers of newer paint and is in good condition poses a lower immediate risk. The danger increases when the paint peels, chips, cracks, or gets disturbed.
When Lead Paint Becomes a Hazard
Lead paint that is intact and undisturbed is generally less dangerous than deteriorating paint. The key risk scenarios are:
Peeling, chipping, or chalking paint: creates lead chips and fine dust
Renovation, sanding, or demolition: disturbing lead paint generates airborne particles that can be inhaled or swallowed
Friction surfaces: windows, doors, and floors that rub generate continuous lead dust even without visible damage
Young children in the home: children are more likely to ingest dust or chips through hand-to-mouth contact, and their developing systems are far more vulnerable
If your older Jacksonville or St. Augustine home has peeling paint and you have young children, the risk is not theoretical. It warrants an inspection before any work is done. For a broader look at what home inspectors evaluate in older homes, see our home inspection service page.
What the Lead Paint Disclosure Rule Means for Home Buyers
If you are buying a home built before 1978 in Florida or anywhere in the U.S., federal law gives you specific protections. The EPA and HUD Lead-Based Paint Disclosure Rule requires:
The seller is to disclose any known information about lead-based paint or lead hazards in the home
The seller is to provide buyers with the EPA pamphlet “Protect Your Family from Lead in Your Home”
A 10-day inspection period for the buyer to conduct a lead inspection or risk assessment (buyers can waive this)
Note that “known” is the operative word. The seller is not required to test for lead, only to disclose what they already know. If a seller claims no knowledge of lead paint, that does not mean the home is lead-free. It means the seller has not tested.
As a buyer of any pre-1978 home in Northeast Florida, you have the right to request a lead inspection during your due diligence period. If you plan to renovate or have young children in the home, it is worth exercising that right. You can also ask your home inspector about whether they offer lead testing or can refer you to a certified risk assessor.
This comes up in the same category as other things worth knowing about older homes. A related issue we cover in our blog about common stucco concerns for exterior walls: older Florida homes using stucco and lead paint together can create compounding risks during any renovation work.
Related Questions to Explore
Is lead paint dangerous if it’s covered by new paint? Not necessarily. Intact lead paint under newer layers poses a lower immediate risk. The danger rises when paint deteriorates, gets disturbed during renovation, or sits on a high-friction surface like a window or door that constantly grinds the layers together. Simply painting over lead does not neutralize it. Any future sanding, scraping, or demolition will expose it again.
How do I know if my home has lead paint? The only way to know for certain is to test. A certified lead inspector uses X-ray fluorescence (XRF) equipment or collects paint chip samples for lab analysis. Visual identification is not reliable: lead paint looks the same as paint without it. If your home was built before 1978, treat it as a potential lead hazard until you have the test results in hand.
Does lead paint have to be removed when selling a house? No. Federal law requires sellers to disclose known lead hazards but does not require removal. If a lead inspection turns up hazards, the parties can negotiate price reductions, repairs, or remediation as part of the sale contract. In many cases, buyers accept the home as-is and plan to manage the lead safely or address it over time.
Can I live in a home with lead paint? Yes, millions of Americans do. Lead paint that is in good condition and not on a friction or impact surface is generally manageable. The EPA guidance is to keep painted surfaces in good condition, clean frequently to reduce dust, and avoid disturbing painted surfaces. The risk level rises significantly if you have children under 6, are pregnant, plan to renovate, or if the paint is already deteriorating. In those cases, professional assessment and possible remediation are worth prioritizing.
When to Call a Professional
Lead paint is manageable in many situations, but it is not something to evaluate on your own. Here is when to bring in a professional:
Before buying a pre-1978 home, especially if you have or plan to have young children, or if renovation is on your agenda. Request a lead inspection during your 10-day due diligence window. Your right to do so is federally protected.
Before any renovation, sanding, or demolition, disturbing lead paint without proper precautions can spread lead dust throughout a home. The EPA’s Renovation, Repair, and Painting (RRP) Rule requires contractors working in pre-1978 homes to be certified in lead-safe work practices. Make sure anyone you hire is certified.
If paint is visibly deteriorating: peeling, chipping, or chalking paint on any surface in a pre-1978 home warrants professional assessment, even if you are not planning to renovate.
If a child in the home has elevated blood lead levels, contact your local health department and a certified risk assessor immediately.
BJ Johnson and the team at Inside & Out Property Inspectors serve Jacksonville, St. Augustine, Ponte Vedra, and surrounding communities. During a standard home inspection, we note visible paint deterioration and flag surfaces of concern in pre-1978 homes. We can also refer you to a certified lead inspector or risk assessor for further testing.
Conclusion
Lead paint was banned for residential use in 1978 after decades of research confirming its serious health risks, particularly for children. But the ban only stopped new lead paint from being sold. It did not remove what was already on the walls of millions of homes.
Key takeaways:
Any home built before 1978 should be treated as a potential lead hazard until tested.
Lead paint that is intact and undisturbed poses a lower immediate risk than deteriorating or disturbed paint.
Federal law requires sellers to disclose known lead hazards in pre-1978 homes and gives buyers a 10-day inspection window.
If you are buying or already own a pre-1978 home in Northeast Florida and have questions about lead paint, start with a thorough home inspection from a certified local inspector.
https://insideandoutpropertyinspectors.com/wp-content/uploads/2023/06/hazard_warning_25.jpeg10041504BJ Johnsonhttps://d39oyu4lp7snwz.cloudfront.net/wp-content/uploads/sites/54/2019/08/31171419/io-favicon-300x300.pngBJ Johnson2026-05-27 17:00:462026-05-27 21:01:30When and Why Did Lead Paint Stop Being Used?
A wind mitigation inspection is a formal evaluation of how well your home is built to resist hurricane-force winds. A licensed inspector reviews key structural features (your roof shape, deck attachment, wall connections, and opening protection), then documents the findings on a standard state form that your insurance company uses to calculate discounts.
For Florida homeowners, this is one of the most practical inspections you can get. Florida law requires insurers to offer discounts for qualifying wind-resistant features, but you have to prove those features exist before any discount applies.
At Inside & Out Property Inspectors, we perform certified wind mitigation inspections across Northeast Florida, including Jacksonville, St. Augustine, and the surrounding communities. This post covers what inspectors look at, how the report affects your premium, and what to expect on inspection day.

What Does a Wind Mitigation Inspection Focus On?
A wind mitigation inspection is not a general home inspection. It does not evaluate your HVAC, plumbing, or electrical systems. Instead, it focuses entirely on how well your home can hold up during a high-wind event like a hurricane or a severe tropical storm.
The goal is simple: document the wind-resistant features your home already has. Those features get submitted to your insurance company as proof. If they meet the criteria, you qualify for credits that reduce your premium.
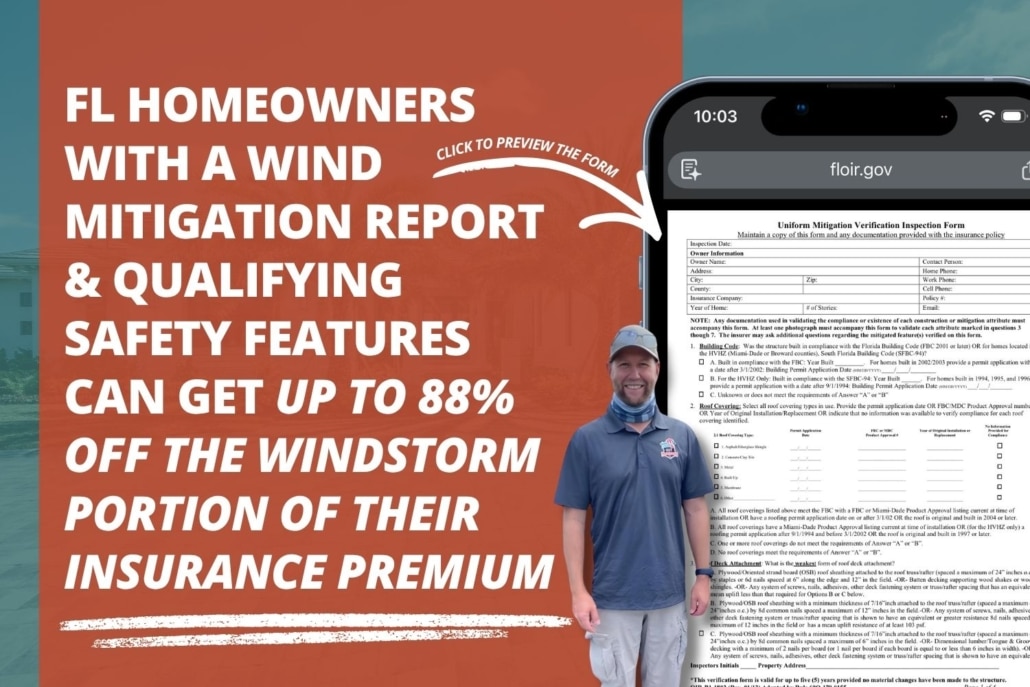
The inspection is documented on Florida’s Uniform Mitigation Verification Inspection Form, known as the OIR-B1-1802. This form was created by the Florida Office of Insurance Regulation and is the standard used by every insurance company writing policies in the state. Every Florida home inspector certified to perform wind mitigation inspections uses this same form.
What Does the Inspector Check?
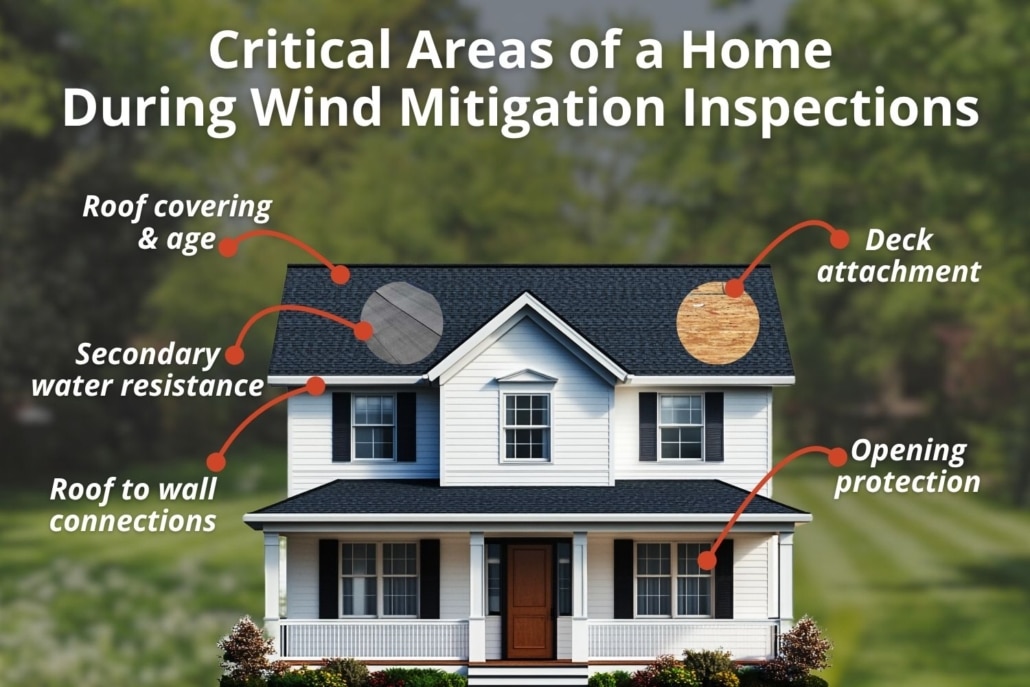
The OIR-B1-1802 covers seven areas of your home. Each one represents a potential insurance discount:
Building code and year built: Homes built after March 1, 2002, were constructed under the Florida Building Code, which sets higher wind-resistance standards. This alone often qualifies you for a discount.
Roof covering: The type of roofing material and when it was installed. A newer roof, especially one installed after 2002, typically earns better credits.
Roof deck attachment: How the plywood or OSB roof deck is fastened to the framing. Larger nails with tighter spacing mean a stronger attachment and a better score.
Roof-to-wall attachment: The connectors holding your roof structure to your walls. Clips, single wraps, and double wraps each carry different weights. Double wraps are the strongest and earn the highest discount.
Roof shape: Hip roofs, where all four sides slope downward to the walls, perform significantly better than gable roofs in high winds. Testing has shown hip roofs can receive up to 40% less wind pressure than gable roofs.
Secondary water resistance (SWR): A sealed underlayment or foam barrier on the underside of your roof deck. This is a backup layer that prevents water from getting in if shingles blow off during a storm.
Opening protection: How your windows, doors, garage doors, and skylights are protected. Impact-resistant glass and hurricane shutters both count here.
The inspector will need access to your attic to check items three and four. Make sure attic access is clear before your appointment!
The OIR-B1-1802 Form Explained
The 1802 form has been through several versions. As of April 2026, the Florida Office of Insurance Regulation released an updated version of the form, which is now the required standard. If you have an old report sitting in a drawer, check when it was completed. Reports are valid for five years, but your insurer may request an updated inspection if the form version has changed.
Photos are required for every feature documented on the form. An inspector who does not take photos or who skips the attic cannot properly complete the form. Be cautious of very low-cost inspections that cut corners here: insurers can and do reject incomplete forms.
How a Wind Mitigation Inspection Affects Your Insurance
Florida law requires all residential property insurers to offer premium discounts for qualifying wind-mitigation features. The discounts are not automatic. You have to submit a completed wind mitigation report to trigger them.
The savings vary by insurer and by the features your home has, but they can be meaningful. A strong report, with a hip roof, impact windows, double-wrap roof straps, and a secondary water barrier, can reduce your wind insurance premium by 30–45%. In Florida, wind coverage can make up 80% of your total homeowner’s insurance premium, so even a 20% discount translates to real money.
If you have never filed a wind mitigation report, you are likely paying the full undiscounted rate.
What Discounts Are Possible?
Each of the seven sections on the OIR-B1-1802 form is a potential discount. Your insurer calculates a credit based on the combination of features documented. The highest credits typically go to homes that have all of the following:
Roof deck attached with 8d nails at 6-inch spacing or tighter
Double-wrap roof-to-wall connectors
A secondary water resistance barrier
Impact-rated windows, doors, and garage doors on all openings
Not every home will qualify for every credit. Older homes with gable roofs and single-pane windows may still qualify for partial credits based on roof age and construction quality.
Homes Built After 2002 vs. Older Homes
If your home was built after March 1, 2002, it was constructed under the Florida Building Code and is far more likely to qualify for multiple discounts. Newer construction tends to have tighter roof deck attachment, modern straps, and often impact-rated openings as standard.
Older homes are still worth inspecting. A home built between 1974 and 2002 may have some qualifying features, especially if the roof has been replaced since 2002. If your roof was replaced with modern materials and proper attachment, a wind mitigation inspection can document that and unlock credits you would otherwise miss.
What to Expect During the Inspection
A wind mitigation inspection typically takes 30 to 60 minutes for an average-sized Florida home. Here is what happens:
The inspector arrives and confirms your address and any permits or documentation you have on hand (roof permits, product specs, or notice-of-acceptance letters for impact windows can help).
They walk the exterior to assess roof geometry, roof covering, and any visible opening protection.
They access your attic to inspect the roof deck attachment and roof-to-wall connections, and take required photos.
They document any shutters, impact doors, or other opening protection on all sides of the home.
You receive the completed OIR-B1-1802 form, with photos attached. Most inspectors deliver the same day or within 24 hours.
You do not need to be on the roof or in the attic yourself. The inspector handles all of that. Your main job is to make sure attic access is clear and that you have any relevant documentation ready.
Many Jacksonville and St. Augustine homeowners bundle a wind mitigation inspection with a 4-point inspection at the same time. Both are common requirements for Florida insurance renewals, and combining them saves a second appointment.
How Long Is a Wind Mitigation Report Good For?
A completed wind mitigation inspection report is valid for five years from the inspection date, as long as no material changes have been made to the structure.
If you replace your roof, install impact windows, or make any other structural upgrades during that window, you should get a new inspection. Those improvements will likely improve your score and earn you better discounts.
If you switch insurance companies during the five-year window, your new insurer may request a fresh inspection. Not all carriers accept older reports at policy transfer, so ask before you assume the old report transfers.
Set a reminder five years out. A lapsed wind mitigation report means you lose your discounts at renewal and will need to schedule a new inspection to get them back.
Related Questions to Explore
Is a wind mitigation inspection required in Florida? No, it is not required by law. However, Florida law does require insurers to offer discounts for homes with qualifying wind-resistant features. The only way to claim those discounts is to submit a completed wind mitigation report. So while the inspection is optional, skipping it likely means paying a higher premium than you need to. For most Florida homeowners, the inspection cost pays for itself in the first year.
What does a wind mitigation inspector look for? The inspector evaluates seven specific areas of your home: when it was built, your roof covering and its installation date, roof deck attachment method, roof-to-wall connection type, overall roof shape, whether a secondary water resistance barrier is present, and what protection exists on your windows, doors, garage doors, and skylights. Each area can qualify for a separate insurance discount. Learn more about what is covered on our wind mitigation inspection service page.
What is the difference between a wind mitigation and a 4-point inspection? A wind mitigation inspection focuses only on your home’s ability to resist wind damage and is used to unlock insurance discounts. A 4-point inspection looks at four major systems (roofing, electrical, plumbing, and HVAC) and is typically required by insurers before they issue a new policy on an older home. The two inspections have different goals and use different forms. Many Florida homeowners need both, and scheduling them together is the most efficient option.
When to Call a Professional
A wind mitigation inspection is not a DIY project. Florida law specifies exactly who can complete the OIR-B1-1802 form: licensed home inspectors with hurricane mitigation training, building code inspectors, licensed general or building contractors, professional engineers, and licensed architects. The inspection must also be performed by the individual holding the license, not a staff member working under them.
Beyond the legal requirement, the quality of the inspection matters. An inspector who skips the attic cannot document your roof deck or roof-to-wall connections, which means you lose two of the largest discount categories on the form. Photos are required for every feature. If your inspector does not produce a photo-backed report, your insurer can reject it.
If you are buying a home in Northeast Florida and your agent has not mentioned a wind mitigation inspection, bring it up. It is one of the most cost-effective add-ons to a pre-purchase inspection, and a strong report can be used as a negotiating tool at closing.
BJ Johnson and the team at Inside & Out Property Inspectors are certified to perform wind mitigation inspections in Jacksonville, St. Augustine, Ponte Vedra, Neptune Beach, and across Northeast Florida. We are InterNACHI Certified Master Inspectors with InterNACHI’s wind mitigation certification.
Also good to keep in mind:
If a recent storm has caused roof damage, a standard home inspection can assess the full scope before you file a claim.
Conclusion
A wind mitigation inspection is a small investment with a long payoff window. For most Florida homeowners, the $75–$150 inspection cost comes back in insurance savings within the first year, and the report stays valid for five years.
Key takeaways:
The inspection documents wind-resistant features your home already has. You do not need to make repairs first.
It uses Florida’s standard OIR-B1-1802 form. Every insurer in the state accepts it.
Reports are valid for five years, or until you make structural changes.
If you are in the Jacksonville or St. Augustine area and have never had a wind mitigation inspection, or if your report is approaching the five-year mark, now is a good time to schedule one. Visit our wind mitigation inspection page to learn more.
https://insideandoutpropertyinspectors.com/wp-content/uploads/2026/05/What-Is-a-Wind-Mitigation-Inspection-Why-They-Matter-in-FL.jpg10001500BJ Johnsonhttps://d39oyu4lp7snwz.cloudfront.net/wp-content/uploads/sites/54/2019/08/31171419/io-favicon-300x300.pngBJ Johnson2026-05-27 11:00:282026-05-27 21:00:59What Is a Wind Mitigation Inspection? Why They Matter in FL
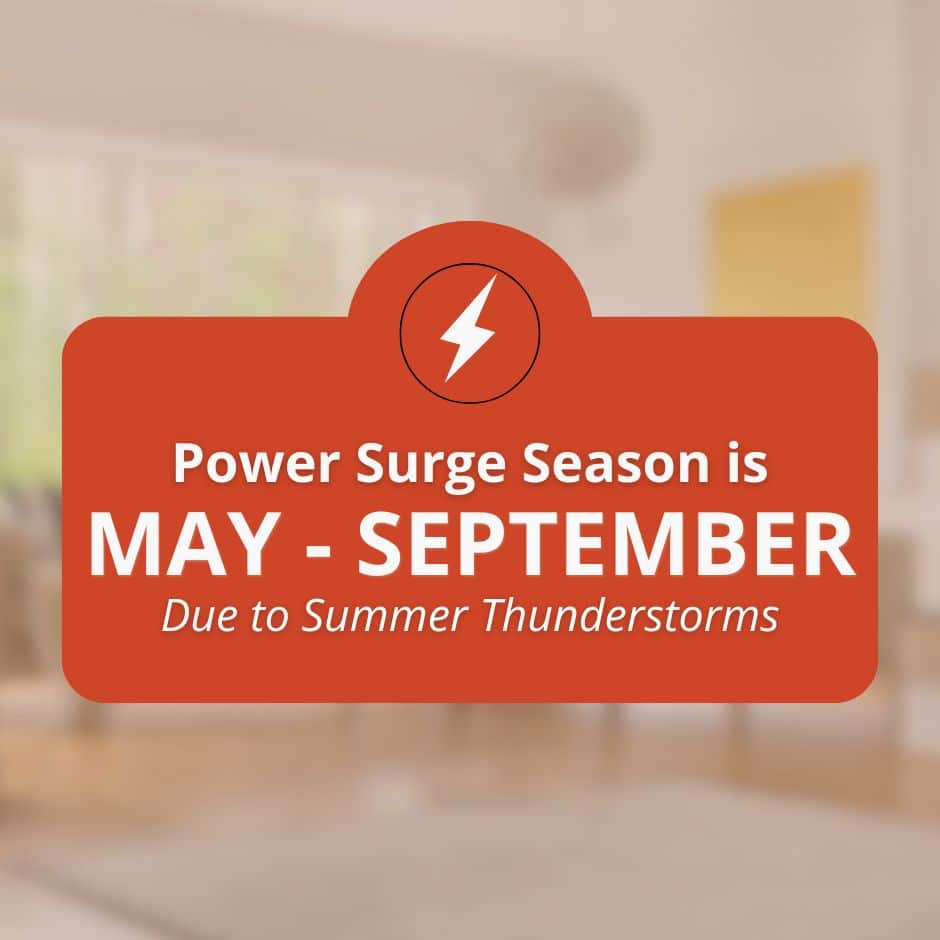
A power surge can last less than a millisecond, but the damage it leaves behind can cost hundreds, sometimes thousands of dollars. If you’ve had an appliance die without explanation, noticed flickering lights during a storm, or come home to tripped breakers after a Florida afternoon thunderstorm, you’ve likely experienced one.
For homeowners in Jacksonville, St. Augustine, and across Northeast Florida, power surges aren’t a rare event. Florida leads the nation in lightning strikes, and the combination of aging electrical systems and the demands of year-round air conditioning creates conditions where surges are a genuine, ongoing risk. Understanding what causes power surges, what they damage, and what a home inspector actually evaluates helps you protect your home and make smarter decisions when buying or selling.
What Is a Power Surge?
A power surge is a sudden jump in electrical voltage that briefly exceeds what your home’s wiring and connected electrical devices are designed to handle.
Power surges are caused by sudden increases in voltage, often exceeding 169 volts in standard 120-volt systems. That excess voltage can destroy the sensitive electronics inside appliances, HVAC systems, and smart home devices in an instant.
What many homeowners don’t realize is that power surges can occur frequently. Low-level surges happen dozens or even hundreds of times each day, often without any visible signs of damage. Over time, this creates what some electricians call “electronic rust,” which is the gradual degradation of internal circuitry that shortens the lifespan of connected electrical devices well before their time.
What Causes Power Surges: Internal vs. External
Power surges fall into two broad categories, and knowing the difference matters for how you protect against them.
Roughly 60 to 80 percent of power surges are caused by internal activities within the home, meaning the biggest threat is often already inside your walls.
Internal Power Surges
Internal surges are the most common cause of day-to-day power surge damage. More than half of household power surges are internal, caused by devices with motors starting up or shutting off, which momentarily diverts electricity to and from other appliances on the same circuit.
Large appliances cycling on and off are the primary culprit. High-energy devices like air conditioners, refrigerators, and washing machines cause internal surges due to their large power demands when their motors start. In Florida, where AC units run nearly year-round, these micro-surges happen constantly and gradually wreak havoc on sensitive electronics throughout the home.
Overloaded circuits occur when too much power is drawn from a single circuit, often from overusing extension cords or plugging too many devices into the same circuit. A basic power strip without surge protection offers no defense against this. Circuit breakers frequently tripping on the same circuit is a clear signal that the circuit is being asked to do more than it was designed for.
Faulty or outdated wiring is a significant internal cause of power surges. Damaged or exposed electrical wires lead to erratic currents and voltage spikes. Outdated wiring cannot manage modern electrical loads effectively.
In older Jacksonville neighborhoods, parts of Orange Park, and the historic areas of St. Augustine, inadequate wiring is more common than many buyers expect. This is also a fire risk, not just a surge risk.
External Power Surges
External power surges are commonly caused by lightning strikes, tree limbs touching power lines, vehicle accidents involving utility poles, or utility equipment failures, all of which can send excess voltage directly into your home.
Lightning strikes are the most destructive. Florida is the lightning capital of the United States, and a direct strike on or near your home can send an overwhelming amount of voltage through power lines into your electrical system instantly. Even a strike that hits a power line several blocks away can travel through the grid and into connected electrical devices immediately.
Power outages and restoration are a lesser-known external cause. Power surges can also occur when electricity is restored after a power outage, as the sudden influx of electrical current creates a voltage spike that can damage plugged-in devices. This is especially relevant in NE Florida during hurricane season, when outages and restorations happen repeatedly in short windows.
Electric utility switching is another source that many homeowners never consider. Power companies’ switching processes to balance demand can cause brief voltage transients that travel into homes on the affected circuit.
What Power Surges Can Damage
Devices containing microprocessors, such as TVs, computers, microwaves, and smart home equipment, are particularly vulnerable, as even a 10-volt fluctuation can disrupt their functioning. In a modern home, it includes nearly every major device.
Some surge damage is instantaneous; a device simply will not turn on after a significant power surge. Other damage accumulates invisibly, with electronic equipment becoming unreliable or failing years before expected.
How to Protect Your Home From Power Surges
A layered approach offers the best protection against both internal and external surges:
A whole-house surge protector installed at the electrical panel by a certified electrician is the most effective defense against external power surges from lightning and utility events. Whole-house surge protector units are generally a worthwhile investment, especially in areas with a high number of lightning strikes, which describes most of Northeast Florida. It intercepts large voltage spikes before they reach your connected electrical devices.
Point-of-use surge protective devices provide a critical secondary layer. Surge protectors at the outlet level, especially combined with a reliable grounding system, protect electrical devices from all but the most severe power surges. Look for a listed joule rating; a basic power strip without one offers no surge protection at all.
Proper grounding is essential. A properly grounded electrical system gives excess voltage a safe path out of the home. Improper grounding is both a surge risk and a safety hazard.
Unplug during storms because no surge protector guarantees full protection from a direct lightning strike. Unplugging sensitive electronics and computer equipment during severe weather remains the most reliable precaution.
What a Home Inspector Looks For
Home inspectors are not electricians. They do not open walls, probe wiring behind surfaces, or perform electrical diagnostic testing. What they do is conduct a thorough visual assessment of accessible components of the electrical system.
During a home inspection, the electrical evaluation includes:
The electrical panel’s condition, brand, and signs of double-tapping or improper wiring
Visible wiring in accessible areas, including the attic, crawlspace, and garage
Evidence of overusing extension cords or DIY electrical work
Presence or absence of whole-house surge protection
For Florida homes, the panel brand matters significantly. Federal Pacific and Zinsco panels are well-documented safety concerns and are frequently flagged by insurers as non-insurable. If you suspect faulty wiring or have concerns about your electric system, a home inspection is the right starting point, but a certified electrician is the appropriate next step for diagnosis and repair.
Power Surges and Florida Home Insurance
Florida insurers take electrical systems seriously. A 4-point inspection covering the electrical system, HVAC, plumbing, and roof is frequently required for older homes before a homeowner’s insurance policy can be issued or renewed. The electrical component looks specifically at panel type, wiring material, and overall condition.
Combining a full home inspection with a 4-point inspection when purchasing an older home in Jacksonville or St. Augustine gives you the most complete picture of the electrical system before closing.
Questions Homeowners Ask About Power Surges
Are internal surges really a bigger risk than lightning? For most homes, yes. While lightning damage is dramatic, internal power surges caused by large appliances like air conditioners cycling on and off cause far more cumulative damage over time. A whole-house protector addresses external surges, but point-of-use surge protective devices protect sensitive electronics from internal surges on the same circuit.
Does a home inspection catch surge-related electrical problems? A home inspection identifies visible issues that contribute to surge risk, such as outdated wiring, overloaded circuits, an inadequate or flagged electrical panel, and the absence of surge protection. It is a visual assessment, not a full electrical diagnostic. If issues are flagged, a certified electrician should evaluate further before you close.
Can a power surge cause a house fire? Yes, in some cases. A large power surge through faulty wiring or damaged exposed electrical wires can generate enough heat to ignite surrounding materials. This is why surge events in older homes should never be ignored, especially when accompanied by a burning smell or buzzing sound coming from the panel or walls.
What’s the difference between a surge and a power outage? A power outage is a complete loss of electrical power. A power surge is the opposite: a sudden jump in electrical voltage above normal levels. Both can damage devices, but surges cause more immediate hardware damage because of the excess voltage spike itself. During a pre-drywall inspection, we verify that your electrical panel is correctly grounded.
When to Call a Professional
If you are buying a home or have just moved in, look into a warranty inspection or home inspection with Inside & Out Property Inspectors. If any of the following are present in your home, contact a certified electrician:
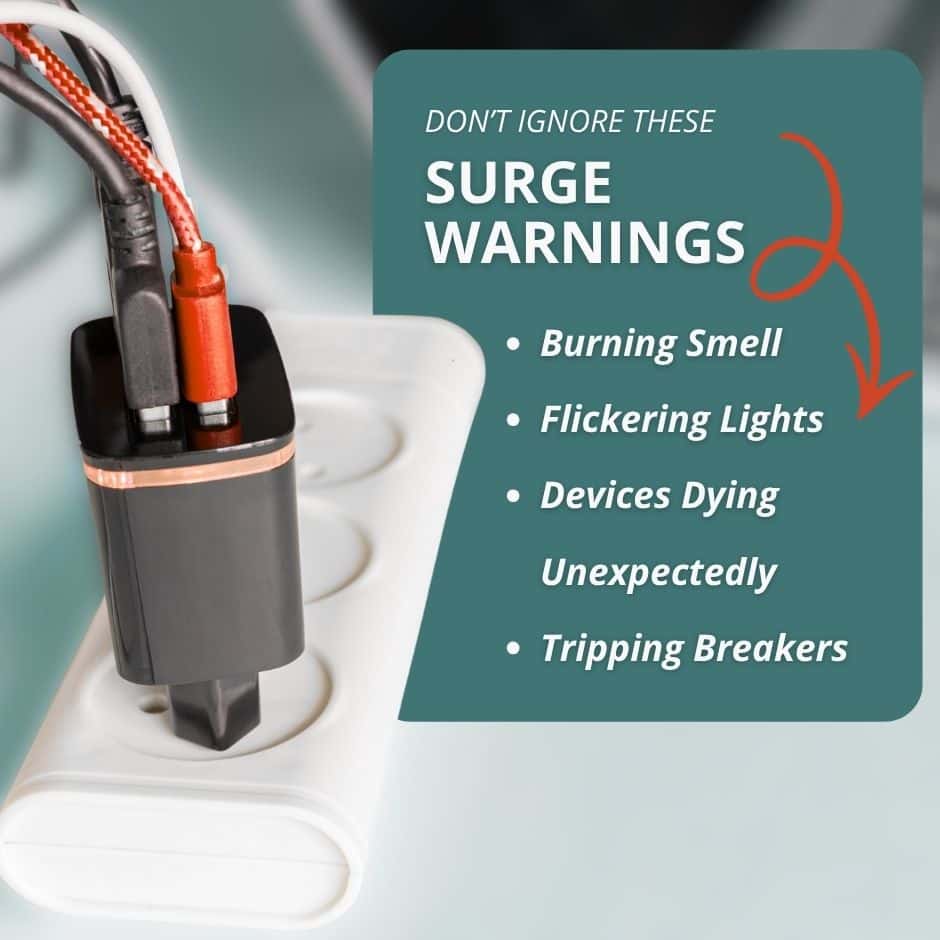
Flickering lights or a buzzing sound with no clear cause
Circuit breakers frequently trip on the same circuit
A burning smell coming from outlets, the panel, or inside the walls
Exposed electrical wires or outlets that feel warm to the touch
Scorch marks or discoloration near any outlet or switch
Conclusion
For buyers and sellers across Jacksonville, St. Augustine, Nocatee, Ponte Vedra Beach, Fleming Island, Orange Park, and throughout Northeast Florida, Inside and Out Property Inspectors provides thorough home inspections covering the full electrical system.
We also offer 4-point inspections for insurance purposes, wind mitigation inspections, and a full range of specialty services to give you a complete picture of any property.
We’re inspectors, not electricians, and we’ll always be upfront about what a visual inspection can and cannot tell you. But knowing what to look for, what questions to ask, and when to bring in a specialist is exactly what a good inspection equips you to do.
Roof vents are not something most Jacksonville homeowners think about until something goes wrong. But proper roof ventilation is one of the more important factors in how well a home holds up over time, and it comes up in more inspection types than most people realize.
Whether you are buying, selling, or maintaining a home in Northeast Florida, understanding how roof vents work and what inspectors or buyers will look for is practical knowledge worth having before you really need it.
Why Roof Ventilation Matters in Florida
A roof ventilation system creates continuous airflow through the attic space. Cool, fresh air enters through intake vents at the soffits. Hot, moist air escapes through exhaust vents near the ridge. That exchange keeps trapped air from building up directly above your living space.
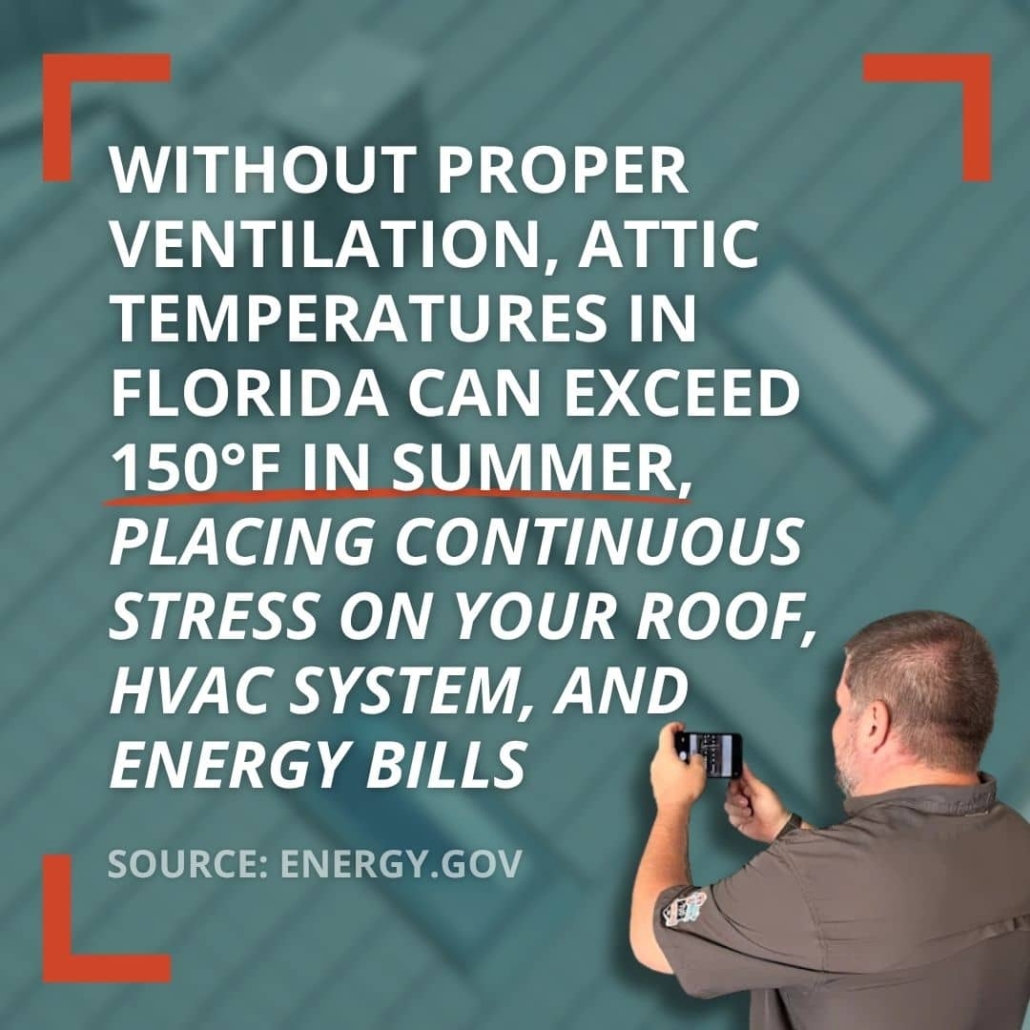
Without proper attic ventilation, attic temperatures in a Jacksonville summer can exceed 150 degrees Fahrenheit. That heat and moisture buildup compounds quietly over time. It consistently shows up as one of the more significant findings during home inspections in Northeast Florida.
Poor attic ventilation commonly leads to:
Premature shingle aging and cracking from sustained heat below the roof deck
Moisture buildup and mold growth on decking, framing, and attic insulation
Wood rot in structural framing from prolonged humid air exposure
Increased cooling costs and strain on HVAC systems year-round
Accelerated roof wear that affects 4-point inspection outcomes and insurance eligibility
That last point matters a lot in Florida. Insurance companies here scrutinize roof condition more closely than in most states. A roof showing premature deterioration from poor ventilation can affect both coverage eligibility and premiums. Wind mitigation inspections and 4-point inspections both evaluate roof condition directly, and ventilation is part of what both assess.
How a Roof Ventilation System Works
Proper roof ventilation depends on a balance between intake and exhaust vents, not just the presence of vents. Hot air rises naturally. When exhaust ventilation sits at or near the roof’s peak, the system works with physics. Intake vents along the roof eaves bring cooler air in at a low point while exhaust vents release hot attic air above.
A well-designed ventilation system follows the general standard of one square foot of net free ventilation area per 150 square feet of attic size. This reduces to one square foot of net free ventilation area per 300 square feet when intake and exhaust are properly balanced.
An attic with adequate exhaust but blocked intake will not achieve proper airflow, regardless of how many vents sit on the roof surface. Blocked soffit vents are the most common ventilation deficiency inspectors find in the Jacksonville area. Attic insulation pushed against the soffit is a frequent cause. It is easy to miss without a thorough inspection.
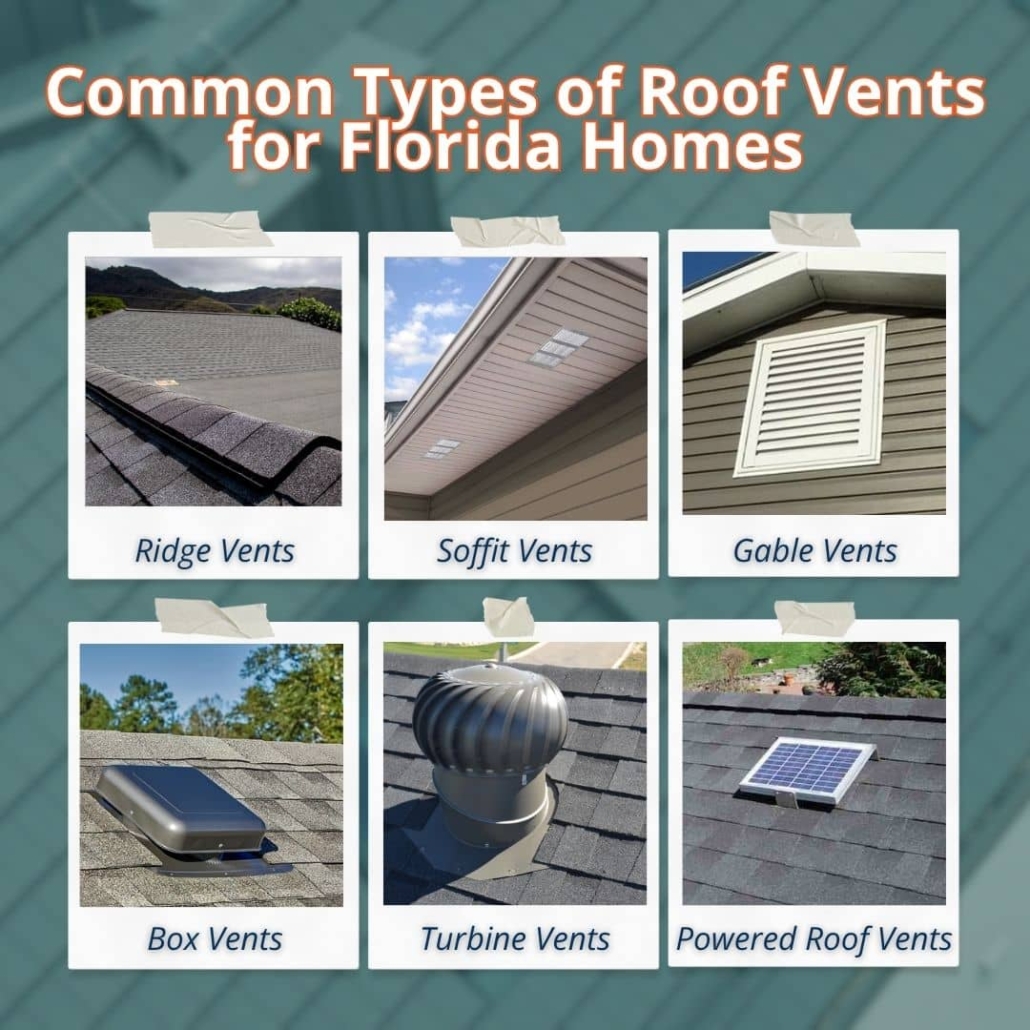
Common Types of Roof Vents
Not all roof vents serve the same purpose, and the combination of any given home says a lot about how well the attic ventilation system performs. Here are the most common types of roof vents on homes across Northeast Florida, along with how each one functions.
Ridge Vents
Ridge vents run along the full length of the roof’s ridge and rank among the most effective exhaust vents available. They span the entire peak, providing uniform exhaust ventilation across the attic rather than venting from a single point.
Ridge vents are common on newer construction in Florida. They are low-profile, support natural airflow effectively, and perform well in high-wind conditions when properly installed. Wind mitigation inspectors evaluate them for insurance purposes.
Soffit Vents
Soffit vents are roof intake vents on the underside of the roof overhang along the eaves. They form the intake side of the ventilation system and work directly with ridge or other exhaust vents above to create a balanced attic ventilation system.
When soffit vents are blocked, the entire ventilation cycle suffers. This holds true regardless of how many exhaust vents are present. Inspectors flag this issue consistently across Jacksonville, St. Johns, and Clay counties.
Gable Vents
Gable vents sit in the triangular wall section at each end of a gable roof. They are common on older homes throughout Northeast Florida and can serve as both intake and exhaust vents depending on wind direction and speed.
Gable vents work reasonably well on their own but are less efficient than a balanced ridge and soffit setup. Combining them with ridge vents on the same roof can disrupt proper ventilation by short-circuiting airflow horizontally.
There is also a storm concern worth noting: gable end vents are one of the more common points of water intrusion during high-wind events and driving rain, which matters for any home in Northeast Florida heading into hurricane season.
Box Vents and Roof Louvers
Box vents, also called roof louvers or static roof vents, are square or rectangular passive vents near the ridge line. They allow hot air to escape naturally with no moving parts, relying on natural airflow and wind to ventilate the attic space.
Most larger roofs need multiple units to ventilate adequately. Static vents are common on both older and newer homes in Northeast Florida. They are also a reliable solution for managing moisture buildup in attics on gable roof designs.
Hip Vents
Hip vents work like ridge vents but serve homes with hip roofs. Hip roofs have sloped sides on all four faces and limited or no traditional ridge area. Hip vents run along the hip lines and provide exhaust ventilation where a standard ridge vent cannot go.
Hip roofs are common in Florida for their wind resistance. That makes hip vents a relevant option for many Jacksonville-area homes. Wind mitigation inspectors assess their performance and condition the same way they assess ridge vents.
Turbine Vents
Turbine vents use wind energy to actively pull hot air out of the attic. When spinning freely, they move significantly more air than a static vent of the same size. They perform well in the coastal and breezy conditions common across Northeast Florida.
A turbine that is not spinning freely or has a seized bearing provides almost no benefit, and inspectors note this during roof assessments. It is also worth knowing that turbine vents sit higher off the roof surface than most other vent types, making them more vulnerable to storm debris and high winds.
In a hurricane-prone area like Northeast Florida, that is a practical consideration when evaluating or replacing them.
Powered Roof Vents
Powered roof vents, including electric attic fans and solar-powered vents, use mechanical ventilation to actively pull air out of the attic. A thermostat or humidistat controls the cycle. Solar-powered vents deliver the same active ventilation without adding to energy costs, making them a smart option in Florida’s sun-heavy climate.
One important consideration: a powered vent in an attic with insufficient intake vents can depressurize the attic. It then pulls conditioned air up from the living space through ceiling penetrations, increasing cooling costs rather than reducing them. Proper airflow balance between intake and exhaust is essential before installing or evaluating any powered solution.
What Do Inspectors Evaluate Here?
Roof ventilation comes up across multiple inspection types. What inspectors assess depends on the scope.
Standard home inspection: Inspectors assess overall attic ventilation adequacy, intake and exhaust balance, soffit blockage, and signs of heat or moisture damage to the roof deck, insulation, and framing. Inside & Out Property Inspectors has a Level II Certified Thermographer on staff who identifies heat and moisture patterns that a standard visual inspection may miss.
Wind mitigation inspection: This inspection evaluates the roof’s ability to resist wind-driven damage, including vent type and condition. In Florida, wind mitigation reports feed directly into homeowners’ insurance premiums.
4-point inspection: This covers the four major systems, including the roof, assessing condition, and remaining useful life. Poorly ventilated roofs show accelerated wear. That affects how inspectors rate the roof and whether an insurer will issue or renew a policy.
Other Related Questions
What is the difference between a wind mitigation inspection and a 4-point inspection? A wind mitigation inspection evaluates features that reduce wind damage risk, including roof covering, deck attachment, and roof-to-wall connections. A 4-point inspection evaluates the four major systems: roof, HVAC, electrical, and plumbing. Florida insurers commonly require both, but they serve different purposes and produce separate reports.
How does attic moisture connect to mold risk in Florida homes? Poor ventilation allows moisture to accumulate on roof decking and framing, creating conditions where mold thrives year-round in Florida’s humidity. A mold inspection identifies whether growth is present in the attic. Thermographic inspection detects moisture patterns before they become visible to the naked eye.
What should buyers know about roof inspections when purchasing a home in Northeast Florida? Roof condition ranks among the most consequential findings in any Florida home inspection report. It directly affects insurance eligibility and premiums. Knowing the roof type, maintenance history, and estimated remaining life before closing can significantly influence negotiation and long-term ownership costs.
When to Call a Professional
Roof ventilation issues are not always visible from the ground or a quick attic look. Schedule a professional inspection when:
You are buying or selling a home and want a complete picture of the roof system
Cooling costs are unusually high, and the attic has not been assessed recently
You notice staining, moisture, or mold growth on attic framing or decking
Your roof is aging, and you are approaching an insurance renewal or a 4-point inspection
You are unsure whether your home’s intake and exhaust vents are balanced or functioning correctly
Conclusion
Roof vents do important work that most homeowners never think about until there is a problem. A well-designed ventilation system extends the life of your roof, reduces cooling costs, improves indoor air quality, and prevents moisture damage and wood rot from showing up in inspection reports at the worst possible time.
In Northeast Florida, heat, humidity, and storm exposure make proper attic ventilation more consequential than in most parts of the country. If you have questions about your roof system or want to schedule an inspection, contact Inside & Out Property Inspectors today.
https://insideandoutpropertyinspectors.com/wp-content/uploads/2024/07/types-of-roof-vents.jpeg10001500BJ Johnsonhttps://d39oyu4lp7snwz.cloudfront.net/wp-content/uploads/sites/54/2019/08/31171419/io-favicon-300x300.pngBJ Johnson2026-04-09 12:00:302026-04-10 12:44:21Importance of Roof Vents & Common Types for Florida Homes
Stucco is one of the most popular exterior finishes on homes throughout Jacksonville, St. Augustine, and the surrounding Northeast Florida area. It holds up well in warm climates, offers design flexibility, and, when properly maintained, can last for decades.
But stucco has a well-documented set of vulnerabilities, and in Florida’s humid, coastal climate, those vulnerabilities get tested constantly.
Understanding the most common concerns helps homeowners and buyers know what to watch for, when to act, and when a professional inspection is the right next step.
Why Stucco Concerns Should Be Taken Seriously
Most stucco problems start small. A hairline crack here, a faint stain there. The issue is that stucco is a layered system applied over the wall assembly, which means surface problems often reflect something more significant happening behind them.
Water that gets past the stucco face does not simply evaporate. It sits inside the wall, where it can damage sheathing, promote mold growth, and compromise structural framing, all while the exterior looks relatively normal.
In Florida, that risk is amplified. High humidity, heavy rain, tropical storms, and salt air along the coast all accelerate the conditions that lead to stucco failure. Homes in communities like Nocatee, Ponte Vedra Beach, Atlantic Beach, and St. Augustine Beach face particularly demanding exterior exposure year-round.
Traditional Stucco vs. EIFS: Why the Type Matters
The two main systems installed on homes today have very different risk profiles, and that distinction shapes how any stucco concern should be evaluated.
Traditional hard-coat stucco is cement-based, applied in multiple layers over metal lath. It is durable, fire-resistant, and breathable, allowing moisture to escape rather than become trapped. When properly installed and maintained, it is one of the more forgiving exterior finishes available.
EIFS (Exterior Insulation and Finish System), sometimes called synthetic stucco, uses foam insulation boards topped with a polymer coating. It offers better energy efficiency but is significantly less forgiving with moisture. Any water that gets past the finish layer has fewer ways out. EIFS systems without proper drainage planes or flashing are among the most common sources of hidden moisture damage found during stucco inspections in Northeast Florida.
Feature
Traditional Stucco
EIFS / Synthetic Stucco
Base material
Cement, lime, sand
Foam insulation + polymer coating
Breathability
Higher
Lower
Moisture risk
Moderate with age
Higher if not installed correctly
Durability
50+ years when maintained
Varies by installation quality
Common failure point
Cracking, efflorescence
Moisture intrusion, improper flashing
The Most Common Stucco Problems on Florida Homes
Florida’s climate puts stucco through a demanding cycle of heat, humidity, rain, and UV exposure year-round. These are the problems that show up most often as a result.
Cracking: Some cracking is normal as stucco expands and contracts with weather changes. Hairline cracks are typically cosmetic and manageable with timely sealing. The concern arises with cracks wider than 1/8 inch, diagonal cracks at window and door corners, or patterns that develop or grow over time. In Florida, where clay soils shift with moisture changes, these can indicate settlement or installation failure.
Moisture intrusion: This is the most consequential stucco problem. Water can enter through unsealed cracks, failed caulking, missing flashing, and gaps at roof-to-wall transitions. Once inside the wall, it damages sheathing, promotes mold, and compromises framing, often invisibly. By the time interior signs appear, like a mildew smell or soft drywall near a window, the damage behind the stucco is typically well established.
Efflorescence: White or chalky deposits on the stucco surface are caused by water moving through the material and carrying dissolved salts to the face as it evaporates. Efflorescence is not structurally damaging on its own, but it reliably signals that water is actively moving through the system.
Failed caulking and sealant: Every penetration in a stucco wall, windows, doors, utility lines, and hose bibs is a potential water entry point. Caulk and sealant break down over time under Florida’s UV exposure and temperature swings. Failed sealant around windows is one of the most common findings during stucco inspections in the Jacksonville area and one of the most preventable causes of moisture intrusion.
Improper installation: Missing weep screeds, insufficient stucco thickness, inadequate lath coverage, and poor flashing integration all create conditions for premature failure. These issues are often not visible during routine maintenance checks, which is why pre-purchase stucco inspections matter on homes where the installation history is unknown.
Warning Signs to Watch For
Whether you own a stucco home or are considering buying one, these are the signs that warrant a closer look:
Cracks wider than a hairline, especially diagonal ones at the window and door corners
Staining, discoloration, or dark streaking on the surface
White chalky deposits (efflorescence) in recurring patterns
Soft, spongy, or hollow-sounding areas when you tap the stucco
Gaps or missing caulk around windows, doors, or stucco-to-trim transitions
Interior signals: mildew smell near exterior walls, damp drywall, staining above baseboards, or warped window casings
Any combination of interior and exterior signs together is a strong indicator that moisture has already entered the wall system.
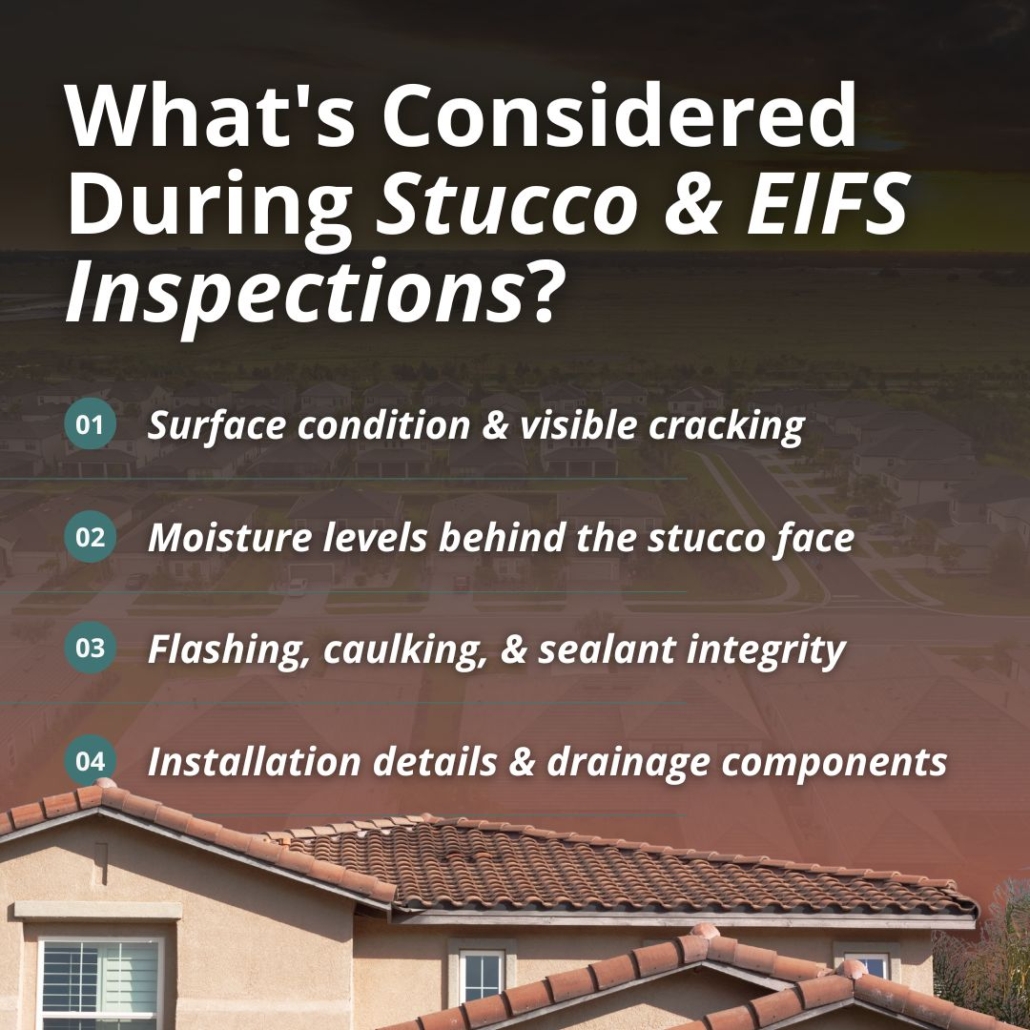
What Does a Stucco Inspection Involve?
A standard home inspection includes a visual evaluation of the exterior, but a dedicated stucco inspection goes further. At Inside & Out Property Inspectors, our team holds a Level II certification from the Exterior Design Institute (EDI) and brings over 20 years of building experience to every stucco evaluation.
We use moisture meters and infrared thermography to detect anomalies behind the stucco face without opening the wall. Where findings warrant, invasive probing involves small openings in the stucco to directly assess the condition of the sheathing and framing below. This is the only way to confirm what is happening inside a wall that shows surface indicators of damage, and it is particularly important for homes with EIFS systems or undocumented prior repairs.
Maintenance That Extends Stucco Life
Staying ahead of stucco issues is always less expensive than addressing them after water damage has set in. These are the habits that make the biggest difference:
Inspect and reseal caulk around all windows, doors, and penetrations annually
Check for new cracks after severe weather or significant rain events
Keep gutters clean and direct downspouts away from stucco walls
Trim vegetation that contacts or overhangs stucco, since plant material holds moisture against the wall
Apply a breathable exterior sealant every five to ten years, depending on exposure
Address any crack or gap promptly rather than waiting for the next maintenance cycle
Related Questions
Stucco is rarely the only exterior concern on a Northeast Florida home. Here are questions that come up most often in connection with it.
How does moisture behind stucco connect to mold?
When water becomes trapped inside a wall assembly, the warm, dark conditions behind stucco create an environment where mold can develop on sheathing and framing before any visible signs appear on the interior. Homes with a history of stucco moisture intrusion often benefit from mold testing alongside the stucco evaluation.
What role does a home inspection play when buying a stucco home?
A full home inspection evaluates the condition of the entire property, including the exterior wall systems. For stucco homes, that evaluation is more meaningful when paired with a dedicated stucco inspection, particularly if the property has EIFS, visible cracking or staining, or a renovation history that is not well documented.
How do wind mitigation or 4-point inspections relate to stucco condition?
Stucco itself is not a direct component of a wind mitigation or 4-point inspection, but active moisture damage found during a stucco assessment can intersect with those reports if it has affected the roof system, electrical, HVAC, or plumbing. Insurers may require documentation of repairs before issuing or renewing coverage on homes with known water intrusion.
What should buyers know about stucco on a new construction home?
Even new stucco can be installed incorrectly. Missing weep screeds, insufficient flashing, and poor window integration are errors that a builder’s quality control process may not catch. A pre-drywall inspection or new construction inspection creates an opportunity to identify these issues before walls are closed and before closing day.
When to Call a Professional
These are the situations where a dedicated stucco evaluation is the right call:
You are purchasing a home with a stucco or EIFS exterior
You have noticed any of the warning signs listed above
The home has had stucco repairs with no documentation of what was done
You are buying a home built before 2000, when EIFS installation standards were less regulated
You have not had a stucco assessment in five or more years
Inside & Out Property Inspectors holds EDI Level II stucco certification and serves buyers, sellers, and homeowners across Jacksonville, St. Augustine, Ponte Vedra Beach, Nocatee, Fleming Island, and throughout Northeast Florida.
Conclusion
Stucco is a durable and widely used exterior finish that performs well in Florida’s climate when installed correctly and maintained consistently. The concerns that come with it are real but manageable, and most serious damage traces back to installation issues or early warning signs that were not addressed promptly.
Whether you are buying, selling, or maintaining a stucco home in Northeast Florida, knowing what to look for and when to bring in a certified inspector gives you the information you need to protect your investment. Get a free quote today.
https://insideandoutpropertyinspectors.com/wp-content/uploads/2025/09/stucco-for-exterior-wall.jpg10001500BJ Johnsonhttps://d39oyu4lp7snwz.cloudfront.net/wp-content/uploads/sites/54/2019/08/31171419/io-favicon-300x300.pngBJ Johnson2026-03-26 08:34:512026-03-26 13:12:06Common Concerns With Stucco For an Exterior Wall
Buying a new build feels different from buying a resale home. Everything is fresh. The finishes are clean, the systems are new, and the builder has assured you the home meets code. It is easy to assume that means everything is in order.
But new construction homes are not exempt from defects. Missed code items, improper installations, and workmanship issues make it into finished homes regularly, often because municipal building inspectors are spread thin and are not evaluating every detail of every build. A private new construction inspector works for you, not the municipality and not the builder, and their job is to catch what others miss before you close and before the home is officially yours.
The question is not really whether to get one: it’s how to find the right one.
The New Construction Distinction
Inspecting a new build is not the same as inspecting a resale home. The two require overlapping but distinct scopes and skill sets, and not every inspector is equally equipped for both.
With a resale home, an inspector is evaluating age-related wear, deferred maintenance, and the cumulative effects of how a home has been used over time. With a new construction home, the inspector is evaluating build quality: whether framing is correct, whether systems were installed per manufacturer specifications, whether the home was built to current code, and whether the builder’s punch list was actually completed before closing day.
This distinction matters when you are choosing who to hire. An inspector with deep construction knowledge brings a different lens to a new build than someone whose experience is primarily in resale properties. They know what shortcuts look like, they know where builders commonly cut corners under schedule pressure, and they know how to evaluate a home against the standards it was actually built to, rather than the standards of a home built 30 years ago.
What Qualifications Actually Matter?
Licensing requirements for home inspectors vary by state. In Florida, home inspectors must be licensed through the Department of Business and Professional Regulation. That is the floor. The best inspectors have gone considerably further.
Here is what to look for beyond the state license:
InterNACHI certification: The International Association of Certified Home Inspectors sets continuing education requirements above what Florida mandates. The Certified Professional Inspector (CPI) and Certified Master Inspector (CMI) designations both indicate inspectors who have committed to expertise beyond the minimum.
Construction experience: A license certifies that someone has passed a test. It does not tell you whether they have ever swung a hammer, managed a build, or worked in the trades. Inspectors with hands-on construction backgrounds understand how homes are actually built, which changes what they look for and what they catch.
Specialty certifications relevant to your build: Depending on your home, thermography certification, stucco inspection certification (such as EDI Level II), or mold assessor licensure may all be relevant. Specialty credentials matter most when your home has stucco exteriors, spray foam insulation, or sits in a flood zone.
Errors and omissions insurance: This protects you if something is missed that causes financial harm. Confirm coverage before hiring.
Team inspections: Some companies send two inspectors rather than one. For a new construction home, which has more ground to cover than most resale properties, two inspectors on site simultaneously means more thorough coverage without cutting corners on time.
These are the credentials and practices that separate a thorough new construction inspector from someone who meets the legal minimum to do the job.
Questions Worth Asking The Inspector
Not every inspector who advertises new construction experience has the background to back it up. A brief conversation before scheduling can tell you a lot.
How many new construction inspections have you completed in the last year?
What is your background in construction or the building trades?
Do you have any specialty certifications relevant to new construction, such as thermography or stucco?
Will you attend the builder’s final walkthrough, or is this a separate inspection?
How is the report delivered, and how soon after the inspection?
Do you carry errors and omissions insurance?
How many inspectors will be on site?
The answers will tell you whether you are talking to someone with real new construction depth or someone who inspects new builds occasionally alongside a resale-heavy workload.
What a New Construction Inspector Should Evaluate
A thorough new construction inspection goes well beyond the builder’s own walkthrough checklist. Builders conduct their own pre-closing reviews, but those are conducted by people who have a financial interest in closing on schedule. A third-party inspector has no such pressure.
Expect a thorough inspector to evaluate:
Structural components, including framing, foundation, and load-bearing elements
Roof installation, including flashing, penetrations, and ventilation
HVAC installation and function relative to manufacturer specifications
Electrical panel, outlets, GFCI and AFCI protection, and service capacity
Plumbing rough-in and fixtures, including water heater installation
Insulation installation quality and coverage
Windows and doors for proper fit, operation, and sealing
Grading and drainage around the foundation
Interior finishes for defects, damage, and incomplete work
If thermography is part of the inspection, it adds the ability to identify moisture intrusion, insulation gaps, and electrical anomalies that are not visible to the naked eye, particularly valuable in a new build where walls are still intact, and problems can hide easily.
Timing Matters More Than Most Buyers Realize
For a new construction home, the final inspection before closing is the most commonly scheduled one. But it is not the only opportunity, and it is not necessarily the most valuable one on its own.
Private inspections can also be conducted at two earlier stages: before the concrete slab is poured, when the foundation prep work is still visible, and before drywall is installed, when the framing, electrical, plumbing, and HVAC rough-ins are all exposed and accessible. Issues caught at these stages are far easier and less expensive to correct than the same issues discovered after the walls are closed up.
If your builder’s schedule allows for it, asking about pre-slab and pre-drywall inspections in addition to a final walkthrough inspection is worth the conversation. Not every buyer takes advantage of all three, but every buyer who does has a much more complete picture of their home’s construction quality before they take ownership.
Red Flags When Evaluating Inspectors
Just as there are signs of a strong inspector, there are signs worth being cautious about.
Unusually low pricing: Inspection pricing varies, but significantly below-market rates often reflect limited experience, high volume with reduced thoroughness, or lack of proper insurance coverage.
No verifiable credentials: If an inspector cannot point you to a license number, certification body, or professional association, keep looking.
Vague experience claims: “I inspect new construction” is not the same as being able to describe their process, their construction background, and the specific things they look for in a new build.
Slow or confusing report: A detailed inspection report should follow the inspection promptly. If the turnaround is multiple days, that affects your ability to use the findings in closing negotiations.
Reluctance to answer questions: A confident, experienced inspector welcomes the questions listed above. Vague or evasive answers are a signal.
Related Questions
What is the difference between a pre-drywall inspection and a final new construction inspection? A pre-drywall inspection takes place before the walls are closed up, while framing, plumbing, electrical, and HVAC rough-ins are still visible. A final inspection happens just before closing and evaluates the completed home. They serve different purposes, and many buyers benefit from both.
What is a pre-slab inspection, and do I need one?
A pre-slab inspection is conducted before the concrete foundation is poured, evaluating the preparation work underneath. This is the earliest opportunity in the construction process to catch issues that would be inaccessible and expensive to correct after the slab is in place.
Does a new construction home also need a wind mitigation inspection?
In Florida, wind mitigation inspections are tied to insurance rather than the purchase transaction itself. A new construction home built to the current Florida building requirements will generally have strong wind mitigation features, but a formal inspection documents those features for your insurer and can meaningfully reduce your homeowner’s insurance premium.
What is a 4-point inspection, and is it required for a new build?
A 4-point inspection evaluates the four major systems most relevant to insurers: roof, electrical, HVAC, and plumbing. Insurers in Florida often require a 4-point inspection for older homes. But may request one for newer properties as well, depending on the insurer and policy type.
Conclusion
A new construction home is not automatically a defect-free home. Builders work under pressure, subcontractors vary in quality, and municipal inspectors are not there to protect your investment specifically. A private new construction inspector is.
Choosing the right one means looking past the license and asking the questions that surface real construction experience, proper credentials, and a process thorough enough to catch what others miss. Inside & Out Property Inspectors serves buyers across Jacksonville, St. Augustine, Ponte Vedra Beach, and the surrounding areas of Northeast Florida. Schedule your new construction inspection before you close.
https://insideandoutpropertyinspectors.com/wp-content/uploads/2026/03/new-construction-inspector.jpg10001500BJ Johnsonhttps://d39oyu4lp7snwz.cloudfront.net/wp-content/uploads/sites/54/2019/08/31171419/io-favicon-300x300.pngBJ Johnson2026-03-12 19:05:202026-03-12 19:05:20How to Find & Select The Best New Construction Inspector
A final new construction inspection is your last chance to catch problems before the home officially becomes yours. Once you close, anything left unaddressed is your responsibility, not the builder’s. This is the third and final phase of the new construction home inspection process, and it is every bit as important as the phases that came before it.
The pre-slab inspection evaluated the foundation preparation and structural integrity before concrete was poured. The pre-drywall inspection covered framing, internal plumbing structures, electrical routing, and HVAC before the walls closed up. Now, with construction complete, the final inspection verifies that every system is functional, installed correctly, and safe before you sign and take occupancy.
Here is what a final new construction inspection covers and why hiring a professional home inspector before closing is one of the smartest decisions a new construction buyer can make.
Why New Construction Homes Need an Independent Inspection
New does not mean defect-free. Research from LJP Construction Services found that Florida has a construction deficiency rate of 5%, one of the highest in the country, and nearly double California’s rate. The most common issues involve exterior weather barriers, framing, mechanical systems, and window and door installations.
Across all home types, 86% of inspections find at least one item that needs to be addressed, according to a Porch survey of nearly 1,000 homebuyers.
More than half of new-build homeowners discover defects after moving in and deal with necessary repairs that disrupt life in a brand-new home.
Many contractors and builders cut corners or make honest mistakes under tight timelines. City building inspectors are responsible for enforcing local building codes, which cover bare minimum safety standards and do not ensure overall construction quality. Municipal codes will not protect you from many of the defects a thorough construction home inspection would identify.
Identifying defects before closing also gives you leverage. Homebuyers can request that the builder complete repairs or negotiate a reduction in the purchase price to account for any required work. A simple $300 to $500 investment in a new construction inspection can save tens of thousands in future repairs.
The Three Phases of a New Construction Home Inspection
There are three phases to the new construction inspection process, and each is equally important.
Phase 1: Pre-Slab Inspection evaluates preparation and structural integrity before the foundation is poured, including soil conditions, rebar placement, and plumbing rough-in below the slab.
Phase 2: Pre-Drywall Inspection occurs after the foundation is poured and before the drywall is hung. This phase allows inspectors to evaluate complex framing, internal plumbing structures, and electrical routing before they are hidden behind walls.
Phase 3: Final Inspection is where inspectors review all aspects of the completed construction home to verify that everything is functional and safe before occupancy.
Multiple inspections throughout the building process are recommended to catch defects early and ensure quality at every stage.
What a Final New Construction Inspection Covers
The final new construction inspection is a full top-to-bottom evaluation of the completed home. Here is a breakdown of what gets covered.
Exterior and Roof
The inspector evaluates the roof covering, flashing, gutters, soffits, and fascia. Exterior siding, trim, windows, and doors are checked for proper sealing, drainage, and installation. Grading around the foundation is reviewed to confirm water drains away from the home.
In Jacksonville and across Northeast Florida, where heavy summer rain is routine, improper grading is one of the most consequential things a home inspector can catch at this stage.
Structure and Foundation
The foundation and visible structural components are reviewed for cracks, settling, or framing concerns that developed as the build progressed. Identifying a foundation issue before closing can save tens of thousands in future repairs that may not be fully covered once the builder’s warranty ends.
Electrical Systems
With the system live and operational, the inspector checks the main panel, circuit breakers, outlets, switches, light fixtures, and GFCI protection in all required locations. Everything is verified to be installed correctly, properly grounded, and free of safety hazards.
Plumbing
Every fixture is run. The inspector checks for leaks, tests water pressure, verifies drainage, and reviews water heater installation, venting, and safety components. Supply and waste line installation quality is evaluated where accessible.
HVAC Systems
Heating and cooling equipment is tested for proper operation, including the air handler, condenser, ductwork, and registers. HVAC systems must be balanced for the home and functioning as designed.
In Florida’s climate, this directly affects comfort, energy costs, and indoor air quality from the first day in the home. A thorough inspection here can also identify energy efficiency opportunities before they become ongoing expenses.
Insulation and Attic
Insulation depth, coverage, and attic ventilation are evaluated. In Northeast Florida’s heat and humidity, problems here cause early HVAC wear, elevated energy costs, and moisture issues that are far more expensive to address after closing.
Interior
Every room gets an assessment. Walls, ceilings, floors, doors, windows, cabinets, and built-in features are evaluated for quality and function. Stairways, railings, and safety-related elements are verified. The inspector is also watching for surface signs of deeper issues, such as drywall cracking near openings or floors that are not level.
Garage
Garage structure, door operation, opener safety features, and fire separation between the garage and living space are all included.
What Inspectors Commonly Find
Even on brand-new construction homes, findings are routine. Common items documented during final new construction inspections include:
HVAC systems not operating within normal parameters or not balanced for the home
Grading issues that leave the foundation vulnerable to water intrusion
Roofing deficiencies, including improper flashing or loose components
Plumbing defects such as leaking fixtures, slow drains, or low water pressure
Insulation gaps or voids in the attic
Windows and doors that do not seal or operate correctly
Electrical concerns that passedthe rough-in but created problems by the time the system was fully installed
None of this is unusual. It is what happens when dozens of contractors work through a build on a deadline. That is exactly why an independent construction inspection matters.
Add-On Inspections to Consider
Several additional services pair well with a final new construction inspection, depending on your home and community.
Sewer scope inspection: A camera is run through the main sewer line to check for construction debris, improper slope, or damage. Inside & Out Property Inspectors was among the first companies in Northeast Florida to offer this service, and it is one of the most practical add-ons for new construction homes.
Thermal imaging: Infrared scanning detects moisture intrusion, heat loss, or electrical hotspots that a standard visual inspection will not catch, particularly behind walls and in the attic.
Mold inspection: Buildings that sat open through extended heat and humidity may warrant a mold evaluation before closing.
What Happens After the Inspection?
You receive a detailed written report, typically within one to two business days, documenting every finding with photos and descriptions. That report is your punch list for the builder conversation before you sign.
Keep it after closing. It is the starting point for your 11-month warranty inspection. An 11-month inspection catches issues while the builder is still responsible for repairs, so items can be submitted before the warranty expires. Most new construction homes come with a one-year builder warranty, and this inspection ensures you use it.
Builder Walkthroughs vs. Independent Inspections
Builder Walkthrough
Independent Inspection
Purpose
Orientation and cosmetic punch list
Full structural and systems evaluation
Who conducts it
Builder’s team
Third-party professional home inspector
Financial interest in sale
Yes
No
Scope
Bare minimum code compliance
Workmanship quality, safety, and code
Report provided
Varies
Detailed written report with photos
City inspectors are responsible for enforcing local building codes, not ensuring the quality of construction. An InterNACHI-certified home inspector with over 20 years of construction experience evaluates your new home with no stake in the outcome.
Questions New Construction Buyers Ask
What does a home inspection cover?
A standard home inspection evaluates the major systems and components of a property from foundation to roof, including electrical, plumbing, HVAC, and structural elements. It gives buyers a detailed picture of the home’s condition before closing.
What is a sewer scope inspection?
A sewer scope runs a camera through the main sewer line to check for damage, improper slope, or construction debris. It is one of the most practical add-ons for any home purchase, new construction, or otherwise.
Is a sewer scope necessary on a brand-new home? It is one of the most overlooked add-ons for new construction homes. Construction debris in the sewer line is a common finding and far less disruptive to address before you move in.
What is thermal imaging, and when does it make sense? Thermal imaging uses infrared technology to detect moisture, heat loss, and electrical hotspots behind walls and ceilings that are not visible during a standard walkthrough. It adds a meaningful layer of detail to any inspection. Below, you can check out an example of a thermography inspection done by the Inside & Out team!
Conclusion
A final new construction inspection is not an extra step. It is the step that completes the process and protects your investment. An independent, thorough inspection before closing is how you confirm the home is safe.
Inside & Out Property Inspectors serves buyers throughout Northeast Florida, including Jacksonville and surrounding communities. With over 20 years of hands-on construction and inspection experience and a team approach to every property, the crew delivers detailed reports that give you real leverage going into closing.

https://insideandoutpropertyinspectors.com/wp-content/uploads/2018/12/new-home-1664302_640.jpg399600BJ Johnsonhttps://d39oyu4lp7snwz.cloudfront.net/wp-content/uploads/sites/54/2019/08/31171419/io-favicon-300x300.pngBJ Johnson2026-02-25 14:00:072026-02-25 22:01:51What Happens During a Final New Construction Inspection?
A pre-drywall inspection is your only real chance to see what’s behind the walls of a new home before drywall installation covers it all up. Once the walls close, the electrical wiring, plumbing system, HVAC systems, and insulation are hidden. Any potential problems at that point become far more costly to find and fix.
For buyers building in Jacksonville, here’s what a home inspector looks for during this crucial step, what they typically find, and why it matters.
What Is a Pre-Drywall Inspection?
A pre-drywall inspection is a visual evaluation of a new home’s systems after rough-in electrical work, plumbing, and HVAC installation are done, but before drywall goes up. It takes place during a specific window in the home building process, after the builder has installed the major systems and the house has passed municipal building codes inspections, but before anything is covered up.
That window is crucial. It’s the one point where every stud, joist, pipe, wire, and duct is fully visible and accessible for inspection.
What Will the Home Inspector Look For?
The home inspector evaluates the quality of work across several major areas of the house, checking that everything is installed correctly and meets building codes.
Here’s a real example from a recent Jacksonville inspection.
A crew was drilling a hole for a pipe and accidentally punched through the HVAC ductwork underneath the floor. Instead of reporting it, they shoved the broken pieces back in and moved on. Without an independent inspector catching it, that damage would have been sealed behind the walls with no one the wiser.
That’s just one example. Here’s a closer look at the major areas your inspector will evaluate and what they’re checking for.
Structural Components
The inspector checks that framing is square, plumb, and built according to plans.
Common concerns include bowed or improperly spaced studs, missing headers above doors and windows, and improperly secured joist hangers that compromise structural integrity.
Electrical Work and Outlets
The electrical system is checked for safe routing, correct junction box placement, and code compliance. Electrical outlets, switches, and dedicated circuits for appliances should match the plans and be positioned where they’ll be useful once the walls close.
Improperly routed electrical work is one of the most common safety concerns found at this stage.
Plumbing System
The plumbing system is inspected for proper routing, secure connections, and correct pipe sizing. The inspector looks for potential problems like pipes run through structural members without reinforcement and drain lines with incorrect slope. These are the types of issues that lead to leaks and costly repairs in the future if not corrected now.
HVAC Systems
Heating and air conditioning ductwork is checked for proper sizing, secure connections, and adequate support. Poorly installed HVAC systems can lead to energy loss, uneven temperatures throughout the house, and noise issues that are nearly impossible to fix after drywall installation.
Insulation and Environmental Factors
The inspector checks insulation for proper coverage, correct material, and no gaps. In Jacksonville’s hot, humid climate, environmental factors make proper insulation and vapor barrier installation crucial for energy efficiency, moisture management, and the long-term safety of the structure.
Area Inspected
What the Home Inspector Checks
Structural components
Structural integrity, spacing, and correct hardware
Electrical work
Wiring routes, electrical outlets, and compliance
Plumbing system
Pipe sizing, connections, slope, and potential leaks
HVAC systems
Duct sizing, connections, support, and sealing
Insulation
Coverage, material type, gaps, vapor barriers
Fire blocking
Required blocking between floors and at penetrations
Doors and windows
Flashing, weatherproofing, and floor level alignment
Why Aren’t Municipal or Builder Inspections Enough?
Many buyers assume that between county inspections and the builder’s own walkthroughs, everything is good. But municipal inspections, builder self-checks, and an independent pre-drywall inspection all serve very different purposes.
County inspectors focus on compliance with building codes at a minimum standard and often spend just 15 to 30 minutes on a property. Builder walkthroughs are helpful, but they’re the same team responsible for the work. That’s not an independent evaluation, and the builder’s priorities don’t always align with yours as the homeowner.
A pre-drywall inspection from an independent inspector typically lasts one to two hours, and results in a detailed inspection report focused entirely on your house and your concerns.
Municipal Inspection
Builder Walkthrough
Independent Pre-Drywall Inspection
Minimum building codes compliance
Internal quality check
Overall quality and workmanship
15–30 minutes
Varies
1–2+ hours
High volume, multiple stops per day
Conducted by the builder’s own team
Dedicated to your property
Pass/fail format
No formal report for the buyer
Detailed inspection report with photos
Works for the jurisdiction
Works for the builder
Works for you
An independent inspector’s evaluation is a best practice in new home builds, even if your builder pushes back. The detailed inspection report gives homeowners real documentation to reference with the builder and any contractor involved in correcting issues.
Common Issues Found During a Pre-Drywall Inspection
Even with reputable builders, a drywall inspection at this stage routinely uncovers concerns. Dozens of contractors work on tight timelines, and mistakes happen. Catching problems early is the whole point.
Common findings include:
Missing fire blocking between floors (a crucial safety concern)
Electrical outlets at incorrect locations or heights
Plumbing vents not routed to code
HVAC ducts disconnected, poorly sealed, or undersized
Improperly installed window flashing around doors and windows
Insulation gaps around outlets, pipes, or at corners of exterior walls
Flooring and floor level concerns from uneven framing
Most of these are straightforward to correct at the pre-drywall stage. After drywall installation, the same repairs require cutting into finished walls, costing more money and time. Fixing these issues at the pre-drywall stage costs a fraction of what the same repairs would run after the walls are closed.
Where This Inspection Fits in the New Home Building Process
If you’re building a new home in Jacksonville, a pre-drywall inspection is the second of three key inspection points.
Pre-slab inspection takes place before they pour the concrete slab. This is your chance to verify plumbing rough-ins, post-tension cables, and soil preparation before they’re sealed under concrete.
Pre-drywall inspection happens after rough-in work on the house is done. This is your widest window for inspecting the home’s structural and mechanical systems before closing up the walls.
Final inspection takes place when the new home is finished, before your walkthrough with the builder. It covers everything from the roof to the foundation, including finished systems, flooring, doors, appliances, and surfaces.
Each inspection catches things the others can’t because each happens at a different stage when different elements are visible. Together, they give homeowners a complete picture of the work at every major milestone.
For Jacksonville buyers: New home construction is booming in areas like Nocatee, the Northside, St. Johns County, and along the First Coast Expressway corridor.
Builders and contractors are working at high volume, and that pace makes an independent inspector at each stage even more important for your peace of mind and the safety of your future home.
Other Questions New Home Buyers Ask
What is a pre-slab inspection?
A pre-slab inspection evaluates plumbing rough-ins, post-tension cables, and soil preparation before the concrete slab is poured. Once the slab is down, everything underneath is sealed permanently.
What does a final inspection cover?
The final inspection happens when the house is done, before your builder’s walkthrough. It evaluates every finished system and surface from the roof to the foundation.
Do new homes come with warranties?
Most builders offer a one-year workmanship warranty and longer structural warranties. Having a detailed inspection report from each stage strengthens your position if you need to file a claim in the future.
Should I get a home inspection even on new construction?
Yes. New doesn’t mean flawless. Dozens of contractors work on tight schedules, and mistakes happen. An independent home inspector catches what builder quality checks and municipal code inspections may not.
When to Schedule a Pre-Drywall Inspection
A qualified home inspector knows what to look for across electrical work, plumbing, HVAC systems, insulation, and safety concerns. This is not something homeowners can do effectively on their own, even with some building knowledge.
You’re building a new home and want independent verification of the work
Rough-in work is done, and drywall hasn’t been hung yet
You want a detailed inspection report to share with your builder
You’re buying in a new development and want to confirm the work meets your standards, not just minimum code
Conclusion
A pre-drywall inspection is your best opportunity to verify that your new home is good to go. It’s the one point in the building process where the most critical systems are fully visible, and that window doesn’t stay open long. The peace of mind it provides is well worth the investment.
If you’re building in Jacksonville, Nocatee, St. Johns County, or anywhere along the First Coast and want thorough inspections at every stage, Inside & Out Property Inspectors is here to help. Get an inspection quote today for the full picture, ground up.
https://insideandoutpropertyinspectors.com/wp-content/uploads/2026/02/what-is-a-pre-drywall-inspection.jpg10001500BJ Johnsonhttps://d39oyu4lp7snwz.cloudfront.net/wp-content/uploads/sites/54/2019/08/31171419/io-favicon-300x300.pngBJ Johnson2026-02-12 22:06:492026-02-12 22:06:49Understanding Pre-Drywall Inspections and Why They Matter