
Myths vs Facts: Can a Dehumidifier Help With Black Mold?
Black mold is one of those household problems that gets a lot of attention, and for good reason. It can damage your home, trigger health issues, and keep coming back if the root cause isn’t handled properly. Many homeowners ask if a dehumidifier can help get rid of black mold. The short answer: not exactly.
A dehumidifier can help prevent mold from growing, but it won’t fix a mold problem that’s already there.
In this post, we’ll break down what dehumidifiers can and can’t do, clear up common myths, and explain when it’s time to bring in a professional.
Myth #1: A Dehumidifier Gets Rid of Existing Black Mold
Fact: A dehumidifier reduces moisture, which helps slow mold growth. But it won’t kill the mold already growing on walls, ceilings, or furniture.
Mold needs to be physically removed or treated with a professional-grade cleaning solution. According to the CDC, visible mold should always be cleaned, no matter what type it is. Dehumidifiers don’t remove spores that are already growing or stuck to surfaces.
If you see black mold, it’s important to treat the area directly before relying on humidity control.
Myth #2: Only Floods or Leaks Cause Mold
Fact: High humidity alone can lead to mold growth, especially in places like bathrooms, laundry rooms, crawl spaces, and attics.
In Jacksonville, the average annual humidity is over 75%. That means mold can develop even without a leak or visible water damage. Dehumidifiers help keep humidity levels below 60%, which slows mold growth in vulnerable areas.
If your home constantly feels damp or smells musty, a dehumidifier can make a noticeable difference.
Myth #3: You Only Need a Dehumidifier in the Summer
Fact: Mold can grow year-round, especially in sealed areas with little airflow.
While humidity levels spike in the summer, mold doesn’t take a break in winter. Homes with poor ventilation or hidden moisture may benefit from year-round humidity control.
What a Dehumidifier Can Do
A dehumidifier is a great tool for:
- Slowing the spread of mold in damp rooms
- Preventing mold in bathrooms, basements, attics, or closets
- Protecting furniture, clothing, and electronics from moisture
- Improving indoor air quality and reducing musty odors
- Supporting your HVAC system by lowering indoor humidity
It’s an important part of prevention, but not a complete solution.
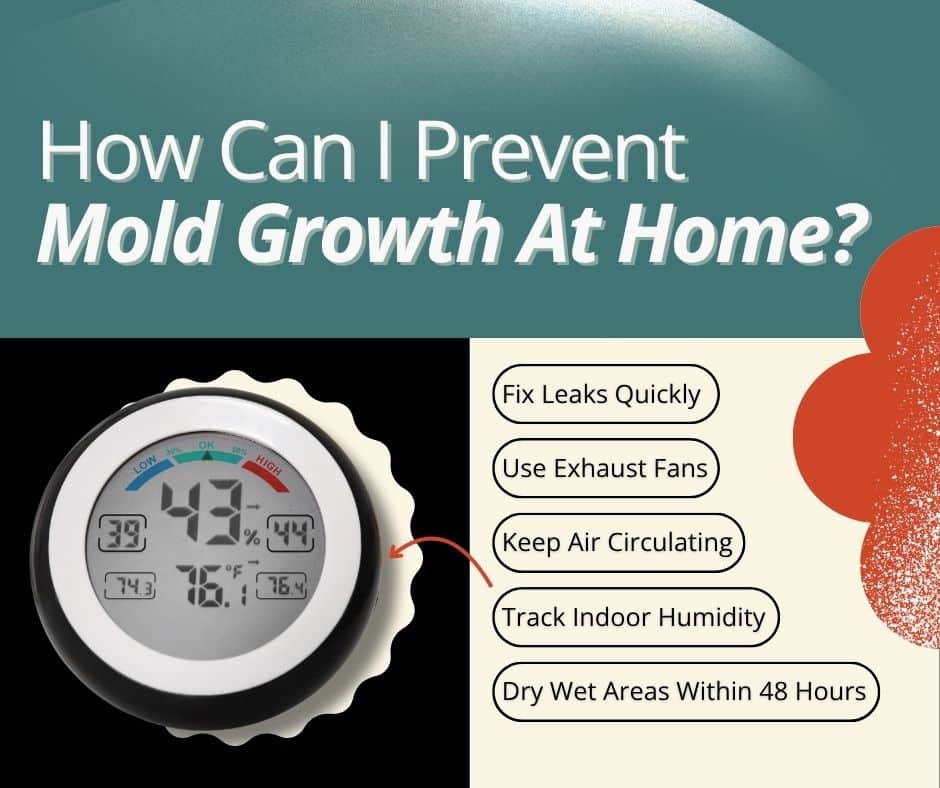
Other Tips to Help Prevent Mold
1. Fix Leaks Quickly
Even small plumbing drips or roof leaks can create perfect conditions for mold. Check under sinks, around windows, and behind appliances regularly.
2. Use Exhaust Fans
Bathrooms, laundry rooms, and kitchens should have working exhaust fans that run during and after use.
3. Keep Air Circulating
Mold thrives in still air. Ceiling fans, open doors, and clean HVAC filters help move air and reduce risk.
4. Dry Wet Areas Within 48 Hours
Whether it’s a soaked carpet or a leaky water heater, mold can start forming within two days. Fast action matters.
5. Track Indoor Humidity
A humidity monitor (also called a hygrometer) can help you keep indoor moisture between 30% and 50%. Many affordable models are available online or in home improvement stores.
When to Call a Professional
If you’re seeing black spots on ceilings, walls, or near HVAC vents, it’s time for a professional evaluation. A licensed home inspector can identify:
- Hidden sources of moisture
- Areas with poor airflow
- Mold risks in crawl spaces, attics, or behind drywall
- Whether mold remediation or repairs are needed
Inside & Out Property Inspectors help Jacksonville homeowners get to the root of moisture problems. We inspect with an eye for long-term prevention, not just surface fixes.
Conclusion
A dehumidifier can help prevent mold from growing, but it won’t remove mold that’s already there. Mold spores need to be cleaned properly, and moisture sources must be addressed at the root.
If you’re unsure what’s causing moisture or mold in your home, getting a professional inspection is the smart move. Inside & Out can help in Jacksonville, and surrounding areas.