• Facebook
  • Twitter
  • Youtube
  • LinkedIn
  • Yelp
  • Instagram
Text: 904-395-1900Call: 904-395-1900
Inside & Out Property Inspectors
  • Home Inspections
    • What’s Included
    • Infrared Thermography Inspection
    • New Construction
    • Pre-Drywall Inspection
    • Warranty Inspection
    • Deck Inspections
    • Sewer Scope
    • Mold Inspection
    • Pre-Slab Inspection
    • Stucco
    • Manufactured Home Foundation Certification (HUD) Inspections
  • Commercial Inspections
    • Commercial
    • Rental Inspection
  • Insurance
    • Wind Mitigation
    • 4 Point Inspection
  • About
    • About Us
    • Careers
    • Standards of Practice
    • Code of Ethics
    • Testimonials
  • Service Areas
    • Inspections
      • Commercial
        • Jacksonville
        • Jacksonville Beach
        • St. Augustine
        • St. Augustine Beach
        • Ponte Vedra Beach
        • Crescent Beach
        • Vilano Beach
        • Green Cove Springs
        • Nocatee
        • Hastings
        • Palm Valley
        • Sawgrass
      • Residential
        • Jacksonville
        • Jacksonville Beach
        • St Augustine
        • St Augustine Beach
        • Green Cove Springs
        • Nocatee
        • Ponte Vedra Beach
        • Vilano Beach
        • Crescent Beach
        • Hastings
        • Palm Valley
        • Sawgrass
        • Neptune Beach
        • Orange Park
    • Pest Control
    • Insurance Inspections
      • Wind Mitigation Inspection
        • Jacksonville, FL
        • St. Augustine, FL
        • Green Cove Springs, FL
        • Nocatee, FL
        • Jacksonville Beach, FL
      • 4 Point Inspection
        • Jacksonville, FL
        • St. Augustine, FL
        • Green Cove Springs, FL
        • Nocatee, FL
    • 11-Month Warranty Inspection
      • Jacksonville, FL
      • St. Augustine, FL
      • Ponte Vedra Beach, FL
      • Crescent Beach, FL
      • Green Cove Springs, FL
      • Vilano Beach, FL
      • Palm Valley, FL
    • View All Service Areas
  • Blog
  • Schedule
  • Free Quote
  • Menu Menu

Tag Archive for: realtor

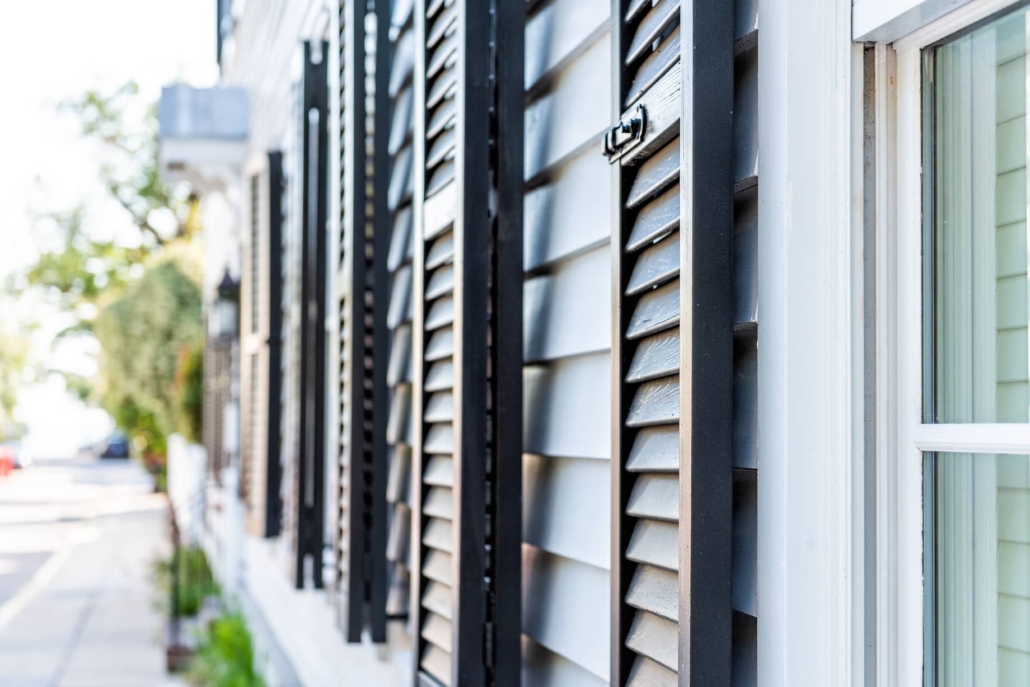
Interior shutter measurements will be vastly different from exterior measurements.

How To Measure For Shutters

May 24, 2023/0 Comments/in Windows/by BJ Johnson

Shopping for new items for your home can be exciting for homeowners. There are so many fun and exciting amenities or ways to upgrade your home that you often cannot finish your wish list in one day. Fortunately, there are some great ways to increase the curb appeal and aesthetic of your home as well as provide you with extra privacy. One of the many curb appeal upgrades is installing exterior or interior shutters. Most homeowners will elect interior shutters because they are easier to install as a do-it-yourself project. To accomplish this project you must have some good measuring skills. Trying to figure out how to measure for shutters? Measure the inside width and height of the window. The width of the shutter will be half the total window width.

Let’s take a look below at some more details regarding shutter measurements.

Exterior window shutters will be measured a bit differently than interior window shutters.

What Do I Need To Know For Measurements?

Believe it or not, there are a few things that you will want to know before attempting to measure your windows for the installation of shutters. Keep in mind that your choice of shutter type and whether you are installing interior or exterior shutters can determine a lot. Let’s take a look below at what you will need to know.

  • Shutter height – Your shutter height should be the same as the inside of the window frame. This means the top of the window shutter will be even with the bottom window sill. Keep in mind that your measurements might be different if you have a brick home. Also, any door shutters should be measured from the top threshold to the bottom of the top jamb.
  • Shutter width – The width of each shutter needs to be half of the width of the window. This allows the shutters to close properly.
  • Arch Top – This usually only applies to custom shutters. They have specific ratios for each arch drop and shutter height. The arch drop is considered the difference between the short side and the tall side of the shutter. Check with the manufacturer for this measurement.
  • Eyebrow top – Similar to an arch top, these are custom and have specific measurement details. Typically, they are only available in 1″, 2″, or 3″ drops. Check the manufacturer for specific measurement needs.
  • Cross-rail placement – These will line up with the meeting rail. The meeting rail is located where the inner and outer window sash meet. Again, check with the manufacturer for specific details regarding the measurements or location of a cross-rail placement.

Keep in mind that to purchase the correct functional shutters, you will need a steel tape measure so that you can get the correct height measurements and width measurements for your windows. Also, each window opening has different opening measurements. Additionally, you will want to check the window to determine if window trim is needed.

Other Recommended Maintenance

Now that you know how to measure for shutters, take a look at whether you can tile around the window without trim. In some cases, your shutters will not have a trim and for a cleaner look, you might consider tiling around the window.

Next, look into how to clean the inside of a double-pane window. If the seals get cracked or damaged, dirt and debris can get inside the double pane. Also, moisture buildup is possible. You will want to know how to clean the inside.

Lastly, read up on if it is worth replacing windows before selling your home. If you have invested in window shutters then replacing the windows could cost you more and not be worth it before the sale of the home.

Bathroom window shutters will hang differently than other window shutters due to the size of the window.

When Do I Call A Professional?

Measuring window shutters can be a complicated task if you don’t have the equipment or understanding of the measurements. Calling on a window installation company is a great idea. They can get the perfect measurements for your window shutter needs. Also, reach out to your local home inspection team. They can inspect the area around the windows for possible damage or window replacement needs. You will get this done during a full home inspection.

Conclusion

When it comes to measuring window shutters, not only is it a great idea to hire someone with the expertise to complete the proper measurements. It is also a great idea to consult your local home inspection team to see what types of shutters will enhance your home’s curb appeal. Keeping the designer look of your home unique in the neighborhood can help separate your home from others if you ever decide to sell your home. Contact Inside and Out Property Inspectors in Jacksonville, FL, and surrounding areas to get your home inspection done today.

https://insideandoutpropertyinspectors.com/wp-content/uploads/2023/05/interior_shutters_25.jpeg 728 1092 BJ Johnson https://d39oyu4lp7snwz.cloudfront.net/wp-content/uploads/sites/54/2019/08/31171419/io-favicon-300x300.png BJ Johnson2023-05-24 18:08:012023-05-24 18:08:01How To Measure For Shutters
Home inspection report

Importance of Keeping Your Home Inspection Report

May 16, 2023/0 Comments/in Home Inspections/by BJ Johnson

Buying a house comes with a lot of expenses and to-do lists, in addition to finding the house you want. You probably have ideas of what you want in it and the non-negotiables with the home and neighborhood. Though not required for the purchase of a home, it is highly recommended. There are several reasons for having a home inspection done, as well as why you should keep the report. Who pays for a home inspection? It is usually the buyer who can find out the ins and outs of the home and an unbiased evaluation. Also, keeping the report is important to show to contractors and repair people so they know what repairs need to be made. Let’s take a look.

Why A Home Inspection?

When looking to buy a home, a potential buyer should pay to have a home inspection done as soon as they can after the offer is accepted by the seller. This is because it is important to give the seller time to fix any issues (if they choose to) that the inspector finds. It also allows you and the seller to come to an agreement on the repairs and a final price.

A home inspection is necessary, whether it is on an older home, new build, or condo. You may wonder about having an inspection on a new home, but they do have defects and sometimes the house is built so quickly that things are overlooked or not done correctly. Paying for the inspection gives you peace of mind that you aren’t getting into a “money pit” or a home with major issues that aren’t seen from the outside.

Never assume a house that looks great on the outside has everything functioning properly on the inside. Spending the money to hire a home inspector is worth it.

Electrical unit is part of the home inspection.

Types of Home Inspections

There are different types of home inspections. A standard home inspection is what is normally conducted. This covers the structure, electrical system, construction, mechanical systems, and plumbing of the home. There are also other home inspections that are specialized, especially here in Florida. Also, there are ones that are for health and safety concerns.

Some of these are:

Sewer Scope

A sewer scope inspection uses a camera to see if there are any issues in the sewer lines of the home.

Mold Inspection

A mold inspection is done to see if there is any pre-existing mold in the home. It is also to see if there are areas that are water damage prone or have high humidity.

Wind Mitigation

A wind mitigation inspection is using certain building techniques to limit the damage caused by intense wind, such as hurricanes. This type of inspection can lower the homeowner’s insurance.

4-Point Inspection

A 4-point inspection covers the roof, plumbing, electrical, and HVAC. Most home insurance companies don’t like to cover homes that are over 25 years old. Thus they require this inspection to make sure the home meets the standards.

Cost

The average home inspection fee in Florida is over $300 for an average-sized home. For a smaller home, it may be less while a large home will be more.

How Buyers Use the Home Inspection Report

The amount of money spent on a home inspection is peanuts to have peace of mind and know what you are getting into for a home. The report helps the buyer and real estate agent with negotiating with the seller. It is also a great idea to have this report so you remember the ages of important elements in your home such as the water heater, HVAC, etc.

If by chance the home you are looking at buying is an “as-is” this inspection can allow you to cancel the purchase of the home, or negotiate the price with the seller. A home inspection report also allows you to use it as a checklist if you are doing a loan for renovations. This can help the buyer with financing.

Keep in mind that a lot of the information you get in the report is not for negotiating, but is for maintenance information. Lastly, the report is needed for contractors. This is because it will show the contractors where the repairs are.

What Happens If Problems Are Discovered?

An inspection that is thorough will list items that should be looked at around the home. The report may come up with minor issues or major issues. Let’s look at some of the common findings.

Structural damage

When looking at the structure of a home, they will be checking for cracks that are in the foundation. Also, in states that have basements, a home inspector will look for drainage issues. The crawl space will also be looked at for issues in drainage, as well as masonry or bricks that are failing.

Roof damage

Roof damage is also another common area. Here in Florida, we have hail storms, hurricanes, tornados, and also just bad summer storms. In other states, snow can also cause damage to the roof. The inspector will look for tilting, and shingles that are broken or missing and check the gutters for clogging.

Chimney issues

The inspector will also look at the chimney and any damage to the flue, bricks, or mortar. They will also look to see if there are any blockages in the interior. Lastly, sometimes the fixes are easy things like a chimney sweep or could end up being structural repairs.

Pest Infestation and Wildlife Issues

Inspectors will also keep an eye out for any pest problems they may come across in an inspection and give recommendations for pest control service or to contact a professional.

Trees That Are Dead

If the inspector finds large trees that appear dead near the home, they will give recommendations as to what to do. Having dead trees near the home can cause problems if they fall on the house or knock down power lines.

Issues with Plumbing and Septic

An inspector will look for pipes that are corroded, broken, or rusted. They will also look at any that have the wrong type of pipe that has been used too. Looking for water damage near the plumbing fixtures will also be another thing that they do as well as stains on the ceiling from water. Mold and mildew will also be signs of water damage. If the home doesn’t have sewer and instead has septic, this will be inspected for leaks, as well as drainage issues. They will also look to see the level of solids that are in the tank. A company that has septic inspections as a service will be needed to do this.

HVAC issues are part of the home inspection.

HVAC issues

The HVAC system will be looked at to make sure it is working properly, it has the correct wiring, as well as the air conditioner is working properly. An air conditioner lasts about 10-15 years and is expensive to replace. You will want to know about these expenses before purchasing a home.

Electrical hazards

An inspector will check to see if the house has GFCI outlets, the grounding of three-pronged outlets as well as the circuit panel doesn’t have any illegal modifications. If there are some issues or suspicion of issues, the buyer may hire an electrician to take a look and make sure everything is up to code.

Fire Issues In The Home

Many issues in a home that are fire hazards are due to electrical issues. There are also fire hazards with fireplaces and the inspector will also check that smoke detectors and carbon monoxide detectors are working. Lastly, they will check that windows and doors are working properly, especially in case of a fire.

Appliances

An inspector will take a look at major appliances such as the oven and the hood, dishwasher, refrigerator and freezer, and garbage disposal. This is to make sure they are all working properly.

Here is a great video about home inspections for first-time buyers.

Recommended Maintenance

Now that you know about having a home inspection and who to share your report with, let’s take a look at a few other areas. One of those is negotiating after a home inspection. This is important as you will know what the necessary repairs are after the home inspection is completed. You as the buyer may also want to have your own contractor fix the issues so you may want to negotiate the price of the home.

Another area is walking away after a home inspection. You may find that the home inspection report shows there are structural issues in the foundation or termites to name a few. These types of findings allow you to walk away from purchasing a home if you choose to do so.

Lastly, if you own a house in the great state of Florida, there are other inspections you the home buyer want to think about doing. Those are wind mitigation and 4-point inspections. The wind mitigation inspection gives homeowners insurance discounts based on certain building attributes while the 4-point inspection tells insurance companies how well the home has been maintained.

Conclusion

When buying a home you are making probably the largest purchase in your life so you want to make sure you have a home inspection done. Keeping copies of this inspection is helpful for the contractors who will need it. Contact Inside and Out Property Inspectors in Jacksonville, FL, and surrounding areas to get your home inspection done today.

https://insideandoutpropertyinspectors.com/wp-content/uploads/2023/05/home_inspection_25.jpeg 917 1375 BJ Johnson https://d39oyu4lp7snwz.cloudfront.net/wp-content/uploads/sites/54/2019/08/31171419/io-favicon-300x300.png BJ Johnson2023-05-16 23:14:142023-05-16 23:14:15Importance of Keeping Your Home Inspection Report
Hail damage markings.

What Does Hail Damage On A Roof Look Like?

April 25, 2023/0 Comments/in Roof/by BJ Johnson

Imagine coming home from a long day at work and the skies start looking very threatening. You rush to pull your car into the garage and get inside where it is safe. As you get settled in your home you start hearing loud bangs. You look outside the window and there are large pieces of ice jumping around on your driveway. Immediately you realize it is a hail storm. Homeowners’ worst nightmares are acts of mother nature that cannot be predicted or changed. Once the storm is over you head outside to inspect the damages to your roof and the rest of the home. What does hail damage on a roof look like? Dents, dings, damaged shingles, bruising to your roof, and loose roof materials are all signs.

Let’s take a look below at some more specifics regarding hail damage on a roof.

How Does Hail Damage The Roof?

Believe it or not, hail can damage a roof in a variety of ways. Let’s take a look below at what those are.

  • Roof slope – Depending on how the roof is sloped on your home will determine the types of hail damage that it might incur.
  • Roof age – The older the roof, the less likely it will survive major damage caused by a hail storm.
  • Roofing materials – Hail can dent, ding, and even cause roofing materials to become loose and out of place.
  • Wind speed – The speed of the wind during a hail storm can cause substantial damage to the roof materials.
  • Wind direction – Depending on how your roof is situated and the direction in which the wind is coming from will determine how damaged the roofing materials will become.
  • Size of the hail – The size of the hail will also determine how bad the damage is. The larger the hail typically means the larger the damage.

Keep in mind that damage to your roof is generally cosmetic. You will want to hire a professional to take a closer look. If the hail is large, you will notice a loss of shingles, loss of granules, bruising to the shingle and even notice other structural changes.

Damaged clay shingles after a hail storm will be a costly replacement.

What Does Hail Damage Look Like?

There will be some noticeable damages to your roof as a result of a hail storm. Let’s take a look below at what some of those damages look like.

  • Fiberglass mat exposure – The force of hail falling from the sky can loosen any shingle and make it slide away which will expose the fiberglass mat underneath.
  • Granule loss – As the hail dings the shingle, the granule material on the shingle will begin to disconnect and fall off the shingle.
  • Damage to the fiberglass mat – If the fiberglass mat is exposed you will notice damage to this protective layer. Damage to the mat could also cause damage to the roof sheathing underneath it.
  • Cracks in the shingle – Hail that causes cracks in the shingle is not good. Cracks and crevices in a roof allow water to get into the roof structure and attic space. This will promote mold growth and other damage to the roof.
  • Damage to the seal – If the hail damages the seal strip or weakens it at all, the shingles will be capable of blowing off the roof during the wind storm. Check for any loose shingles when the storm is over.

Other Recommended Maintenance

Now that you understand what hail damage to a roof looks like, you can proceed with a roof inspection checklist. This allows you to look for any exposed nails, missing tiles, or flashing to name a few. If there are damaged shingles, they should be repaired or replaced immediately.

Next, check the ceilings to make sure there are no wet spots. Any wet spots are a sign that you have a roof leak. Check to see if there is damage to your shingles, flashing, or roof vent seals. You will need to call a professional to check for you.

Lastly, if you really want to know what kind of damage could occur to your roof after a hail storm, get to know what shingles are made of.

Hail damage to your roof needs to be inspected by a professional.

l

When Do I Call A Professional?

To get your roof inspected after a hail storm you should reach out to your local home inspection team. Also, consider hiring a local professionally licensed roofing contractor that understands the specifics regarding your roofing material. Together these professionals can come up with a solution and some reports for your insurance company. Keep in mind that your insurance company will want multiple estimates for roof repairs.

Conclusion

Whenever you are dealing with roofing materials and mother nature you will want to get a professional to take a look. Professionals have the experience and knowledge to know what they are looking for after a hail storm. Additionally, you should call on your local home inspection team for a roofing inspection. Contact Inside and Out Property Inspectors in Jacksonville, FL, and surrounding areas to get your home inspection done today.

https://insideandoutpropertyinspectors.com/wp-content/uploads/2023/04/hail_damage_markings_25.jpeg 1000 1500 BJ Johnson https://d39oyu4lp7snwz.cloudfront.net/wp-content/uploads/sites/54/2019/08/31171419/io-favicon-300x300.png BJ Johnson2023-04-25 15:37:152023-04-25 15:37:15What Does Hail Damage On A Roof Look Like?
Toilet should not be bubbling while you're in the shower.

Why Is My Toilet Bubbling When The Shower Is Running?

April 12, 2023/0 Comments/in Plumbing/by BJ Johnson

Typically, homeowners do not like to deal with maintenance issues. When it comes to plumbing issues, you should consult a master plumber. Unfortunately, this could take some time and any homeowner needs to understand the ins and outs of their homes. So, dealing with toilet bowl issues while in the shower is important to know. This allows you to troubleshoot the problem before any master plumber has time to assist. Why is my toilet bubbling when the shower is running? Three reasons: clogged sewer drain, blocked vent stack, and incorrect plumbing.

Let’s take a look below at some more details regarding your plumbing.

How Does My Plumbing Work?

The plumbing of your home is very simple. Plumbing is set up to feed your fixtures and appliances to successfully transport water to your faucets and appliances. Let’s take a look at what your plumbing is composed of.

  • Air and gas plumbing vent
  • Water feed lines
  • Waste drain lines

Typically, plumbing consists of your sinks, showers, toilets, dishwashers, garbage disposals, and washing machines. Additionally, you might have a few other water and waste needs in your home. Consequently, your plumbing system works by using the laws of physics. Those laws of physics are as follows:

  • Air pressure
  • Water pressure
  • Gravity

The negative part of this system is that if one thing goes awry, it could cause a domino effect of other issues. Hiring a master plumber will allow you to troubleshoot these issues more quickly.

Any issues with your shower and toilet bubbling is cause for a concern with your plumbing.

What Is Causing My Bubbling Toilet While My Shower Is Running?

Believe it or not, there are three main reasons why your toilet is bubbling during a shower. Let’s take a look at what this all means.

  • Clogged sewer drain – A clogged sewer drain will not allow air to escape the proper pipe. As water drains down the pipe of your shower, air must be pushed out from another pipe. This is likely the toilet line, which would cause it to bubble. Additionally, a clog could suck air into the P-trap of the toilet, if there is a clog. Any air being sucked in would cause the toilet to bubble or gurgle.
  • Blocked vent stack – Keeping the vent stack clear of any debris is very important. Sewer gas and odors are pushed out of the vent stack while fresh air is brought back in. A blocked vent stack can create negative pressure in your pipes and prevent proper water flow. Air is forced through your toilet instead of the blocked vent pipe. This likely is your cause for toilet bubbling.
  • Incorrect plumbing – If your builder or contractor does not correctly install the plumbing lines, the air will not escape correctly. Your vent needs to be inspected to ensure that it was installed correctly.

How Do I Fix This?

Fixing these issues can be done with a simple solution first. If any simple solutions do not work, then you will want to call a professionally licensed master plumber.

  • Check with the municipality – Call your local municipality and have them check the sewer line. They can ensure that there is no clog at the end of the plumbing connection.
  • Use duct tape – Take duct tape and cover the shower and sink drains. Use a plunger to plunge your toilet so that the water in the toilet is forced through to loosen the possible clog.
  • Check the vent stack – Climb up on the roof and check the vent stack. Use a flashlight and tie string around it. This allows you to drop it down the vent stack up to 10 feet, and determine if a clog is present. Also, you can take your garden hose and flush water down the vent stack. If there is a clog it will be loosened and pushed back into the sewer system.
  • Check the other toilets – You will want to eliminate each bathroom from having this same issue. Once you have identified the location of the potential clog, you will want to snake the line to dislodge any clog. In some cases, removing the toilet is necessary to properly loosen any clog.
  • Still, have an issue – Call on a master plumber to complete the remaining troubleshooting. Depending on how old the pipes are, roots could have grown into the pipes and created a clog. You will need to get these removed before proceeding to use the plumbing in your home.

Other Recommended Maintenance

Now that you know why my toilet is running when the shower is running, let’s look at a few other maintenance areas. One of those is plumbing problems in old homes. If you have an old home or are considering buying one, it Is important to know that you may encounter more issues. Those are pipes that are lead or galvanized. This is in addition to possible pipe bellies, sewer lines that fail, and old fixtures.

Another area is when the bathroom smells like sewage. This is not something we want to smell when in this area. You will want to check the shower drain, jacuzzi tub, sink, or toilet. It could also be an issue with the sewer system so you may need to contact a professional to take a look.

Lastly, many toilets come with a ball float. However, if yours does not have a ball float and you have a running toilet, you will need to shut off the water system and probably replace the fill valve.

Always hire a plumber to determine why your toilet bowl is bubbling during a shower.

When Do I Call A Professional?

The moment that you have a plumbing issue, you will want to call a professional master plumber to fix your issues. In some cases, homeowners can make the necessary repairs on their own. However, there are some instances where the homeowner does not have the tools or equipment to troubleshoot the plumbing issues. Also, reach out to your local home inspection team. They can conduct a sewer scope inspection to see how big the plumbing issue is.

Conclusion

Discovering why your toilet is bubbling during a shower is important to saving water on your utility bill. If something isn’t right in your toilet, it could end up costing you hundreds on your next utility bill. Getting a solution to this problem is necessary for saving money. Additionally, calling on a local master plumber can help you solve this problem. Consequently, calling on your local home inspection team is also important. Not only can they refer a reputable master plumber, but they can also conduct a sewer scope and inspect your entire plumbing system. Contact Inside and Out Property Inspectors in Jacksonville, FL, and surrounding areas to get your sewer scope inspection done today.

https://insideandoutpropertyinspectors.com/wp-content/uploads/2023/04/toilet_bowl_25.jpeg 1040 1560 BJ Johnson https://d39oyu4lp7snwz.cloudfront.net/wp-content/uploads/sites/54/2019/08/31171419/io-favicon-300x300.png BJ Johnson2023-04-12 16:08:102023-04-13 15:27:53Why Is My Toilet Bubbling When The Shower Is Running?

How To Kill Moss On Brick

March 31, 2023/0 Comments/in Home Maintenance/by BJ Johnson

Owning a home requires a lot of maintenance. Imagine that you are about to throw a summer party and you haven’t paid any attention to your brick patio and exterior brick walls. You take a look around as you plan your party preps and notice a large amount of moss has taken over your brick. Are you wondering how to kill moss on brick? Either hire a professional cleaning service or utilize an eco-friendly chemical and your pressure washer.

Let’s take a look below at the best ways to manage and kill or clean moss off brick.

How Can I Clean Moss Off Brick?

Applying a household chemical such as bleach and water to the moss on the brick is a great way to kill and remove it. Keep in mind, bleach is not eco-friendly and can be replaced with other products. One of the safest products to use would be vinegar. Mixing equal parts vinegar with equal parts water to ensure an environmentally friendly solution that can be used to kill moss. Also, it will not kill surrounding plants. Let the mixture soak into the moss for 15 to 20 minutes. Then take your pressure washer and scrub brush to remove the moss from the brick surface.

Using the right chemicals will help you kill and clean moss off brick.

What Are The Best Ways To Keep Moss Off Brick?

Believe it or not, there are a few ways that you can keep moss growth off your brick surfaces. Let’s take a look below at what those options are.

Sunlight

Exposing your brick wall or brick patio to sunlight is a great way to keep moss off of the surface. Moss only grows on dark and damp surfaces. Sunlight will naturally kill or prevent moss from growing.

Irrigation

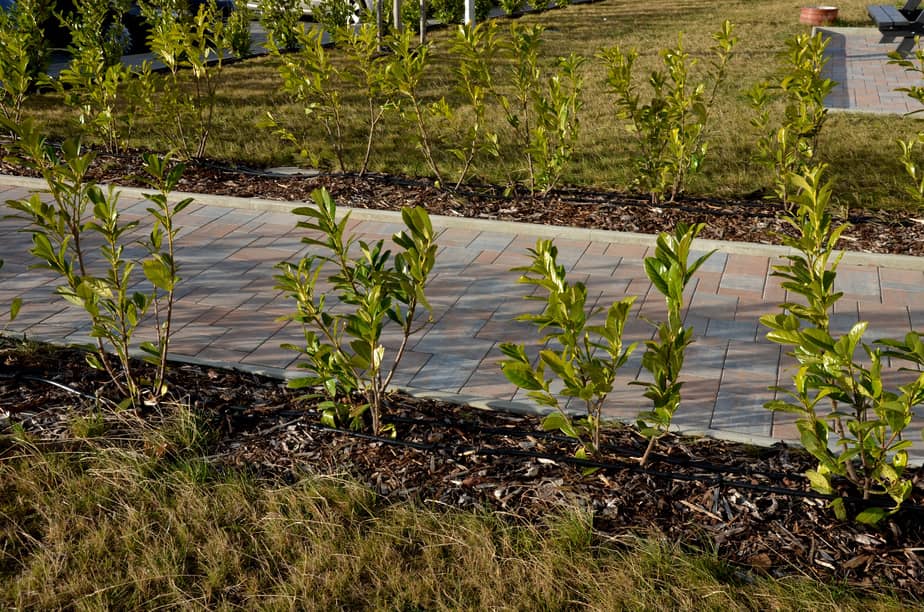
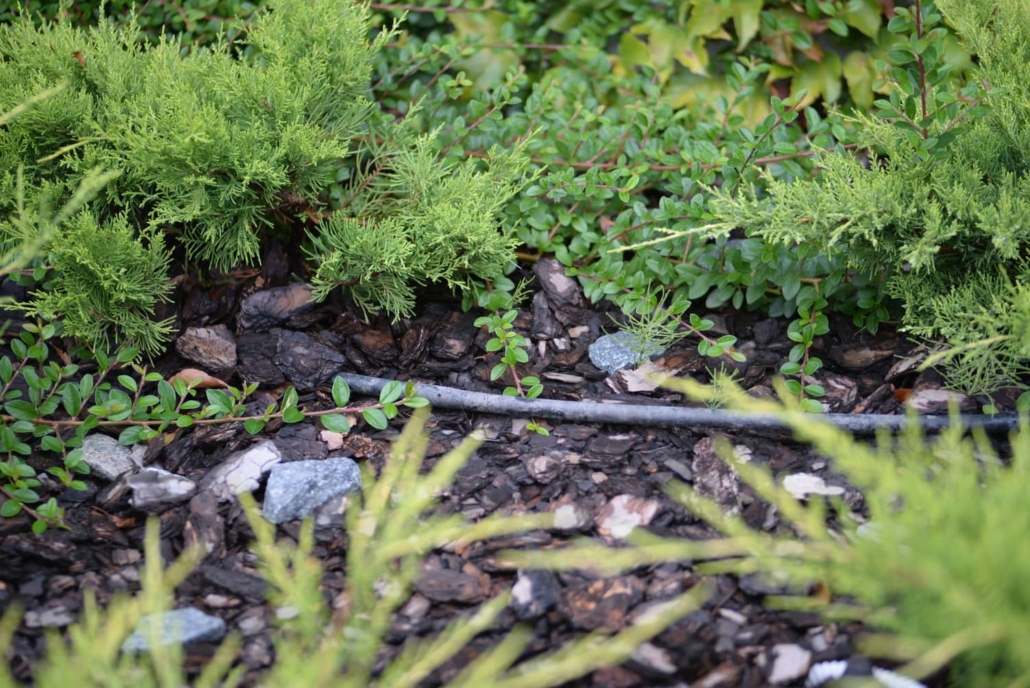
Check your sprinkler system for where the zones are spraying. Also, check for leaks in your sprinkler system. A leaky faucet or sprinkler head can promote the damp and dark zone for moss to grow.

Boiling Water

Using hot water, such as boiling water is a great way to prevent moss from growing on your hardscape. Additionally, a good scrubbing after the boiling water is applied is a great way to keep the moss off of the brick. Also, it is eco-friendly preventative maintenance.

Vinegar

A vinegar and water mixture is a great combination for treating and killing moss. Anytime you use an eco-friendly solution, this is a great way to kill and keep moss away. Be sure to scrub the area or use a pressure washer to remove any moss from the brick.

Power Washing

Pressure washing or power washing the surface is a necessity for completely removing the moss from your brick. Completing this project once a month will ensure that your brick surfaces stay clean and look brand new. Use your garden hose and a nozzle if you do not have access to a power washer.

Baking Soda

Another great eco-friendly product for killing moss from the brick is baking soda. Pour the baking soda directly on the moss and leave it overnight. The next day, brush the area and scrub or power wash the moss off of the brick.

What Other Options Do I Have?

Unfortunately, if you aren’t big on eco-friendly concepts and want to zap away the moss and surrounding vegetation for a long time, you can use the following chemicals below.

Bleach

Mixing one cup of bleach with two gallons of water and spraying the solution onto moss will suffice. Let the mixture sit for 15 minutes. Using water in a spray bottle allows the beach to soak into the moss and kill it. Also, avoid pouring bleach directly onto the surface.

Commercial Moss Killer

Commercial moss killers are products that are not deemed to be very safe. Although these products can be purchased at your local hardware store, it is important to consider using these products as a last resort.

How Can I Clean Moss Off Other Surfaces?

Remember that moss can grow on several solid surfaces. Damp and dark surfaces are breeding grounds for moss. If you have a situation of moss growing on your solid surfaces other than brick, use a spray bottle with a water and bleach mixture. Spray the solution on the brick and use a scrub brush to remove the moss from the solid surface. Keep in mind that using bleach should be done with protective gear and away from pets and children. Consequently, pressure washing regularly with an eco-friendly solution such as vinegar is perfect for maintaining your solid surfaces.

How Much Does It Cost To Clean?

Keep in mind that the cost of removing moss from brick walls or patios will be based on the square footage of the project. The national average cost to remove the moss ranges from $0.58 to $1.00 per square foot. Additionally, you will be expected to pay a labor charge to complete the project. Most professionals charge a service fee between $45 and $65 per hour. Also, in some cases, you will just pay a flat rate of $90 to $120 per job.

Other Recommended Maintenance

Now that you are aware of how to kill moss on brick, it is a great idea to read up on how to kill moss on your roof. Believe it or not, there are likely similarities between killing moss on brick and killing moss on a roof.

Next, while you have your pressure washer out cleaning your brick patio, you might want to consider cleaning your stucco walls. It is important to read up on easy ways to clean stucco before you go assuming that you have the answer. Reading the suggestions might surprise you and make your task a lot simpler.

Lastly, gain an understanding of where moss and mold like to grow. As stated above, dark and damp places are very popular for moss and mold. In some cases, mold will grow well before any moss has a chance. This can occur on solid surfaces such as concrete blocks. If you happen to have a concrete block home or have used concrete blocks in parts of your home, you will want to know how to control mold growing on concrete blocks.

Killing moss off your brick wall or patio brick is fairly simple.

When Do I Call A Professional?

Getting moss off your brick walls or paver brick patio is a project that can be easily accomplished. If you don’t have a pressure washer available, you are going to want to use a professional pressure washing company. Also, you should not mix your chemicals incorrectly. Using the wrong chemicals can damage your brick and cause health concerns for you and your family. Consequently, to avoid any issues with your health and chemical damage, use a professional.

Conclusion

Mosses are known to grow on a brick when the area is dark and damp. The moment that you notice moss growing on your brick wall or brick paver patio, it is likely an area that does not get sun. Consult your local pressure washing professional on how to kill and clean the moss off of your brick. Also, call on your local home inspection team to determine where the moss is likely to grow back and where it is concentrated the most. Reach out to Inside and Out Property Inspectors in Jacksonville, FL, and surrounding areas to get your home inspection done today.

https://insideandoutpropertyinspectors.com/wp-content/uploads/2023/03/moss_on_brick_wall_25.jpeg 1072 1606 BJ Johnson https://d39oyu4lp7snwz.cloudfront.net/wp-content/uploads/sites/54/2019/08/31171419/io-favicon-300x300.png BJ Johnson2023-03-31 00:17:192023-03-31 00:17:19How To Kill Moss On Brick
Baking soda and citrus can help get the smell out of your carpet.

How To Get Smell Out Of Carpet

March 16, 2023/0 Comments/in Home Maintenance/by BJ Johnson

When you make the big decision of purchasing a home, you want to remind yourself that this investment requires upkeep and maintenance. Having pets that wander your carpet or spills that occur on the carpet could cause a few concerns. In most cases, homeowners do not think of the overuse of their carpets. Some homeowners will hire a carpet cleaning company once a year to clean the carpets. However, this doesn’t necessarily solve all of the issues. Luckily, if your carpet smells, a carpet cleaning company might help. Wondering how to get the smell out of carpet? There are a variety of ways to get this done, baking soda, and vinegar are always an option.

Let’s take a look below at how you can keep your carpet smelling fresh.

Vacuum the baking soda out of the carpet after it has had the time to soak up the smells from your carpet.

What Are The Steps?

Every home project requires a particular level of instructions or directions. Let’s take a look at how we can get the foul odors out of the carpet.

  1. Sprinkle the Baking Soda – Baking soda has many uses in your home. As a natural odor absorber, it can be used in your closet, garbage, garbage disposal, or on your carpets. Spread the baking soda around your carpet.
  2. Spread the Baking Soda – With your shoes on, walk around the carpet to spread the baking soda around the carpet. It is important to spread the baking soda around.
  3. Let it settle in – Allow the baking soda to settle into the carpet for roughly 30 minutes. You want the baking soda to seep down to the base of the carpet. Not only will it soak up odors, but it will also grab excess moisture.
  4. Suck it up – Grab your vacuum cleaner and vacuum up the baking soda.
  5. Still smells – Repeat these steps until you no longer have a smell.

How Can I Keep My Home Smelling Fresh?

Luckily, if the baking soda trick doesn’t work, there are a few other tricks that you can pull off. Let’s take a look below at what those other options might be.

  • Essential oils – Masking the smells in your home with essential oils is a great way to naturally eliminate odors. If you don’t have an oil diffuser, just mix the correct amount of oil drops with water into a spray bottle. Then spray the mixture onto your carpet.
  • Fruit peels – Cut up the fruit peels for oranges, limes, or lemons, and grind them into your garbage disposal. This will create a fruity smell in your kitchen that can mask other odors in your home.
  • Crockpot – With the lid off and the crockpot on the “low” setting, mix baking soda and water and let the heat from the crockpot do the trick.
  • Vinegar and water – If you have a mildew smell coming from your carpet, mix 2 cups of warm water with 1 cup of distilled white vinegar. Gently spray the vinegar solution onto your carpet. Once the carpet dries, you will no longer smell the vinegar scent.

Keep in mind that you can also look to cleaning products such as hydrogen peroxide or carpet shampoo. You will want the area dry and if not, use a fan to air dry the carpet.

Other Recommended Maintenance

Now that you have an idea of how to get a smell out of your carpet, you can begin reading up on how to remove mold from your carpets. Mold is a likely proponent of your smelly carpet. Understanding how to remove the mold will determine if you need to replace the carpet or simply get it cleaned.

Next, while using a carpet cleaner or scrubbing away mold and stains, soap is likely to settle on the carpet. Removing the soap from the carpet is important. You will want to read up on how to clean soap out of your carpets. This will ensure that the carpet gets properly dried.

Lastly, the moment that you start cleaning your carpet, you will want to know how long it takes the carpet to dry. If you do not dry the carpet promptly, then you risk the carpet breeding mold and mildew. Consequently, if this occurs, you will be back to square one about getting smells out of your carpet.

Hire a professional carpet cleaning service if you do not have the time to remove smells from your carpets.

When Do I Call A Professional?

Carpet cleaning services are fairly prevalent in most communities. If you do not have a local carpet cleaning service, it is possible that you could rent a carpet cleaning machine from your local hardware store. Once you have completed the recommended cleaning steps above, determine how effective they were. If you aren’t satisfied, reach out to your local home inspection team. They can inspect your carpet and other floors. Also, they can refer a reputable carpet cleaning company.

Conclusion

After you have attempted to get the smells out of your carpet keep a record of how many times this maintenance occurs. Consequently, this might be a situation where it is time to replace your carpet. In some cases, the padding underneath the carpet can get moldy and soggy and creates a constant smell. This would be a good time to get a home inspection. They can conduct a thorough inspection of your carpet and flooring. Reach out to Inside and Out Property Inspectors in Jacksonville, FL, and surrounding areas to get your home inspection done today.

https://insideandoutpropertyinspectors.com/wp-content/uploads/2023/03/baking_soda_and_fruit_peels_25.jpeg 960 1440 BJ Johnson https://d39oyu4lp7snwz.cloudfront.net/wp-content/uploads/sites/54/2019/08/31171419/io-favicon-300x300.png BJ Johnson2023-03-16 15:23:382023-03-16 15:23:38How To Get Smell Out Of Carpet
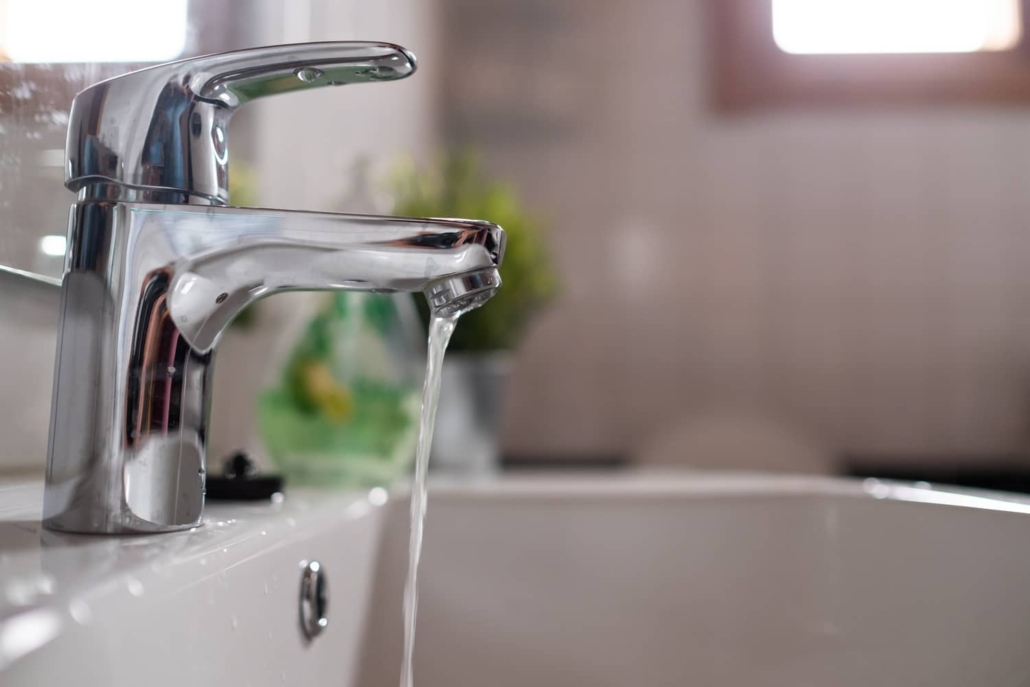
Removing the drain from your bathroom sink is easy.

How To Remove A Drain From Bathroom Sink

February 23, 2023/0 Comments/in Home Maintenance/by BJ Johnson

Owning a home requires you to complete a lot of maintenance and projects. One of those rare projects deals with clearing your sink drain and keeping the P-trap free and clear. If you don’t want your bathroom sink drain to clog, you will want to ensure that it is cleaned out on a regular basis. Ever wonder how to remove a drain from a bathroom sink? Believe it or not, there is a simple nine-step process to remove your sink drain.

Let’s take a look below at how to remove the drain from your bathroom sink.

Recommended Equipment?

If you need to remove the drain of your bathroom sink you will want specific tools. Let’s take a look at what those tools are.

  • Flashlight
  • Pliers or Wrench
  • Bucket
  • Vinegar or other cleaning supplies
  • Hair clog removal tool
  • Scrub brush
Loosening the P-trap can be fairly simple with the right tools.

What Are The Best Steps?

Believe it or not, the steps to removing your bathroom sink drain are fairly easy. If you don’t have the tools or the patience to complete this project, reach out to your local professionally licensed master plumber. Let’s take a look below at what those steps are.

  1. Place your bucket under the P-trap that is located under your sink.
  2. Turn off the water for both of your hot and cold faucet lines.
  3. Pull the stopper and then remove the spring clip attached to the pivot rod and then unscrew the pivot nut from the connected drain pipe under the sink.
  4. Then remove the drain stop from the drain pipe.
  5. Unclog the drain with your hair removal tool.
  6. Now unscrew each section of the P-trap from the main drain pipe.
  7. Use hot water and vinegar to rinse the drain pipe and clean it from any gunk that is remaining.
  8. Pop the drain pipe from the sink to remove the drain pipe.
  9. Clean the drain pipe and the sink.
  10. Use a plumber’s putty and replace the drain pipe in the sink so that you have a tight seal.
  11. Re-attach the plumbing below the sink and clean all areas that are still dirty.

Following these steps allows you to pop the drain stopper and remove the sink stopper to clean the stopper. If you want to remove the bathroom sink drain assembly, then unscrew the nut and take out the bathroom sink stopper so that the drain opens are keys.

How Much Does It Cost?

The good thing about removing a drain from your bathroom sink is that it is fairly simple to do. However, if you don’t have the tools or the energy to get this project done, you can call on a local master plumber. The average labor charge for a project like this is between $40 and $50 per hour.

Other Recommended Maintenance

Now that you know how to remove the drain from your bathroom sink, you can check on why the sink drain pipes might be leaking. Once you determine the issue, you can use a patch and clamp with some epoxy putty to stop the leak.

Next, while you are checking your plumbing, you can work on your kitchen sink. Make sure that the kitchen faucet is tight so that there are no leaks. Use the wrench that you used to remove the drain from your bathroom sink to tighten the kitchen faucet.

Lastly, if you have a clog in your sink drain and cannot remove the drain from your bathroom sink, consider pouring salt down the drain. Pouring salt down the drain and rinsing it with hot water allows the salt to emulsify and work to remove the clog in your bathroom sink drain.

Getting the drain cap off to remove the bathroom sink clog is fairly simple.

When Do I Call A Professional?

If removing the drain from your bathroom sink becomes an issue, call on a local master plumber. Not only can they replace your bathroom sink drain, but they can also clean it and check all of the plumbing in your bathroom. Keep in mind, calling on your local home inspection team is also a great idea. Additionally, they can inspect your entire plumbing system. Also, they can refer a reputable Master Plumber.

Conclusion

When it comes to removing your bathroom sink drain, can be a fairly simple project. However, if you don’t have the tools or the strength to remove the drain, you will want to call a professional. Consequently, using a master plumber can allow you the opportunity to have all of your sink drains removed for cleaning. Also, call on your local home inspection team to inspect your entire plumbing system checked. Contact Inside and Out Property Inspectors in Jacksonville, FL, and surrounding areas to get your sewer scope inspection done today.

https://insideandoutpropertyinspectors.com/wp-content/uploads/2023/02/bathroom_sink_25.jpeg 1008 1512 BJ Johnson https://d39oyu4lp7snwz.cloudfront.net/wp-content/uploads/sites/54/2019/08/31171419/io-favicon-300x300.png BJ Johnson2023-02-23 20:03:422023-02-23 20:03:43How To Remove A Drain From Bathroom Sink
Downspouts can match your homes exterior color to blend into the curb appeal.

How Many Downspouts Do I Need?

February 8, 2023/0 Comments/in Roof/by BJ Johnson

Owning a home comes with a lot of maintenance needs and decisions of what to spend your money on for upgrades. Keeping water away from the foundation of your home is one of the more important upgrades. The best way to accomplish this task is by installing a gutter system with the proper number of downspouts. How many downspouts do I need? This varies by home. Gutter size, the roof slope, the roof size, and the climate in your area are all factors.

Let’s take a look below at some more specifics regarding downspouts.

What Is A Downspout?

Downspouts are metal or flexible pipes that connect your gutters to the ground. They run vertically up your home’s exterior walls and have the main purpose of carrying water from the gutters to the ground. Downspouts ensure that water flows away from your home, rather than puddling up next to your foundation.

Installing downspouts should be done by a professional installation company who has knowledge of the proper installation.

Where Should They Be Installed?

Installing downspouts is going to be based on a few factors. Typically, they are installed every 30 to 40 feet. Also, in most cases, you will install downspouts at each of the gutter sections. Let’s take a look to see what else determines how many downspouts you might need.

  • Climate – Where you live and how much rain occurs will determine how many downspouts are needed to alleviate the water pressure on your gutters.
  • Gutter size – If you install larger gutters you will likely need fewer downspouts. However, if you install smaller gutters you will need more downspouts to handle the volume of water and gutter capacity.
  • Roof area – The larger the roof the more water is moved. This means more downspout locations to accommodate the volume of water being moved around and reduce the possibility of water damage.
  • Roof slope – The higher the slope of the roof or roof pitch, the faster the water will seek the ground. Also, extra downspouts can be used to alleviate any issues that the roof slope may cause.

Making sure that your gutter installation company measures and cuts your gutters properly is key. The square footage of your roof will deal with so much water at a time, so having the right gutters and amount of downspouts is necessary.

Other Recommended Maintenance

Now that you have a grasp of how many downspouts you need for your gutter system, this might be a great time to read up on if you need gutters around your house. Each home is unique in this situation, so call on a gutter specialist to go over the needs of your roof and home.

Next, having gutters installed requires maintenance. In many cases, homeowners cannot get up on a ladder to clean their gutters. However, there are ways to clean your gutters without a ladder. Read up on all of your options before you call on a cleaning crew to come out and clean your gutters.

Lastly, keeping leaves, debris, and birds out of your gutters can be tricky. You can try gutter guards or other means of keeping birds out of your gutters. Be sure to explore all of your options before you spend too much money trying to solve the problem.

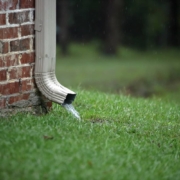
Downspouts are great about keeping water away from your home.

When Do I Call A Professional?

Maintaining your gutter system and downspouts is very important. This will ensure that the foundation of your home does not get damaged. Consequently, be sure to hire the right gutter installation company in your area. If you aren’t sure who is reputable, reach out to your local home inspection team. Also, they can inspect your roof to ensure it is safe for a gutter installation. Additionally, they will refer a reputable gutter installation company.

Conclusion

When it comes to gutters and downspouts it is a great idea to hire a professional. They have the experience and knowledge about how many downspouts you will need. This is based on the square footage of your home. Also, call on your local home inspection team to get a roof inspection. Additionally, this is a good idea before spending a lot of money to install a gutter system with downspouts. Contact Inside and Out Property Inspectors in Jacksonville, FL, and surrounding areas to get your home inspection done today.

https://insideandoutpropertyinspectors.com/wp-content/uploads/2023/02/downspouts_25.jpeg 1000 1500 BJ Johnson https://d39oyu4lp7snwz.cloudfront.net/wp-content/uploads/sites/54/2019/08/31171419/io-favicon-300x300.png BJ Johnson2023-02-08 02:40:492023-02-08 02:40:50How Many Downspouts Do I Need?
Bay windows add curb appeal to any home.

Is It Worth Replacing Windows Before Selling A House?

January 21, 2023/0 Comments/in Home Sellers/by BJ Johnson

When it comes to selling a home every homeowner wants to get the most money out of their investment. In some cases, there can be a huge upside when the windows are brand new. The words “brand new” give the buyer a sense of excitement about their new home purchase. Anytime that you can provide the potential buyer with the idea that one less project is needed makes the home buyer happy. Is it worth replacing windows before selling a house? Not necessarily. It is recommended that you update the weather stripping and caulking.

Let’s take a look below at when and why you should replace the windows in your home.

What Are The Various Types Of Windows?

When it comes to selecting new windows for your home the choices are abundant. Depending on the style of your home will determine the style of the windows that you select. In some cases, you can have a structural architect look into completely changing some of your windows looks. Let’s take a look below at what the nine most popular windows are.

  • Picture – These are large windows that have little functionality. They are energy-efficient due to the fact that they are completely sealed shut. This provides higher energy cost savings.
  • Hopper – These windows are found mostly in basements and bathrooms. They are small and compact, for low-level spaces. Typically they are crank, push-open, or tip-down style windows.
  • Double-hung – these windows are two in one. They both slide up and down within the frame. This provides increased airflow to any room. Also, they are easier to clean on the inside and outside.
  • Single-hung – With these windows, only the bottom window moves up and down. This will increase energy efficiency as the top window is sealed.
  • Bay – These windows are large and centrally fixed. On each side, there are smaller angled windows. This provides more interior room space and will increase the home’s curb appeal.
  • Bow – More interior room space and a panoramic view. Bow windows are 4 or more windows that are in a curved framing.
  • Casement – These are most often the windows installed in contemporary and traditional-style homes. They are poor at providing wind protection. Their seals provide great energy efficiency. Also, they are crank-style window that swings outward from the hinges.
  • Slider – These windows are two or more panels that slide left or right to open. Additionally, they provide great views and great air circulation and ventilation for the home.
  • Awning – These windows open outward from their frame. They are great at keeping the rain out and providing additional air circulation. Additionally, they are difficult to break into and will keep any intruder away.
There are so many types of window options. Be sure to select the ones that fit the style of your home.

When Should I Replace Windows?

Replacing your windows is not a fun or exciting project for a homeowner. Typically, it can be one of the more expensive projects to complete due to the number of windows needing replacement. Let’s review when it is best to replace your windows.

  • Energy-Efficiency upgrade – If you purchase a home or live in a home that has older windows, it might be a good idea to replace them. Increased heat in your home will cause the AC unit to work harder to cool your home. Updating your windows is a great way to improve your energy efficiency.
  • Broken – Anytime that a window breaks you need to replace it. Without replacing it, you risk allowing rain, insects, or even strangers into your home.
  • Drafty – Whenever you feel a draft near your window or window sill you are losing energy. If you want to maintain your energy efficiency in the home, you will need to update the caulking and weather-stripping around the window.

Is It Worth Replacing Windows?

Replacing your windows can immediately increase your home value and save you money on utility bills. Let’s take a look below at what the return on investment might be and whether is it worth replacing windows before selling your home.

  • Window upgrades will provide you with a greater curb appeal and aesthetic value as the home looks more up-to-date.
  • Energy efficiency is increased when you upgrade your windows.
  • If you need to change a single-glazed pane window with a more energy-friendly window it is worth it.
  • If you have noticeable damage to your window frames such as rotten, cracking, damaged, or other issues, it is beneficial to replace the window.

Installing newer windows will immediately impact your home. You will begin to save money on your utility bills and the home will have an immediate increase is aesthetic value.

How Much Do They Cost?

Replacing your windows will vary in cost based on the type or style of window that you are installing. The national average for replacing a standard window ranges from $600 to $900 per window. Additionally, if there is added work needed a contractor will charge you an extra $100 per window. Keep in mind that most homes have an average of 10 windows per home. A quick calculation puts your investment at between $7,000 and $12,000 per home.

Other Recommended Maintenance

Now that you are knowledgeable on if it is worth upgrading your windows before selling your home, it’s a good idea to look into other window concerns such as why your windows might leak when it rains. Understanding the ins and outs of your windows is important. It is possible that you purchased a home that needs to upgrade the windows. No matter the reason, getting your windows inspected for leaking and condensation can go hand in hand.

Next, if you begin to notice dirt or moisture buildup in your windows, it is possible that you have double-pane windows and a seal is broken. If you cannot get this fixed with a fan, dehumidifier, or water snake, you might need to replace the windows.

Lastly, be sure to read up on the style or material used for the windows that you purchased. For example, if you purchased vinyl windows you will want to know if they warp or operate differently than other window materials.

Hiring a professional window installation company will ensure that it is worth replacing windows before selling your home.

When Do I Call A Professional?

The moment you decide that you want to update your windows you will want to reach out to a reputable professional window installation company. Be sure to call on at least three companies to get multiple quotes before you invest. If you aren’t sure who to call or what is needed you can reach out to your local home inspection team. they can inspect your windows and make recommendations for fixes or upgrades. Additionally, they can recommend a reputable professional window installation company.

Conclusion

When you get ready to sell your home make sure you reach out to your local home inspection team. They can inspect the windows during a whole home inspection and recommend to you if upgrading the windows is necessary. Typically, they have a good idea as to what is new on the market for homes and how you can help separate your home from your neighbors. Consequently, if you need window upgrades, be sure to get multiple quotes so that you can select the most reputable company to complete the project in a timely manner. Contact Inside and Out Property Inspectors in Jacksonville, FL, and surrounding areas to get your home inspection done today.

https://insideandoutpropertyinspectors.com/wp-content/uploads/2023/01/bay_windows_25.jpeg 422 750 BJ Johnson https://d39oyu4lp7snwz.cloudfront.net/wp-content/uploads/sites/54/2019/08/31171419/io-favicon-300x300.png BJ Johnson2023-01-21 16:12:482023-01-21 16:12:48Is It Worth Replacing Windows Before Selling A House?
Toilet tank cylinder float fill valve.

How to Adjust the Water Level in a Toilet?

January 9, 2023/0 Comments/in Home Maintenance/by BJ Johnson

One of the few frustrating maintenance items in a home involves your toilet. When the fill valve in your toilet begins to malfunction, it could cause the water levels in your toilet to be off. Once you flush the toilet, the fill valve will work to refill the toilet tank and bowl. Unfortunately, if the fill valve is not working in unison with the amount of water needed in your toilet bowl overflowing could occur. How do I adjust the water level in the toilet? In most cases, use your screwdriver to adjust the fill valve float in your toilet tank.
let’s take a look below at what this means.

Ball and arm float valve.

What Type Of Fill Valve Do I Have?

Before you decide how to adjust the water level in your toilet, you need to know the type of fill valve that you have. Take the lid off your toilet tank and look at the type of fill valve. Let’s take a look below at what type of fill valves could be in your toilet tank.

  • Cylinder style float – This style of fill valve looks like a plastic cylinder that has an opening going through the middle of the cylinder.
  • Ball and Arm float – This style of fill valve has a metal arm with a ball attached at the end of it.

How Do I Adjust Each Fill Valve?

Adjusting the water level in your toilet tank and toilet bowl should occur with the fill valve. Each type of fill valve can be adjusted so that your water levels can shift to meet your needs. Let’s take a look below at the steps to adjust each type of fill valve.

Ball and Arm Float

  • Remove the toilet tank lid.
  • Check the current water level in the tank so that you know how to adjust the float.
  • Check the height of the floating ball that is connected to a metal rod. You will see a plastic ball that is floating at the water level.
  • Turn off the water. Twist the water line feed into the off position. There is an oblong handle that you can turn clockwise until the handle is tight.
  • Flush the toilet to empty the water from the toilet tank.
  • Now, adjust the water level by turning the screw that is connected to the ball and arm float with a screwdriver.
  • Turning the screw clockwise will raise the water level.
  • Turning the plastic screw counterclockwise will decrease the water level.
  • Flush the toilet to test the water levels and determine if you need to make any other adjustments.

Cylinder style Float

  • Remove the toilet tank lid.
  • Check the current water level so that you know how to adjust it.
  • Find the cylinder float on the shaft of the fill valve.
  • Turn off the water. Twist the water line feed into the off position. There is an oblong handle that you can turn clockwise until the handle is tight.
  • Flush the toilet to empty the water from the toilet tank.
  • Look for the release clip that is connected to the change stem. Also, this connects the float to the stem.
  • Gently pinch the release clip to raise or lower the float.
  • If that doesn’t work, get your screwdriver and gently twist the plastic screw located on the cylinder arm.
  • Turn the plastic screw clockwise to lower the cylinder float.
  • Turn the plastic screw counterclockwise to raise the cylinder float.
  • Check your desired water level by flushing the toilet and testing out the level each time you twist the screw.
  • Make adjustments based on the water level.

Other Recommended Maintenance

Now that you learned about adjusting the water level in the toilet, let’s take a look at other areas of maintenance.

One of those areas is the toilet leaking. If you see water outside of the toilet on the floor near the base, you want to stop using it. This is because the water has bacteria in it and will ruin the floor. You will want to make sure the t-bolt is in place and check the wax ring.

The next area is a gurgling bathroom sink. If you have a gurgling bathroom sink, this can be due to a vent pipe clogged, a bathroom drain clogged, a clogged garbage disposal, a P-trap that is busted, or a clogged drain.

Lastly, if you see that you have low water pressure in the sink, it can be due to a few things. It can be the aerator, a blockage in the faucet, or pipes. Once you figure out what it is, you can also flush the water heater to increase the water pressure.

Cylinder style float in toilet bowl.

When Do I Call A Professional?

Dealing with the maintenance of your toilet bowl and toilet tank can be rather frustrating. In most cases, it is best to hire a local master plumber. Not only can they update the fill valve in your toilet tank, but they can also check for leaks. If you aren’t sure who to call, reach out to your local home inspection team. Consequently, they can inspect your entire plumbing system and recommend any plumbing repairs. Also, they can refer a reputable local master plumber to complete the project.

Conclusion

Having to mess with a plumbing project can be rather frustrating. Most homeowners don’t have the tools to loosen or disconnect parts involved with a toilet. Additionally, having the strength to disconnect the various parts could be troubling. Luckily, you can reach out to your local reputable master plumber. Before you do that, go ahead and reach out to your local home inspection team. They can inspect and assess your entire plumbing system. Contact Inside and Out Property Inspectors in Jacksonville, FL, and surrounding areas to get your sewer scope inspection done today.

https://insideandoutpropertyinspectors.com/wp-content/uploads/2023/01/toilet_fill_valve_25.jpeg 1006 1512 BJ Johnson https://d39oyu4lp7snwz.cloudfront.net/wp-content/uploads/sites/54/2019/08/31171419/io-favicon-300x300.png BJ Johnson2023-01-09 18:56:142023-01-09 18:56:15How to Adjust the Water Level in a Toilet?
Page 1 of 7123›»

Categories

Recent Posts

  • How To Measure For Shutters
  • Importance of Keeping Your Home Inspection Report
  • What Does Hail Damage On A Roof Look Like?
  • Why Is My Toilet Bubbling When The Shower Is Running?
  • How To Kill Moss On Brick

Archives

Inside and Out Property Inspectors Logo

SCHEDULE YOUR INSPECTION TODAY!

 
Contact Inside & Out Property Inspectors Inc. today to schedule your home inspection with an InterNACHI Certified Professional Inspector in Northeast Florida.

$30 Hero Discount for Military, First Responders, and Teachers

Call 904-395-1900 Get a Quote
​
Certified Master Inspector
Northeast Florida Association of Realtors
Fabi Logo
Jacksonville 7945 Pine Lake Rd, Jacksonville, Florida 32256  |  St. Augustine 52 Tuscan Way, St. Augustine, Florida 32092

© 2019 Inside and Out Property Inspectors All rights reserved | Website by WolfPack Advising
  • Facebook
  • Twitter
  • Youtube
  • LinkedIn
  • Yelp
  • Instagram
  • Contact
  • DIY Home Maintenance Videos
  • Approved Contractors
  • Terms of Use
  • Sitemap
Scroll to top