Water pipes are an integral part of any residential or commercial building’s plumbing system. They are responsible for the distribution of water throughout a property, ensuring that clean water is accessible at various points such as sinks, showers, and outdoor faucets. Sometimes air can get in the water pipes. We will learn in this article about where water pipes are located, identifying air in the pipes, and what causes air in water pipes.
What Are Water Pipes?
Water pipes are cylindrical tubes designed to transport water from the main supply to various fixtures and appliances within a building. These pipes can be made from various materials including PVC, copper, galvanized steel, and PEX.
Where Are Water Pipes Located?
Typically, water pipes are located within walls, beneath floors, and above ceilings. In some cases, they can also be found in the ground outside buildings, connecting the municipal water supply to the internal plumbing system.
How to Identify Air in Water Pipes?
Air trapped in water pipes usually manifests as irregular water flow, loud noises such as banging or whistling when a tap is turned on, sputtering at the outset of water flow, or vibrations in the pipes. This may help you find and give you ideas about what the causes of air in water pipes may be.
What Causes Air in Water Pipes?
Air in the water pipes can be caused by a few things:
Water Supply Turnoff: Shutting off the main water supply can sometimes allow air to enter the system.
System Repairs or Modifications: Any repairs or changes to the plumbing can introduce air into the pipes.
Faulty Valves or Seals: Compromised valves or seals may suck air back into the pipes when water pressure drops.
High Water Velocity: High speeds of water flow can create vacuum pockets that trap air.
Improperly-Sized Pipes: Oversized or undersized pipes can cause air chambers to form.
Why Air in Water Pipes Needs to Be Removed
Air in water pipes needs to be removed because it can lead to inconsistent water pressure. It can also lead to potential pipe damage due to water hammer, noise disturbance, and inefficient water heating.
Steps to Remove Air From Water Pipes Yourself
If you figure out what the causes of air in your water pipes are, you can remove the air yourself. Take a look below at the steps.
Turn Off Water Main: Locate the main shut-off valve and turn off your water supply.
Open Highest Faucet: Go to the highest level in your home and open the faucet.
Open Lowest Faucet: Find the lowest faucet in your home, often this is an outdoor hose bib or basement sink, and open it as well.
Turn On Water Supply: Reopen the main valve to allow water to push the air out through the open faucets.
Close Faucets: Once water flows consistently without sputtering, close the lowest faucet followed by the highest one.
How to Protect Your Plumbing?
Regular maintenance such as inspecting for leaks, proper insulation, and checking water pressure can extend the lifespan of your water pipes. It can also prevent issues like airlocks. To protect your plumbing, avoid chemical drain cleaners. Additionally, reduce water pressure if it’s too high, and soften hard water to minimize mineral buildup. Also, never allow your pipes to freeze. These are all good ways to make sure you protect your pipes.
Maintaining Pipes in Your Home
Now that you are aware of how air has gotten into your water pipes you can begin reviewing other possible plumbing issues in older homes. Once you purchase an older home, it is a great idea to read up on all of the possible issues that could arise. This allows you to save money towards any big repair needs down the road.
Next, there are other areas in your home where you might notice air bubbles in your water lines. The toilet is often a place that has an issue with too much air, based on the water pressure and the need to swap out old equipment. Be sure to understand why your toilet bubbles when the shower is running. This could be a result of air in your water lines.
Lastly, if you notice a problem with your bathroom smelling like sewage, you should immediately investigate this. Checking all drains and other possible causes during a sewer scope inspection is key. As you work to get the air out of your water pipes, you might also get rid of any clogs or bacteria build-up that has caused this foul smell.
When to Call a Professional
If you’ve attempted to remove the air and are still experiencing problems, it may be time to call a licensed plumber. Also, if you’re uncomfortable performing these steps yourself, reach out to a professional. It can be difficult to figure out the solution, especially if it is something a little more technical. A professional can help solve the issue.
Check out the video below about getting the air out of the water pipes in your house.
https://insideandoutpropertyinspectors.com/wp-content/uploads/2023/07/water_droplets_25.jpeg10001500BJ Johnsonhttps://d39oyu4lp7snwz.cloudfront.net/wp-content/uploads/sites/54/2019/08/31171419/io-favicon-300x300.pngBJ Johnson2024-02-21 02:54:262024-02-21 02:54:26What Causes Air In Water Pipes?
For homeowners with shrubs, drip irrigation offers an efficient way to keep plants healthy while conserving water. But how long should you run drip irrigation for shrubs? The ideal duration depends on several factors like soil type, climate, and the water needs of your plants.
In this post, we’ll cover the benefits of drip irrigation, how it works, and considerations for setting your system’s runtime when watering shrubs. You’ll learn general time recommendations based on your conditions. We’ll also discuss signs your shrubs need more or less water. With the right drip irrigation schedule, you can nurture robust root systems, prevent disease, and reduce your water usage.
What is Drip Irrigation?
Drip irrigation is a water-saving system that gives plants a drink right where they need it – at the roots. This targeted approach sets it apart from sprinklers that spray everywhere. With drip irrigation, water flows through flexible plastic tubing laid out along garden beds and borders. Small outlets called emitters are installed in the tubing. They release water slowly, drop by drop, onto the soil.
You can place emitters next to each shrub or plant. Or space them evenly to cover entire rows. The flow rate is measured in gallons per hour, so it’s easy to control how much water is applied. Unlike sprinklers, drip irrigation delivers a steady, gentle stream of moisture. This allows soil to absorb water without any runoff or puddles. Foliage stays dry, which reduces disease.
Deep watering encourages plants to grow extensive root systems. This makes them more drought-tolerant. Drip irrigation can be automated with timers and sensors for convenience.
Gardeners love drip systems because they’re affordable, customizable, and up to 90% more water-efficient than sprinklers. They excel at nourishing trees, shrubs, flowerbeds, and vegetable rows with exactly what each plant needs.
Optimizing Your Drip Irrigation Schedule
When creating a watering schedule for shrubs, focus on deep, infrequent irrigation to promote robust root growth. Frequent shallow watering leads to weak, short roots unable to withstand drought.
Aim to run drip irrigation for shrubs just once or twice per week. The optimal duration depends on:
Soil Type – Sandy soils need more frequent watering with shorter runtimes. Clay soils stay moist longer and require less frequent, deeper watering. Loams strike a balance between the two.
Weather Conditions – Hot, dry, windy weather causes faster moisture evaporation from soil and plant leaves. Irrigate more often during droughts or heat waves. Reduce watering in humid climates.
Plant Varieties – Native plants and drought-tolerant varieties need less frequent watering than exotic shrubs unaccustomed to your climate.
Season – Plants have higher water needs during hot summer months compared to cooler spring and fall. Reduce watering in winter when growth slows.
Emitter Flow Rate – Faster watering with higher flow emitters allows you to shorten runtimes. Go longer for slower, more targeted applications.
General Drip Irrigation Runtime Guidelines
Sandy soil: 30-45 minutes, 1-2 times per week
Loam soil: 60 minutes, 1 time per week
Clay soil: 90 minutes, 1 time every 1-2 weeks
Check soil moisture before each watering, and aim to supplement with occasional deep soaking during dry seasons!
Cost Considerations
Installing a drip irrigation system requires an initial investment, but you’ll reap ongoing savings from water efficiency. Here are the main factors that impact the cost:
System scale – Larger landscapes need more tubing, emitters, and connector parts which adds expense. But costs per square foot decrease with size.
Materials – Tubing, connectors, and emitters are available in a range of price points. Opt for UV-resistant tubing for longevity.
Automation – Smart timers, WiFi control, moisture sensors, and valves increase automation but also cost. They can optimize watering and prevent overwatering, saving resources.
Installation – Hiring an irrigation specialist is recommended unless you’re experienced. Professional installation averages $300-$800 but ensures proper layout and function.
Maintenance – Occasional filter cleaning, emitter replacement, and inspections help sustain system health and water savings. Annual costs are low.
Expect to invest $200-$800 for parts in a small DIY drip system. Professionally installed systems for whole gardens with automation can cost $2,000-$5,000. The expenses tend to pay for themselves over a few years through water savings. Plus, healthy shrubs and gardens are priceless!
When to Call a Professional
Installing drip irrigation can be straightforward, but complex landscapes often benefit from an experienced irrigation specialist. Their skills and know-how prevent rookie mistakes. Large yards requiring expansive tubing layouts with dozens of emitters call for pro design and placement. Precise spacing and zoning ensure even coverage across diverse plantings.
Additionally, sloping or multilevel terrain calls for an expert eye. They can account for elevation changes and prevent runoff. Maximizing efficiency and automating watering requires specialized expertise. Advanced controllers, moisture sensors, and smart valves integrate seamlessly when installed by professionals.
Even smaller, simple drip system installations often develop leaks or coverage gaps. Proactive maintenance from experts optimizes performance. And you skip the hassle and headaches of DIY.
Finally, careful system design, leak prevention, and efficiency maximize the benefits of drip irrigation. For complex installations or advanced features, irrigation specialists earn their keep.
Other Recommended Maintenance
Aside from smart watering, a few extra care tips keep your shrubs looking their best. Each spring, spread a fresh layer of compost or mulch around shrub beds. This boosts moisture, nutrients, and healthy bacteria in the soil. Apply 2-3 inches of mulch but avoid piling it against the stems. Bark, leaves, straw, or rocks will all work.
Also, prune overgrown shrubs after blooming or during winter dormancy. Pruning opens up tangled branches for better growth and shape. Group shrubs with the same lighting and watering needs together. For example, azaleas, hydrangeas and camellias all thrive on moderate watering and partial shade. Drought-lovers like junipers need less than others in the garden.
Check leaves, stems and roots for signs of problems. Treat pests and diseases early before they get worse, and clear out dead annuals after frost so bugs have fewer places to overwinter!
https://www.youtube.com/watch?v=fSyCL-nXc9g
Conclusion
When it comes to scheduling when to run drip irrigation for shrubs, the optimal duration leads to healthy plants. Run times that are too long cause waste and disease, and too short leaves shrubs stressed and dry.
Aim for deep weekly soakings based on your soil and climate. Sandy soils may need 30-45 minutes. Loams and silty soils 1 hour. Heavy clay even less frequently. Adjust as needed based on weather, plant types, and the season. Automated timers set to water before dawn are ideal. With the right schedule matched to your conditions, drip irrigation keeps shrubs vibrant with no hassle.
https://insideandoutpropertyinspectors.com/wp-content/uploads/2023/07/drip_irrigation_25.jpeg9281392BJ Johnsonhttps://d39oyu4lp7snwz.cloudfront.net/wp-content/uploads/sites/54/2019/08/31171419/io-favicon-300x300.pngBJ Johnson2024-02-15 15:44:532024-12-24 19:41:38How Long to Run Drip Irrigation For Shrubs
Downspouts are crucial components of your home that help prevent water damage. Many homeowners know they’ll need downspouts, but wonder how many their gutter system will need. The ideal downspout configuration depends on several factors like climate, gutter size, roof area, and slope.
This article will explore the rights and wrongs of downspout placement so you can make informed decisions about your home’s water management system. With the help of a professional installer, you can customize your downspouts to fit your roof and protect your home.
What is a Downspout?
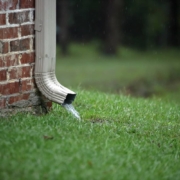
Downspouts are vertical drainage pipes that carry rainwater from your gutters down the exterior walls of your home. Also called leaders or conductor pipes, they redirect water away from your home’s foundation. Without effective downspouts, gutters can overflow and lead to flooding, soil erosion, basement leaks, and damage to siding and landscaping. Downspouts are typically made of galvanized steel, copper, aluminum, or plastic. They come in various shapes like round, square, or rectangular.
Strategically placed spouts are crucial for an efficient gutter system. They help prevent rain gutter overflow and guide water at least 5 feet away from your home’s foundation. They also reduce pressure on gutters from pooled water and debris buildup. Investing in properly positioned downspouts protects your biggest asset, saves on costly foundation repairs, and boosts curb appeal.
Determining the Ideal Amount
Installing the optimal number of downspouts is crucial for properly managing rainwater and preventing damage to your home. There are several key factors to consider when determining how many downspouts your gutter system requires:
Roof Square Footage – The total roof area dictates how much rainwater runoff needs to be effectively drained. Larger roofs require more downspouts, while smaller roofs may only need a minimum of 2-3 spaced evenly. Most standard two-story homes between 1500-3000 square feet need at least 4-5.
Climate and Average Rainfall – Homes in regions with frequent heavy rainfall need more than those in drier climates. Space downspouts closer together at 20-30 foot intervals in wetter regions to handle larger water volumes.
Gutter Type and Size – Larger box gutters or K-style gutters have greater water capacity than standard half-round gutters. Bigger gutters require fewer downspouts to effectively drain water. Consult your contractor.
Roof Pitch and Slope – Steeper-angled roofs allow water to run off faster. More gently sloped roofs cause water to drain slower, requiring more spouts to compensate.
Optimal Downspout Placement
Once you’ve determined the ideal number of downspouts needed, proper placement around your home’s perimeter is crucial for optimal performance. Follow these key guidelines when positioning new or existing downspouts:
Space Evenly Around Entire House – The spouts should be spaced at regular intervals around all sides to prevent overflow. Standard spacing is 30-40 feet apart for most homes.
At Endpoints of Gutter Runs – Install downspouts at the endpoint of every gutter run to drain all connected sections. Runs over 30 feet should have downspouts at both ends.
Near Roof Valleys and Inside Corners – Position downspouts at roof valleys or inside corners where water naturally accumulates to prevent heavy concentration.
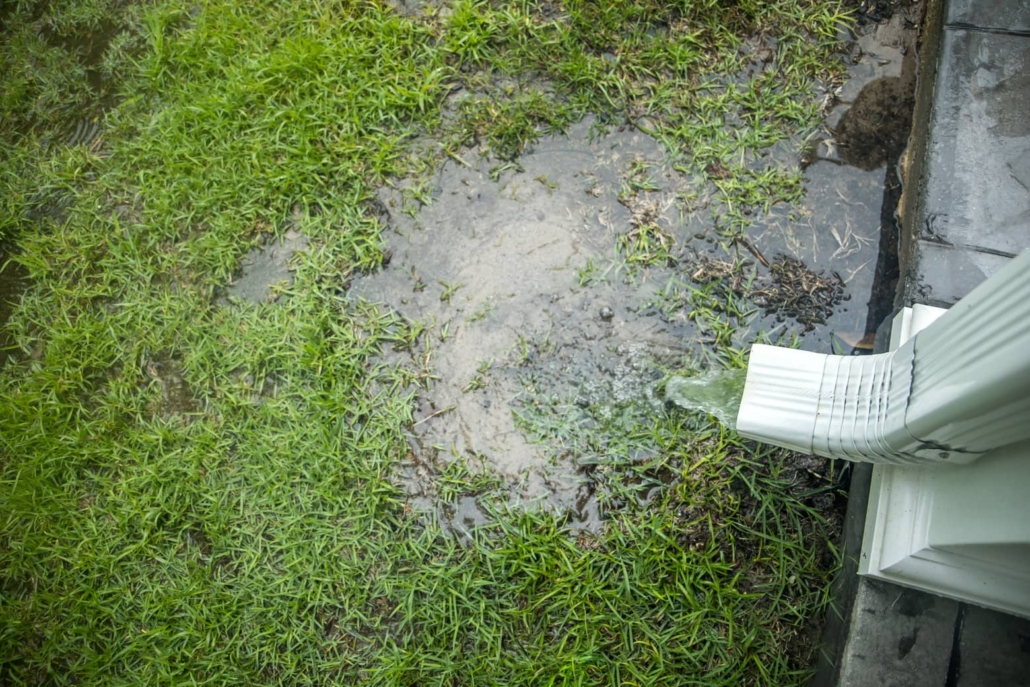
Angle Away From Foundation – Direct downspouts at least 5-10 feet away from your foundation depending on yard slope. Use extenders if more distance is required.
Avoid Outer Corners and Peaked Edges – Don’t place downspouts at vulnerable outer corners or peaked roof edges where wind/rain can detach them.
Drain Toward Hardscapes – Ideal to direct downspouts toward driveways, patios, or French drains for efficient runoff.
Other Recommended Maintenance
Properly positioning your downspouts is one crucial maintenance task for optimal gutter performance, but it’s not the only one. Here are some other important maintenance tips to help your gutters function efficiently:
Cleaning gutters at least twice per year, and more often if you have overhanging trees, is essential. Pay special attention to removing debris around downspouts so water can flow freely. Installing gutter guards or covers can also minimize debris buildup and reduce cleaning frequency.
Checking for leaky joints or seams is also recommended during cleaning. Reseal any leaky spots to prevent water overflow and damage. Rusty downspouts or gutters may need replacement – consult a pro about spot repairs versus full replacement.
Downspout extenders should drain 5-10 feet or more from your foundation. Check that existing extenders are at a proper angle or install new ones if necessary. Keep the surrounding soil graded so water flows away from your home.
Finally, trimming overgrown trees and shrubs near your roofline helps prevent leaves and debris accumulation in gutters. Maintaining vegetation minimizes falling debris that can clog downspouts.
When to Call a Professional
If you need to install a completely new gutter system, always hire a pro. They have the expertise to determine the optimal gutter type, size and number of downspouts specific to your home’s requirements. Professionals also have the equipment and skills to properly install gutters for maximum effectiveness and longevity.
For existing gutters, call a pro if you notice any signs of damage like peeling paint, rust spots, leaks, or sagging areas. They can assess if spot repairs or full replacement are good ideas. Trying DIY repairs often leads to bigger problems.
If your gutters overflow frequently or you suspect your downspouts are improperly positioned, have an expert evaluate them. They can confirm if realigning downspouts or adding more will improve performance.
To determine how many downspouts your existing gutters need, or where new ones should go, consult a gutter pro. Their years of experience give them an expert eye for optimal downspout placement customized to your home.
For specialty needs like copper gutters, gutter heating cables or custom covers, you’ll need a professional’s expertise. Don’t compromise on quality to save money.
Final Thoughts
Essentially, the positioning and quantity of your home’s downspouts can play a crucial role in effectively managing rainwater runoff. Improperly placed spouts can lead to flooded gutters, water accumulation by the foundation, and damage to siding and landscaping. Determining the ideal number depends on factors like your roof size, climate, gutter type, and pitch.
Once you’ve calculated the right amount, strategic placement around the roof perimeter is key for optimal performance. Spouts should be evenly spaced, located at gutter endpoints, and angled safely away from your home. To get an expert’s eyes on your downspouts or to schedule a complete home inspection, reach out to Inside & Out Property Inspectors in Jacksonville, FL, and surrounding areas.
https://insideandoutpropertyinspectors.com/wp-content/uploads/2023/02/how-many-downspouts-needed.jpeg10001500BJ Johnsonhttps://d39oyu4lp7snwz.cloudfront.net/wp-content/uploads/sites/54/2019/08/31171419/io-favicon-300x300.pngBJ Johnson2024-01-30 18:52:202024-01-30 18:52:21How Many Downspouts Do I Need?
Ever glanced at your sewer bill and felt your eyebrows leap toward the heavens? You’re not alone. Many homeowners are finding their sewer costs mysteriously climbing, without an apparent change in household habits. It begs the question: why is this essential service taking such a hefty toll on our wallets? The sewer system is a part of our everyday life unless we have a septic. It is important to keep it functioning well as it carries wastewater to the treatment area. Let’s learn about when a sewer bill is high, what might be causing it, but also how to spot an issue before it’s too late.
Why Is It Important to Know About the Sewer?
Understanding the intricacies of sewer-related expenses can be a daunting task for many homeowners. However, with a clear understanding of the costs involved and knowledge of how to maintain your sewer system efficiently, you can navigate these expenses more effectively.
Average Sewer Bill Cost Per Month
The average sewer bill for homeowners typically falls within the range of $20 to $60 per month. This figure, however, is subject to significant variation based on factors such as location, usage, and the rate structure set by the local municipality. In Florida, the average monthly cost for sewer services can range between $20 and $80. This variation largely depends on the specific locality and individual usage levels.
Why Is My Sewer Bill So High?
A high sewer bill can be attributed to several factors. Increased water usage, leaks in the system, or even billing errors could be potential culprits. If you notice a sudden spike in your sewer bill, it’s crucial to investigate and identify the cause.
Signs of a Sewer in Trouble
Certain signs indicate that your sewer system might be in trouble:
Unusual Noises: Skeletons shouldn’t be the only things rattling in your home. Gurgling pipes could indicate a backup.
Foul Odors: A whiff of something foul could mean your sewer line is waving a red flag.
Water Woes: Puddles in your yard or slow drains inside your home? These are classic SOS signals from your sewer system.
What to Do When Your Sewer Bill is High?
If your sewer bill is higher than usual, start by reviewing your water usage. Look for any significant changes that could justify the increase. If your water usage hasn’t changed drastically, consider checking for leaks in the system or getting a professional inspection done.
Ways to Find Out What Is Causing Issues with Sewer
Identifying what’s causing issues with your sewer involves a few steps.
You can monitor your water meter for unusual activity which might indicate a leak.
Conducting dye tests in toilets can also help detect leaks.
Inspecting pipes for corrosion or blockages can reveal issues, and video inspections can provide deeper insights into the state of your sewer system.
Average Sewer Repair Costs
Sewer repair costs can vary widely. Minor fixes might only cost a few hundred dollars, while major repairs or full replacements can run into the thousands. It’s important to get a professional estimate for any repair work.
Ways to Maintain The Sewer
Maintaining your sewer system involves being cautious about what goes down the drains, using strainers to catch debris, performing regular drain cleaning, and avoiding planting trees near sewer lines. Regular maintenance can prevent costly issues in the future. Ideas are:
Regular Check-Ups: An ounce of prevention is worth a pound of cure. Regular inspections can save you a ton of trouble.
Mindful Flushing: Your toilet isn’t a trash can. Flush wisely.
Plant Placement: Keep trees and larger plants away from sewer lines—their roots crave chaos.
Other Information To Know
Now that you know about high sewer bills, let’s take a look at other areas of maintenance.
One of those is knowing where the water meter is located. This is important as it controls the amount of water that flows into your home. Also, if you monitor it, you can find out the amount of water that is being used in the home and hopefully prevent future issues.
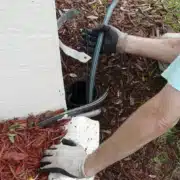
Another is when the city is responsible for sewer lines. The city is responsible for when they start at the main underground sewer pipe and are past your property boundaries. This is the main sewer line. On the other hand, the lower lateral and upper lateral sewer lines are the responsibility of the homeowner.
Lastly, it is important to know how deep the sewer lines are buried. Residential lines are usually buried 5-6 feet deep, while in colder areas it is 4-8 feet. On the other hand, city lines are buried 12 feet deep.
When Do I Call a Professional?
If basic troubleshooting doesn’t resolve the issue or if you notice signs of significant damage, it’s time to call a professional plumber or sewer service. They also have the expertise to diagnose and fix complex sewer problems. The sewer is nothing to mess with and you want to know if it is something you or the city are responsible for.
Check out the video below about a woman and her high sewer bill.
Conclusion
Being informed about your sewer system and taking proactive measures can help keep costs down and extend the life of your infrastructure. By monitoring your usage, performing regular maintenance, and acting swiftly when issues arise, you can effectively manage your sewer expenses. It’s important to keep up with the maintenance and also know what you or the city are responsible for. While taking a look at your sewer bill, this is a great time to call Honor Services as they are your best home inspection company in Brevard County, FL.
https://insideandoutpropertyinspectors.com/wp-content/uploads/2024/01/reisdential_sewer_line_23.webp563751BJ Johnsonhttps://d39oyu4lp7snwz.cloudfront.net/wp-content/uploads/sites/54/2019/08/31171419/io-favicon-300x300.pngBJ Johnson2024-01-19 14:10:382024-01-19 14:10:38Why Is My Sewer Bill So High?
When it comes to selling a home every homeowner wants to get the most money out of their investment. In some cases, there can be a huge upside when the windows are brand new. The words “brand new” give the buyer a sense of excitement about their new home purchase. Anytime that you can provide the potential buyer with the idea that one less project is needed makes the home buyer happy. Is it worth replacing windows before selling a house? Not necessarily. It is recommended that you update the weather stripping and caulking.
Let’s look below at when and why you should replace the windows in your home.
Assess the Condition and Value of Your Current Windows
When contemplating selling a house, assessing the condition of your windows and determining if it’s worth replacing them is a pivotal step. This analysis will not only inform potential buyers of the home’s state of repair but also contribute to the overall energy efficiency and aesthetic appeal that can sway purchasing decisions.
Conduct a Thorough Window Assessment
Begin with a meticulous examination of your windows. Here’s what to look for:
Signs of Wear: Check for drafts, condensation between panes, and difficulty in operation, which all suggest poor performance.
Structural Integrity: Inspect for decay in wooden window frames, cracks in the glass, or compromised seals. Any of these could impact both insulation and security.
Aesthetic Condition: Look for peeling paint, water stains, or outdated styles that detract from your home’s appeal.
Gauge Energy Efficiency
Energy efficiency is a key selling point in today’s market. Buyers are increasingly conscious of both their carbon footprint and the long-term cost savings associated with efficient homes. Energy Star-certified windows, for instance, can be a significant draw for buyers looking to reduce their energy bills.
Understand the Market
Real estate markets vary widely, and what’s expected in one neighborhood might be less important in another. In areas prone to extreme weather, for instance, the quality of windows can be a make-or-break feature for buyers. Research local trends and consult with real estate agents to understand how much value new windows might add to your home.
Cost-Benefit Analysis
Replacing windows can be a substantial investment. To decide whether it’s worth it, compare the costs of replacement to the potential increase in property value. Remember, while new windows may not cover their costs entirely at sale, they could expedite the selling process by making your home more attractive to buyers.
To Replace or Not to Replace
The decision to replace windows before putting your house on the market is not one-size-fits-all. Several factors must be weighed to determine whether this home improvement will translate into a worthwhile return on investment when you sell. Here’s how to clarify whether window replacement is the right move for your home sale.
Evaluate the Current State
Reflect on the thorough window assessment conducted earlier. If your windows show significant signs of wear, compromise the structural integrity of your home, or have a dated appearance that detracts from your home’s overall look, these issues might negatively impact a buyer’s perception of your property.
Consider the Energy Efficiency Factor
Energy efficiency upgrades can be a strong selling point. If your existing windows are not energy-efficient and you live in an area where energy conservation is a priority for buyers, investing in new windows could be a strong selling point that adds to your home’s market value.
Balance Costs and Returns
Weigh the costs of full replacement against potential returns. If the window issues are cosmetic, a less expensive repair might suffice. However, if the windows are functionally obsolete, this could be a deterrent for buyers looking for a move-in ready home.
Market Expectations
Understand what is standard in your area. If you’re in a high-end market where buyers expect homes to be turnkey, new windows could be necessary to compete. Conversely, if you’re in a seller’s market or an area where buyers are likely to renovate post-purchase, investing in new windows may not provide a significant return.
Buyer Incentives
Consider the alternative of offering an allowance for window upgrades in the sale price, which can be an attractive option for buyers. This allows them to choose their preferred style and may be a more cost-effective solution for the seller.
Consult with Professionals
Before making a decision, consult with a local real estate agent and a window installation professional. They can provide insights into the local market and the potential increase in sale price that new windows might bring.
Ultimately, while it is generally worth it, replacing windows before selling a house should be based on a combination of practical considerations and a strategic assessment of the housing market. If new windows will significantly enhance the curb appeal, functionality, and energy efficiency of your home, thus making it more attractive to buyers and likely to sell faster and at a higher price, then replacement is a sound investment. If not, then simple repairs and a good cleaning may suffice.
Cost Considerations for Window Repair or Replacement
When deciding whether to repair or replace windows before selling your home, it’s essential to have a grasp of the potential costs involved. Here’s a breakdown of the financial aspects to consider:
Average Cost of Window Repair or Replacement
Minor repairs such as replacing weather stripping, re-caulking, or repainting window frames are generally affordable, often ranging from $100 to $300 per window. These repairs can mitigate issues like drafts and improve the overall appearance of the windows without a significant investment.
The cost of replacing windows can vary widely based on the window type, material, and installation fees. On average, homeowners might expect to spend anywhere from $300 to $1,000 per window for vinyl replacement windows, which are a cost-effective and popular choice. Wood or fiberglass windows can cost significantly more, potentially ranging from $600 to $2,000 per window.
Energy-Efficient Windows
If you opt for Energy Star-certified windows, the initial cost might be higher; however, these can offer long-term savings on energy bills and entice energy-conscious buyers. The additional investment might range from 10% to 15% more than standard windows but could be offset by energy savings over time.
Return on Investment (ROI)
While new windows can enhance your home’s value, they usually do not recoup 100% of the investment upon sale. The ROI for window replacement averages around 70%, which means for every $1,000 spent on new windows, you could expect to increase the home’s selling price by about $700. However, this figure can fluctuate based on your area’s housing market and buyer expectations.
Additional Factors
The Scale of Replacement: The cost will also depend on whether you’re replacing all windows or just a few. Quantity discounts may apply for larger jobs.
Custom Windows: Custom shapes and sizes will increase costs, so standard window sizes are more budget-friendly.
Installation Costs: Professional installation is crucial for window performance and typically accounts for a significant portion of the replacement costs. It’s worth getting multiple quotes to ensure competitive pricing.
Potential Rebates: Some energy-efficient upgrades qualify for rebates or tax credits, which can reduce the overall cost.
Ballpark Figures
For a modest-sized home, repairing windows could cost between $200 and $600 for basic fixes, while full replacement with standard, energy-efficient models could range from $3,000 to $10,000 or more, depending on the number and type of windows. It’s advisable to obtain at least three quotes from reputable contractors to get an accurate estimate for your specific situation.
Other Recommended Maintenance
Ensuring your home is presented at its best is key to achieving a successful and profitable sale. A well-maintained structure and facade are as critical as the condition of your windows. Address any exterior issues such as chipped paint, damaged siding, or missing roof tiles. A pristine exterior boosts curb appeal and indicates to potential buyers that the home is cared for inside and out.
Inside, tackle any basic repairs that could undermine the perceived value of your home. Fix leaky faucets, ensure all appliances are in working order, and oil any creaky hinges. These small adjustments contribute to the overall impression of a home that has been maintained diligently.
Servicing your home’s heating, ventilation, and air conditioning system is another crucial step. A functional and efficient HVAC system is a hidden complement to new windows, reinforcing the message of energy efficiency and comfort.
Good lighting is also paramount; it highlights your home’s best features, complements the new windows, and sets a welcoming ambiance. Replace any non-working bulbs and consider updating dated fixtures to modernize and brighten your space. Attending to these maintenance aspects shows a commitment to your home’s condition and can significantly sway a buyer’s perception, potentially making the difference between a house that lingers on the market and one that sells promptly at a desirable price.
When to Call a Professional
Deciding when to call a professional is an important step in preparing your home for sale. For window repairs or replacements, a professional should be consulted if you encounter issues beyond basic cosmetic fixes. This includes problems like foggy windows, which indicate a failed seal, windows that are difficult to open or close, or signs of rot or water damage on wooden window frames. These conditions often require specialized skills and tools to ensure the job is done correctly and safely.
For other home maintenance tasks, such as servicing your HVAC system, dealing with electrical work, or addressing significant plumbing issues, professional expertise is not just recommended, it’s essential. These systems can be complex and, if not handled properly, can lead to costly damage or pose safety risks.
Additionally, if you’re unsure about the structural integrity of your home or if you’ve discovered potential mold or pest infestations, it’s time to bring in experts. They can assess the situation accurately and provide solutions that will stand up to scrutiny during a home inspection.
In summary, for any task that goes beyond your knowledge, could affect your home’s safety, or might impact its value, enlist the services of a professional. This ensures that all work is up to code, completed efficiently, and presents your home in the best light for prospective buyers.
In a competitive real estate market, presenting your home at its finest can make all the difference. This being the case, the investment of replacing windows before selling the house is usually worth it. By carefully considering the condition of your windows and addressing other key maintenance issues, you set the stage for a successful and lucrative home sale.
Remember that while the charm is in the details, the confidence comes from the foundations. Don’t overlook the power of first impressions; ensure your windows and home maintenance speak of quality and care. When tasks exceed your expertise, calling in professionals is a smart investment in your home’s marketability. For guidance on the condition of your current windows or an inspection of any other home components, reach out to Inside and Out Property Inspections today.
https://insideandoutpropertyinspectors.com/wp-content/uploads/2024/01/windows-and-real-estate.jpeg10001500BJ Johnsonhttps://d39oyu4lp7snwz.cloudfront.net/wp-content/uploads/sites/54/2019/08/31171419/io-favicon-300x300.pngBJ Johnson2024-01-18 21:04:312024-12-24 19:40:56Is It Worth Replacing Windows Before Selling A House?
A deck is a great place to entertain friends and family and enjoy the outdoors. Trex composite decking is a nice deck material to have on the outside of your home. In order to keep it looking nice, there are various ways to maintain it, as maintenance is necessary. Wondering how to clean Trex decking? Sweeping, pressure washing, removing stains, and cleaning mold are a few ways to maintain your deck.
Let’s take a look.
What is Trex Decking?
Trex decking is a composite deck material and is an alternative to using wood. It doesn’t rot, warp, or splinter and is easier to clean. Additionally, it is made of 95% reclaimed wood so it is good for the environment. This type of decking is said to last about 27 years, which is longer than most people keep a home. There are different ways to keep it looking nice and lasting a long time.
1. Clean Dirt and Debris
A great way to clean Trex decking is regularly sweeping or using a leaf blower to help remove dirt, leaves, and other debris that may accumulate. This will prevent the build-up of dirt and grime, which can cause staining and discoloration over time.
2. Pressure Washing the Deck
Using a pressure washer can be an effective way to clean your composite deck. However, it is important to use caution when using this method, as excessive pressure or misdirected streams can damage the surface of your deck. Make sure to follow the manufacturer’s instructions and guidelines when using a pressure washer.
3. Removing Concrete, Cement, Mortar, or Stucco Dust
If your deck has come into contact with concrete, cement, mortar, or stucco dust, it is important to remove it promptly, as these substances can cause discoloration and staining. Use a mild detergent and warm water to clean the affected area, and rinse thoroughly.
4. Hard Water Staining
Hard water can leave unsightly stains on your composite deck. Clean your Trex decking to remove these stains, and use a cleaning product specifically designed for hard water stains. Follow the manufacturer’s instructions and guidelines for best results.
5. Removing Chalk Lines
Chalk lines can sometimes transfer onto your deck during construction or other projects. To remove chalk lines, use a mild detergent and warm water, and scrub gently with a soft brush or sponge. Rinse thoroughly after cleaning.
6. Ice and Snow Removal in Winter Months
During winter months, it is important to remove ice and snow from your composite deck to prevent slipping and potential damage. Use a plastic shovel or a broom with soft bristles to remove snow, and avoid using metal shovels or sharp objects that may scratch the surface of your deck.
7. Clean Up Oil, Grease, and Food As Soon As Possible
If your deck has come into contact with oil, grease, or food stains, it is important to clean them as soon as possible to prevent staining. Use a mild detergent and warm water to clean the affected area, and rinse thoroughly.
8. Mold and Mildew Removal
If you notice mold or mildew on your composite deck, it is important to remove it promptly to prevent further growth. Use a composite deck cleaner or a solution of 1 part bleach to 3 parts water to scrub the affected area. Rinse thoroughly after cleaning.
9. Maintaining Transcend and Select Railing
Transcend and Select railing systems require regular cleaning and maintenance to keep them looking their best. Use a mild detergent and warm water to clean the railing, and rinse thoroughly. Avoid using abrasive cleaners or scrub brushes that may scratch the surface.
10. Trex and Static Electricity Issues
In dry environments, composite decks may occasionally generate static electricity. To reduce static electricity, use an anti-static spray or apply a thin coat of liquid fabric softener diluted with water to the surface of your deck.
11. Lift and Remove Rubber Mats
Rubber mats can sometimes cause discoloration or staining on composite decks. To prevent this, periodically lift and remove rubber mats to allow air to circulate and prevent moisture buildup.
12. Construction and Remodeling Projects
During construction or remodeling projects, it is important to properly store materials and equipment to prevent damage to your composite deck. Avoid storing heavy objects or sharp tools directly on your deck’s surface, as this can cause scratching or other damage.
Check out the video below on cleaning Trex decking.
Other Recommended Maintenance
Now that you know about cleaning Trex decking, there are a few other things for recommended maintenance. One of those is cleaning black mold off the pool deck. To do this, you will need a scrub brush,
Another is your pool pump may be leaking. If this is happening, then you will want to have it checked for a broken seal, issues with the pump housing, improper fittings, a lid issue, or pump drain plugs to name a few.
Lastly, if you have a pool as well and notice it is leaking, that could be due to a few things. One way to know if there is a leak is if you are losing 1/4 inch of water a day. You can do a bucket test, and check the equipment pad, you may have bubbles in the return lines, or cracks in the pool.
When to Contact a Professional
If you are unsure about how to properly care for or clean your composite deck, or if you have stubborn stains or damage that you are unable to remove, it may be best to contact a professional deck cleaning and restoration company for assistance.
Coffee for many is a morning staple. It is the smell many want in the morning and the taste to start their day off right. When we run coffee in our machines, grounds are left over. What do we do with them? Some people think putting them down the sink makes it smell better. Can coffee grounds go down the sink? Unfortunately, no, as they don’t dissolve in water and can cause clogs in the drainage system.
Let’s take a look.
What Happens With the Coffee Grounds in The Sink?
As mentioned above, they don’t dissolve in water and can accumulate in pipes, leading to blockages. This can result in slow-draining sinks or even complete backups, requiring expensive repairs.
What Else Should Not Go In The Sink?
Apart from coffee grounds, there are several other items that you should never dispose of in the sink. These include:
Grease or cooking oil: These substances can solidify in pipes, causing major blockages.
Eggshells: The thin membrane lining inside eggshells can stick to pipes and create obstructions.
Rice, pasta, and bread: These starchy foods can absorb water and expand, leading to pipe blockages over time.
Fibrous vegetables, such as celery and potato peels: The long, stringy fibers can wrap around pipes and impede drainage.
Putting the wrong things down the sink can have serious consequences for your plumbing system. Clogs can develop, resulting in slow drainage, foul odors, and even sewage backups. In some cases, the pipes may burst or leak due to increased pressure caused by blockages. This can lead to extensive water damage and costly repairs.
Other Ideas For The Coffee Grounds
Instead of disposing of coffee grounds down the sink, there are several eco-friendly alternatives you can consider:
Composting: Coffee grounds make an excellent addition to compost piles or bins. They can enrich the soil with organic matter, improve drainage, and act as a natural fertilizer.
Gardening: Coffee grounds can be sprinkled around acid-loving plants like azaleas, rhododendrons, and blueberries. They provide essential nutrients and help maintain the desired pH level in the soil.
Cleaning: Coffee grounds can be used as an abrasive cleaner for pots, pans, and even as a natural scrub for exfoliating your skin.
Other Recommended Maintenance
Now that you know why you don’t put coffee grounds down the sink, let’s take a look at a few other areas of maintenance. One of those is drain cleaner in the garbage disposal. Some people say that drain cleaner is okay, but the problem is there are harsh chemicals used to make it. Thus, it can eat away at the pipes and cause major damage.
Lastly, garbage disposals don’t need a GFCI. They only need a dedicated circuit that is 15 or 20 amp and it should be a circuit that is separate from the dishwasher. This is so the dishwasher circuit is not on overload.
When to Call Inside and Out Property Inspectors?
If you have accidentally put the wrong things down the sink and are experiencing persistent plumbing issues, it is advisable to call Inside and Out Property Inspectors so we can recommend a master plumber. They have the expertise and proper tools to clear stubborn blockages safely and efficiently, preventing further damage to your plumbing system.
Conclusion
To maintain a healthy plumbing system and avoid costly repairs, it is crucial not to put coffee grounds and other inappropriate items down the sink. Also, by responsibly disposing of coffee grounds and using eco-friendly alternatives, you can protect your pipes and contribute to a more sustainable environment. If in doubt or facing severe plumbing problems, always consult a professional for assistance. Contact Inside and Out Property Inspectors in Jacksonville, FL, and surrounding areas to get your home inspection done today.
https://insideandoutpropertyinspectors.com/wp-content/uploads/2023/08/coffee_grounds_25.jpeg9361404BJ Johnsonhttps://d39oyu4lp7snwz.cloudfront.net/wp-content/uploads/sites/54/2019/08/31171419/io-favicon-300x300.pngBJ Johnson2023-08-15 01:02:012023-08-15 01:02:02Can Coffee Grounds Go Down The Sink?
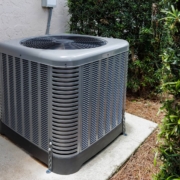
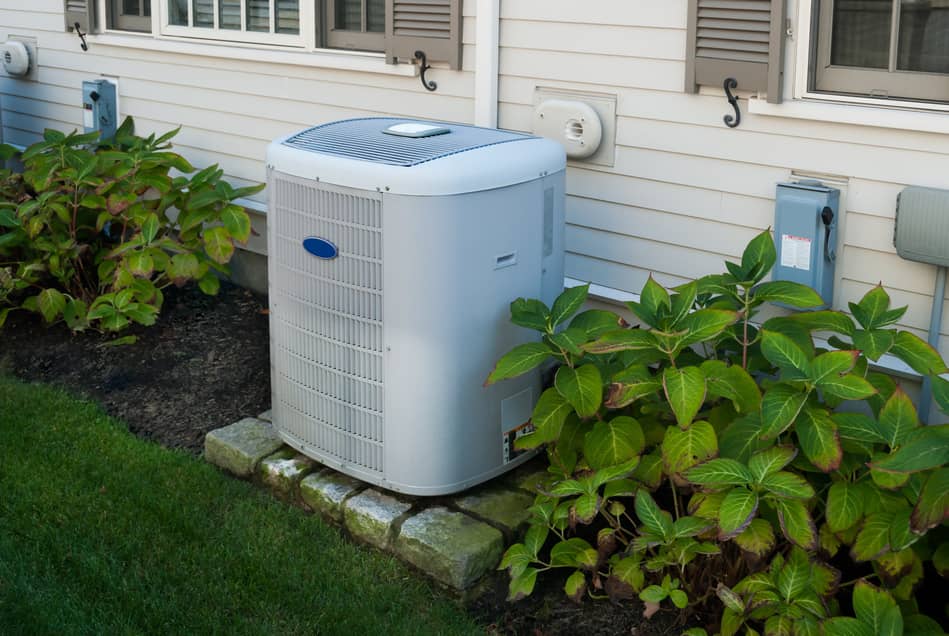
When it comes to owning a home, there are a variety of maintenance and cleaning needs. Additionally, you will want to ensure that everything in your home is working properly. Make sure that you have an understanding of how every system in your home functions. This will save you time and money as you work through your maintenance checklist. Also, ensure that the conditions in your home are conducive to keeping the home safe and free from mold. Humidity will promote mold growth, so ensure your air conditioner is working to dehumidify your home as it runs. Do air conditioners dehumidify? Yes, it will remove moisture from the air that gets sucked into the AC unit as it cools the air down.
Let’s take a look below at some more details regarding dehumidifying and cooling your home.
What Does It Mean To Dehumidify?
Dehumidifying your home means removing moisture from the air. The air conditioner will act as a dehumidifier while it runs in your home. The air conditioner will not completely remove all moisture from your home, but it will remove some. If your home shows a high moisture reading, then you will want to invest in an additional dehumidifier. Run your air conditioner at a temperature that is consistent with the outdoor air. Consequently, this allows the unit to reduce the moisture from the air as it sucks it into the unit and blows the warm air out.
How Does It Work In An Air Conditioner?
Let’s take a look at how the air conditioning system works to remove excess moisture from your home.
Liquid refrigerant – When the ac unit kicks on it will push refrigerant through the pipes within the unit. Excess heat is then removed.
Evaporator – The cold air will then be pushed through to each room by the evaporator in the system.
Liquid refrigerant – The liquid refrigerant is then converted to gas once it passes through the expansion valve.
Evaporator coils – The evaporator coils cool the refrigerant once the refrigerant is pushed through the evaporator coils.
AC fans – The internal fans in the AC unit then push the cool air from the evaporator coils through the air ducts in the home.
Liquid refrigerant – The refrigerant then absorbs the hot air from the home and converts it to a hot gas.
Compressor – Next, the refrigerant is pushed into the compressor where it becomes a high-temperature and high-pressure gas.
Condenser coils – The gas is then pushed through the condenser coils and the heat that was absorbed is released through the outside unit.
When Should I Purchase A Dehumidifier?
If you aren’t sure when you will need to purchase a dehumidifier to dehumidify the air, it should be considered under the following circumstances. Also, read up on how a dehumidifier works with your central air conditioners.
Personal preference – If the environment in your home does not feel like the humidity levels are where they need to be, you will want to purchase a dehumidifier. Consider determining the type of environment that you want the rooms that you spend your time in to feel like.
Budget – An AC unit’s cost is expensive compared to a dehumidifier. Purchasing a dehumidifier will go a long way toward reducing the humidity in the home. Dehumidifiers are portable and inexpensive.
Location – If you live near water, then the moisture levels in your home will be exponentially high. Installing a dehumidifier will help keep the moisture levels in your home from getting out of hand.
Other Recommended Maintenance
Now that you are aware of how an air conditioner dehumidifies your home, you can read up on whether or not your ceiling fans help the ac unit. Placing your ceiling fans on the correct rotation allows you to assist your ac unit with maintaining the airflow and moisture control in your home.
Next, read up on what you need to consider when you replace your HVAC unit. Homeowners should not rush into replacing their HVAC unit without researching how long the new one could last. Also, research the size of the HVAC unit to ensure that it fits your home’s needs.
Lastly, as you install your new ac unit or work to repair your current unit, keep in mind that carbon monoxide should be a non-issue. Any electrical system like an HVAC unit will not emit carbon monoxide.
L
When Do I Call A Professional?
When it comes to your HVAC unit, you will want to make sure that it is working properly. Keeping the humidity levels in your home at a stable level will allow you to keep mold and mildew from growing in your air ducts and home. Call on your local home inspection team to inspect your HVAC unit and determine that everything is working properly. Also, your home inspection team can recommend a reputable HVAC system service technician to test your system.
Conclusion
Hiring the right professional HVAC service technician is necessary to determine that your system is set to remove excess moisture from your home. Not only is the goal of the HVAC unit to provide your home with the right air temperatures, but it also wants to maintain indoor air quality. Dehumidifying your home will need assistance. The air conditioning unit will not be able to remove all of the moisture on its own. Call on your local home inspection team to determine where additional dehumidifiers could be used. Reach out to Inside and Out Property Inspectors in Jacksonville, FL, and surrounding areas to get your home inspection done today.
https://insideandoutpropertyinspectors.com/wp-content/uploads/2023/06/air_conditioner_25.jpeg11351702BJ Johnsonhttps://d39oyu4lp7snwz.cloudfront.net/wp-content/uploads/sites/54/2019/08/31171419/io-favicon-300x300.pngBJ Johnson2023-06-26 15:45:172023-06-26 15:53:01Do Air Conditioners Dehumidify?
Buying an older home can come with a lot of questions. There were building materials and building codes that are completely different in today’s home market. As a home buyer, you should be very thorough with your home inspection. Ensure that everything in the home is up to building code, and there are no harmful materials in the home. Keep in mind that materials like asbestos and lead paint could have been used many years ago. When did lead paint stop being used? Lead paint was used all the way up to 1978. After 1978 it was phased out due to its toxicity.
Let’s take a look below at some more details regarding lead paint in the home.
What Is Lead Paint?
Lead-based house paint is a highly toxic material that was created before the 1980s. Lead is a metal that can cause major health issues in young children and adults. If lead is absorbed in the body, it can break down organs such as the kidneys, brain, nerves, and your blood. This toxic metal can create some major damage to the body.
It is estimated that 29 million houses in the United States have lead-based paint in them. This leads to a contaminated home with lead paint that can create damaging lead dust. If you ever suspect that your home has lead paint in it, call for a lead paint inspection. Once you have the lead paint inspection done, you can get a risk assessment to see how hazardous the paint in your home is.
How Can I Reduce My Exposure To Lead Paint?
To protect you and your family from lead exposure and lead hazards you will want to consider the following things below to reduce your exposure to lead paint. If the home was built before 1978 it is likely to have levels of lead that could result in lead poisoning. Let’s take a look at the ways we can reduce lead paint exposure.
Check-in – Reach out to your local health department and schedule a test for lead paint in your home.
Keep it clean – Inspect the entire home for any areas of paint that are peeling from the walls or other painted structures. Keeping your child from accessing any paint chips is important.
Safely renovate – If you begin to renovate the home, sanding, cutting, replacing windows, and other activities could create lead dust in the air and reduce the air quality. Also, this can expose you and your family to significant health damage. Be sure to review the Environmental Protection Agency (EPA) guidelines for lead paint removal.
Removal – Hire a professional lead-based paint removal company to get all lead paint chips and peeling paint off their surfaces. This kind of work should be done with proper safety precautions and tools and equipment to protect all involved.
Mop regularly – It is recommended that you use a wet mop on your floors and dust the window sills and wells with a wet rag. Keeping all surfaces free from any dust is important for maintaining your health and safety.
Wash regularly – If you suspect that your home has contaminated dust or soil, you will want to wash your child’s hands on a regular basis.
Create a barrier – Use contact paper and duct tape to cover holes and walls that are contaminated. Consequently, this should be done as you await the proper removal of the contaminated areas. Also, keep children away from contaminated soils.
Keep away – Be sure to keep pregnant women and children from accessing the home during renovations. While a renovation is being done, dust is flying around and paint debris is in the area. Once the work is done and all areas are cleaned up, the pregnant women and children can re-enter the home.
Keep in mind that in the 20th century, the EPA banned the use of lead in paint and homes. Public health is the biggest concern. Lead creates health problems for property owners who purchase a home with lead-based paint.
Other Recommended Maintenance
Now that you know when lead paint was stopped being used you can read up on how to negotiate after the home inspection. If your initial inspection finds that you have lead paint in or on the surfaces of the home, you will want to negotiate the sale price as you look to remove all toxic lead materials from the home.
Next, be sure to read up on who the best home inspection companies are in your local area. It is vital that you not just hire the cheapest home inspector. Hire the most reputable home inspection team to assist with determining if the home you live in has toxic materials in or on it.
Lastly, keeping your home inspection report is important for having a point of reference during the risk assessment portion of the home. Finding out if the paint does have lead in it will be necessary for any home buyer to know before a purchase is made. The home inspection report is a great start in the process.
When Do I Call A Professional?
Dealing with lead paint is not ideal for any family. It can cause some major health issues for you and your family. Be sure to reach out to your local home inspection team. They will determine if the paint in your older home is lead-based. Protecting you and your family should be a priority before worrying about any home purchase. Additionally, your local home inspection team can recommend a local risk assessment company. They will determine how toxic the paint in your home might be.
https://insideandoutpropertyinspectors.com/wp-content/uploads/2023/06/hazard_warning_25.jpeg10041504BJ Johnsonhttps://d39oyu4lp7snwz.cloudfront.net/wp-content/uploads/sites/54/2019/08/31171419/io-favicon-300x300.pngBJ Johnson2023-06-09 17:38:462023-06-09 17:38:47When Did Lead Paint Stop Being Used?
Buying a house comes with a lot of expenses and to-do lists, in addition to finding the house you want. You probably have ideas of what you want in it and the non-negotiables with the home and neighborhood. Though not required for the purchase of a home, it is highly recommended. There are several reasons for having a home inspection done, as well as why you should keep the report. Who pays for a home inspection? It is usually the buyer who can find out the ins and outs of the home and an unbiased evaluation. Also, keeping the report is important to show to contractors and repairpeople so they know what repairs need to be made. Let’s take a look.
Why A Home Inspection?
When looking to buy a home, a potential buyer should pay to have a home inspection done as soon as they can after the offer is accepted by the seller. This is because it is important to give the seller time to fix any issues (if they choose to) that the inspector finds. It also allows you and the seller to come to an agreement on the repairs and a final price.
A home inspection is necessary, whether it is on an older home, new build, or condo. You may wonder about having an inspection on a new home, but they do have defects and sometimes the house is built so quickly that things are overlooked or not done correctly. Paying for the inspection gives you peace of mind that you aren’t getting into a “money pit” or a home with major issues that aren’t seen from the outside.
Never assume a house that looks great on the outside has everything functioning properly on the inside. Spending the money to hire a home inspector is worth it.
Types of Home Inspections
There are different types of home inspections. A standard home inspection is what is normally conducted. This covers the structure, electrical system, construction, mechanical systems, and plumbing of the home. There are also other home inspections that are specialized, especially here in Florida. Also, there are ones that are for health and safety concerns.
Some of these are:
Sewer Scope
A sewer scope inspection uses a camera to see if there are any issues in the sewer lines of the home.
Mold Inspection
A mold inspection is done to see if there is any pre-existing mold in the home. It is also to see if there are areas that are water damage prone or have high humidity.
Wind Mitigation
A wind mitigation inspection is using certain building techniques to limit the damage caused by intense wind, such as hurricanes. This type of inspection can lower the homeowner’s insurance.
4-Point Inspection
A 4-point inspection covers the roof, plumbing, electrical, and HVAC. Most home insurance companies don’t like to cover homes that are over 25 years old. Thus they require this inspection to make sure the home meets the standards.
Cost
The average home inspection fee in Florida is over $300 for an average-sized home. For a smaller home, it may be less while a large home will be more.
How Buyers Use the Home Inspection Report
The amount of money spent on a home inspection is peanuts to have peace of mind and know what you are getting into for a home. The report helps the buyer and real estate agent with negotiating with the seller. It is also a great idea to have this report so you remember the ages of important elements in your home such as the water heater, HVAC, etc.
If by chance the home you are looking at buying is an “as-is” this inspection can allow you to cancel the purchase of the home, or negotiate the price with the seller. A home inspection report also allows you to use it as a checklist if you are doing a loan for renovations. This can help the buyer with financing.
Keep in mind that a lot of the information you get in the report is not for negotiating, but is for maintenance information. Lastly, the report is needed for contractors. This is because it will show the contractors where the repairs are.
What Happens If Problems Are Discovered?
An inspection that is thorough will list items that should be looked at around the home. The report may come up with minor issues or major issues. Let’s look at some of the common findings.
Structural damage
When looking at the structure of a home, they will be checking for cracks that are in the foundation. Also, in states that have basements, a home inspector will look for drainage issues. The crawl space will also be looked at for issues in drainage, as well as masonry or bricks that are failing.
Roof damage
Roof damage is also another common area. Here in Florida, we have hail storms, hurricanes, tornados, and also just bad summer storms. In other states, snow can also cause damage to the roof. The inspector will look for tilting, and shingles that are broken or missing and check the gutters for clogging.
Chimney issues
The inspector will also look at the chimney and any damage to the flue, bricks, or mortar. They will also look to see if there are any blockages in the interior. Lastly, sometimes the fixes are easy things like a chimney sweep or could end up being structural repairs.
Pest Infestation and Wildlife Issues
Inspectors will also keep an eye out for any pest problems they may come across in an inspection and give recommendations for pest control service or to contact a professional.
Trees That Are Dead
If the inspector finds large trees that appear dead near the home, they will give recommendations as to what to do. Having dead trees near the home can cause problems if they fall on the house or knock down power lines.
Issues with Plumbing and Septic
An inspector will look for pipes that are corroded, broken, or rusted. They will also look at any that have the wrong type of pipe that has been used too. Looking for water damage near the plumbing fixtures will also be another thing that they do as well as stains on the ceiling from water. Mold and mildew will also be signs of water damage. If the home doesn’t have sewer and instead has septic, this will be inspected for leaks, as well as drainage issues. They will also look to see the level of solids that are in the tank. A company that has septic inspections as a service will be needed to do this.
HVAC issues
The HVAC system will be looked at to make sure it is working properly, it has the correct wiring, as well as the air conditioner is working properly. An air conditioner lasts about 10-15 years and is expensive to replace. You will want to know about these expenses before purchasing a home.
Electrical hazards
An inspector will check to see if the house has GFCI outlets, the grounding of three-pronged outlets as well as the circuit panel doesn’t have any illegal modifications. If there are some issues or suspicion of issues, the buyer may hire an electrician to take a look and make sure everything is up to code.
Fire Issues In The Home
Many issues in a home that are fire hazards are due to electrical issues. There are also fire hazards with fireplaces and the inspector will also check that smoke detectors and carbon monoxide detectors are working. Lastly, they will check that windows and doors are working properly, especially in case of a fire.
Appliances
An inspector will take a look at major appliances such as the oven and the hood, dishwasher, refrigerator and freezer, and garbage disposal. This is to make sure they are all working properly.
Here is a great video about home inspections for first-time buyers.
https://www.youtube.com/watch?v=j-SJ9G1K8bo
Recommended Maintenance
Now that you know about having a home inspection and who to share your report with, let’s take a look at a few other areas. One of those is negotiating after a home inspection. This is important as you will know what the necessary repairs are after the home inspection is completed. You as the buyer may also want to have your own contractor fix the issues so you may want to negotiate the price of the home.
Another area is walking away after a home inspection. You may find that the home inspection report shows there are structural issues in the foundation or termites to name a few. These types of findings allow you to walk away from purchasing a home if you choose to do so.
Lastly, if you own a house in the great state of Florida, there are other inspections you the home buyer want to think about doing. Those are wind mitigation and 4-point inspections. The wind mitigation inspection gives homeowners insurance discounts based on certain building attributes while the 4-point inspection tells insurance companies how well the home has been maintained.
https://insideandoutpropertyinspectors.com/wp-content/uploads/2023/05/home_inspection_25.jpeg9171375BJ Johnsonhttps://d39oyu4lp7snwz.cloudfront.net/wp-content/uploads/sites/54/2019/08/31171419/io-favicon-300x300.pngBJ Johnson2023-05-16 23:14:142024-12-24 19:41:04Importance of Keeping Your Home Inspection Report