Maintaining the appearance of your home demands attention to detail, and it doesn’t stop at brick surfaces. Whether you’re prepping your home for a vibrant summer party or simply doing routine upkeep, the sight of moss creeping across your brick patio or climbing up your exterior walls can kill a good mood.
But fear not! Tackling the green intruder is not as daunting as it may seem. In this guide, we’ll walk through removal and prevention strategies, including eco-friendly options, to address this eyesore. Whether you opt for a professional cleaning service or take matters into your own hands, our goal is to make sure that moss doesn’t stand a chance against your efforts.
Causes of Moss Growth on Brick
Thriving in damp, cool environments, moss spores latch onto the porous surface of bricks, where they absorb water and nutrients.
As time goes on, this seemingly harmless plant can become a destructive force, trapping moisture against brick surfaces. This not only accelerates wear but also compromises the structural integrity of your bricks, potentially leading to costly repairs.
The secret to moss control lies in understanding and modifying the environmental conditions that facilitate its growth, paving the way for effective prevention and maintaining the health of your brick surfaces.
Preparing to Remove Moss
Firstly, equip yourself with the appropriate tools to ensure your project is a success. Here’s what you’ll need to kill the moss on your brick surfaces:
Protective gloves
Safety glasses
A stiff brush
A cleaning solution of your choice
Whether you lean towards eco-friendly methods like vinegar or opt for stronger solutions such as bleach, prioritizing safety is paramount. When you protect yourself and ensure good ventilation in the area, you avoid a whole host of potential safety issues.
The Moss Removal Process
Removing moss from brick requires a delicate balance between effectiveness and preserving the integrity of the brickwork. Here’s a step-by-step approach that ensures thorough removal while maintaining the health of your bricks:
Moisten the Moss – Begin by gently dampening the moss with water. This preliminary step softens the moss, making it easier to remove without damaging the brick’s surface.
Physical Removal – Using a stiff, non-metal brush, gently scrub the moss from the bricks. The key here is to use enough pressure to remove the moss while being gentle enough to avoid scratching or damaging the bricks. Work in small sections to ensure thorough removal.
Choose Your Cleaning Solution – For a natural approach, mix equal parts water and white vinegar. For more stubborn moss, a solution of diluted bleach (one part bleach to ten parts water) can be effective. Apply your chosen solution directly to the affected areas, taking care to protect surrounding vegetation, and wear protective gear to safeguard your skin and eyes.
Application and Waiting – Apply the solution using a spray bottle or brush, ensuring full coverage of the mossy areas. Allow the solution to sit for at least 15 minutes. For tougher moss, a longer soak might be necessary but never exceed 30 minutes to avoid brick damage.
Rinsing – Thoroughly rinse the treated area with clean water. A low-pressure hose is ideal for this task, removing the dead moss and cleaning the solution without eroding the mortar.
Dry and Assess – Allow the area to dry completely. This not only gives you a chance to assess your work but also helps prevent immediate moss regrowth. If moss remains, repeat the process, focusing on the persistent areas.
Other Recommended Maintenance
Regular cleaning is essential to prevent the accumulation of dirt and early detection of wear or damage. Another crucial practice is repointing, which involves renewing the external parts of mortar joints to prevent water ingress and structural damage. Applying a breathable sealant can also protect the bricks from moisture while allowing trapped water vapor to escape, crucial for preventing moss and mildew growth.
Finally, consistent inspections are key to identifying cracks or damage early, allowing for timely repairs before minor issues escalate.
When to Call a Professional
Sometimes, the moss may have already gotten out of control, inviting structural damage to your bricks. In such cases, professional help isn’t just recommended; it’s necessary. Experts can assess the extent of damage, provide targeted treatments, and even offer advice on preventing future growth.
Remember, the goal is to preserve your property’s integrity and aesthetics, and professionals are equipped with the skills and tools to do just that.
Conclusion
Moss on brickwork is an obvious aesthetic issue, but it’s also a sign that your brick surfaces need attention. With the right approach, the steps to kill moss on brick and maintain your home’s exterior are simple and immensely rewarding. Remember, the key to successful brick maintenance lies in regular care and early intervention!
Whether you decide to tackle moss removal yourself or seek professional assistance, maintaining your brick surfaces not only enhances your property’s appearance but also its longevity and value. However, when in doubt, give a shout! For guidance on your home’s exterior or to schedule an inspection, reach out to Inside and Out Property Inspectors in Jacksonville, FL, and surrounding areas.
https://insideandoutpropertyinspectors.com/wp-content/uploads/2024/03/how-to-kill-moss-on-brick.jpeg10001500BJ Johnsonhttps://d39oyu4lp7snwz.cloudfront.net/wp-content/uploads/sites/54/2019/08/31171419/io-favicon-300x300.pngBJ Johnson2024-03-26 20:49:302024-03-26 20:49:30How To Kill Moss On Brick
Water pipes are an integral part of any residential or commercial building’s plumbing system. They are responsible for the distribution of water throughout a property, ensuring that clean water is accessible at various points such as sinks, showers, and outdoor faucets. Sometimes air can get in the water pipes. We will learn in this article about where water pipes are located, identifying air in the pipes, and what causes air in water pipes.
What Are Water Pipes?
Water pipes are cylindrical tubes designed to transport water from the main supply to various fixtures and appliances within a building. These pipes can be made from various materials including PVC, copper, galvanized steel, and PEX.
Where Are Water Pipes Located?
Typically, water pipes are located within walls, beneath floors, and above ceilings. In some cases, they can also be found in the ground outside buildings, connecting the municipal water supply to the internal plumbing system.
How to Identify Air in Water Pipes?
Air trapped in water pipes usually manifests as irregular water flow, loud noises such as banging or whistling when a tap is turned on, sputtering at the outset of water flow, or vibrations in the pipes. This may help you find and give you ideas about what the causes of air in water pipes may be.
What Causes Air in Water Pipes?
Air in the water pipes can be caused by a few things:
Water Supply Turnoff: Shutting off the main water supply can sometimes allow air to enter the system.
System Repairs or Modifications: Any repairs or changes to the plumbing can introduce air into the pipes.
Faulty Valves or Seals: Compromised valves or seals may suck air back into the pipes when water pressure drops.
High Water Velocity: High speeds of water flow can create vacuum pockets that trap air.
Improperly-Sized Pipes: Oversized or undersized pipes can cause air chambers to form.
Why Air in Water Pipes Needs to Be Removed
Air in water pipes needs to be removed because it can lead to inconsistent water pressure. It can also lead to potential pipe damage due to water hammer, noise disturbance, and inefficient water heating.
Steps to Remove Air From Water Pipes Yourself
If you figure out what the causes of air in your water pipes are, you can remove the air yourself. Take a look below at the steps.
Turn Off Water Main: Locate the main shut-off valve and turn off your water supply.
Open Highest Faucet: Go to the highest level in your home and open the faucet.
Open Lowest Faucet: Find the lowest faucet in your home, often this is an outdoor hose bib or basement sink, and open it as well.
Turn On Water Supply: Reopen the main valve to allow water to push the air out through the open faucets.
Close Faucets: Once water flows consistently without sputtering, close the lowest faucet followed by the highest one.
How to Protect Your Plumbing?
Regular maintenance such as inspecting for leaks, proper insulation, and checking water pressure can extend the lifespan of your water pipes. It can also prevent issues like airlocks. To protect your plumbing, avoid chemical drain cleaners. Additionally, reduce water pressure if it’s too high, and soften hard water to minimize mineral buildup. Also, never allow your pipes to freeze. These are all good ways to make sure you protect your pipes.
Maintaining Pipes in Your Home
Now that you are aware of how air has gotten into your water pipes you can begin reviewing other possible plumbing issues in older homes. Once you purchase an older home, it is a great idea to read up on all of the possible issues that could arise. This allows you to save money towards any big repair needs down the road.
Next, there are other areas in your home where you might notice air bubbles in your water lines. The toilet is often a place that has an issue with too much air, based on the water pressure and the need to swap out old equipment. Be sure to understand why your toilet bubbles when the shower is running. This could be a result of air in your water lines.
Lastly, if you notice a problem with your bathroom smelling like sewage, you should immediately investigate this. Checking all drains and other possible causes during a sewer scope inspection is key. As you work to get the air out of your water pipes, you might also get rid of any clogs or bacteria build-up that has caused this foul smell.
When to Call a Professional
If you’ve attempted to remove the air and are still experiencing problems, it may be time to call a licensed plumber. Also, if you’re uncomfortable performing these steps yourself, reach out to a professional. It can be difficult to figure out the solution, especially if it is something a little more technical. A professional can help solve the issue.
Check out the video below about getting the air out of the water pipes in your house.
https://insideandoutpropertyinspectors.com/wp-content/uploads/2023/07/water_droplets_25.jpeg10001500BJ Johnsonhttps://d39oyu4lp7snwz.cloudfront.net/wp-content/uploads/sites/54/2019/08/31171419/io-favicon-300x300.pngBJ Johnson2024-02-21 02:54:262024-02-21 02:54:26What Causes Air In Water Pipes?
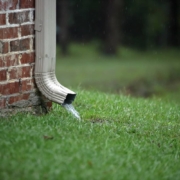
Downspouts are crucial components of your home that help prevent water damage. Many homeowners know they’ll need downspouts, but wonder how many their gutter system will need. The ideal downspout configuration depends on several factors like climate, gutter size, roof area, and slope.
This article will explore the rights and wrongs of downspout placement so you can make informed decisions about your home’s water management system. With the help of a professional installer, you can customize your downspouts to fit your roof and protect your home.
What is a Downspout?
Downspouts are vertical drainage pipes that carry rainwater from your gutters down the exterior walls of your home. Also called leaders or conductor pipes, they redirect water away from your home’s foundation. Without effective downspouts, gutters can overflow and lead to flooding, soil erosion, basement leaks, and damage to siding and landscaping. Downspouts are typically made of galvanized steel, copper, aluminum, or plastic. They come in various shapes like round, square, or rectangular.
Strategically placed spouts are crucial for an efficient gutter system. They help prevent rain gutter overflow and guide water at least 5 feet away from your home’s foundation. They also reduce pressure on gutters from pooled water and debris buildup. Investing in properly positioned downspouts protects your biggest asset, saves on costly foundation repairs, and boosts curb appeal.
Determining the Ideal Amount
Installing the optimal number of downspouts is crucial for properly managing rainwater and preventing damage to your home. There are several key factors to consider when determining how many downspouts your gutter system requires:
Roof Square Footage – The total roof area dictates how much rainwater runoff needs to be effectively drained. Larger roofs require more downspouts, while smaller roofs may only need a minimum of 2-3 spaced evenly. Most standard two-story homes between 1500-3000 square feet need at least 4-5.
Climate and Average Rainfall – Homes in regions with frequent heavy rainfall need more than those in drier climates. Space downspouts closer together at 20-30 foot intervals in wetter regions to handle larger water volumes.
Gutter Type and Size – Larger box gutters or K-style gutters have greater water capacity than standard half-round gutters. Bigger gutters require fewer downspouts to effectively drain water. Consult your contractor.
Roof Pitch and Slope – Steeper-angled roofs allow water to run off faster. More gently sloped roofs cause water to drain slower, requiring more spouts to compensate.
Optimal Downspout Placement
Once you’ve determined the ideal number of downspouts needed, proper placement around your home’s perimeter is crucial for optimal performance. Follow these key guidelines when positioning new or existing downspouts:
Space Evenly Around Entire House – The spouts should be spaced at regular intervals around all sides to prevent overflow. Standard spacing is 30-40 feet apart for most homes.
At Endpoints of Gutter Runs – Install downspouts at the endpoint of every gutter run to drain all connected sections. Runs over 30 feet should have downspouts at both ends.
Near Roof Valleys and Inside Corners – Position downspouts at roof valleys or inside corners where water naturally accumulates to prevent heavy concentration.
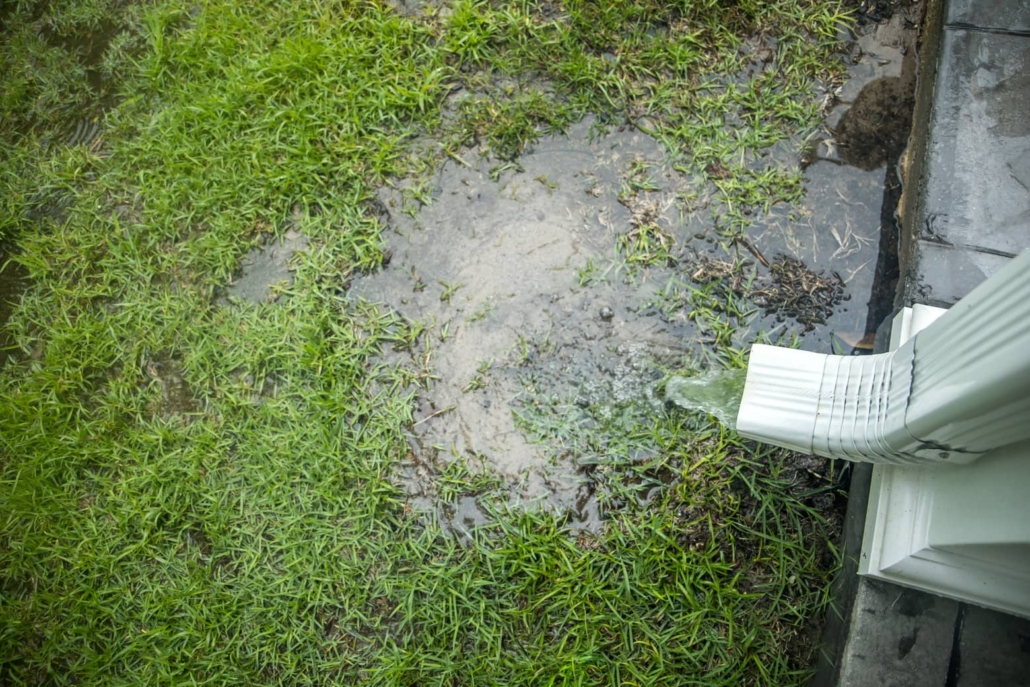
Angle Away From Foundation – Direct downspouts at least 5-10 feet away from your foundation depending on yard slope. Use extenders if more distance is required.
Avoid Outer Corners and Peaked Edges – Don’t place downspouts at vulnerable outer corners or peaked roof edges where wind/rain can detach them.
Drain Toward Hardscapes – Ideal to direct downspouts toward driveways, patios, or French drains for efficient runoff.
Other Recommended Maintenance
Properly positioning your downspouts is one crucial maintenance task for optimal gutter performance, but it’s not the only one. Here are some other important maintenance tips to help your gutters function efficiently:
Cleaning gutters at least twice per year, and more often if you have overhanging trees, is essential. Pay special attention to removing debris around downspouts so water can flow freely. Installing gutter guards or covers can also minimize debris buildup and reduce cleaning frequency.
Checking for leaky joints or seams is also recommended during cleaning. Reseal any leaky spots to prevent water overflow and damage. Rusty downspouts or gutters may need replacement – consult a pro about spot repairs versus full replacement.
Downspout extenders should drain 5-10 feet or more from your foundation. Check that existing extenders are at a proper angle or install new ones if necessary. Keep the surrounding soil graded so water flows away from your home.
Finally, trimming overgrown trees and shrubs near your roofline helps prevent leaves and debris accumulation in gutters. Maintaining vegetation minimizes falling debris that can clog downspouts.
When to Call a Professional
If you need to install a completely new gutter system, always hire a pro. They have the expertise to determine the optimal gutter type, size and number of downspouts specific to your home’s requirements. Professionals also have the equipment and skills to properly install gutters for maximum effectiveness and longevity.
For existing gutters, call a pro if you notice any signs of damage like peeling paint, rust spots, leaks, or sagging areas. They can assess if spot repairs or full replacement are good ideas. Trying DIY repairs often leads to bigger problems.
If your gutters overflow frequently or you suspect your downspouts are improperly positioned, have an expert evaluate them. They can confirm if realigning downspouts or adding more will improve performance.
To determine how many downspouts your existing gutters need, or where new ones should go, consult a gutter pro. Their years of experience give them an expert eye for optimal downspout placement customized to your home.
For specialty needs like copper gutters, gutter heating cables or custom covers, you’ll need a professional’s expertise. Don’t compromise on quality to save money.
Final Thoughts
Essentially, the positioning and quantity of your home’s downspouts can play a crucial role in effectively managing rainwater runoff. Improperly placed spouts can lead to flooded gutters, water accumulation by the foundation, and damage to siding and landscaping. Determining the ideal number depends on factors like your roof size, climate, gutter type, and pitch.
Once you’ve calculated the right amount, strategic placement around the roof perimeter is key for optimal performance. Spouts should be evenly spaced, located at gutter endpoints, and angled safely away from your home. To get an expert’s eyes on your downspouts or to schedule a complete home inspection, reach out to Inside & Out Property Inspectors in Jacksonville, FL, and surrounding areas.
https://insideandoutpropertyinspectors.com/wp-content/uploads/2023/02/how-many-downspouts-needed.jpeg10001500BJ Johnsonhttps://d39oyu4lp7snwz.cloudfront.net/wp-content/uploads/sites/54/2019/08/31171419/io-favicon-300x300.pngBJ Johnson2024-01-30 18:52:202024-01-30 18:52:21How Many Downspouts Do I Need?
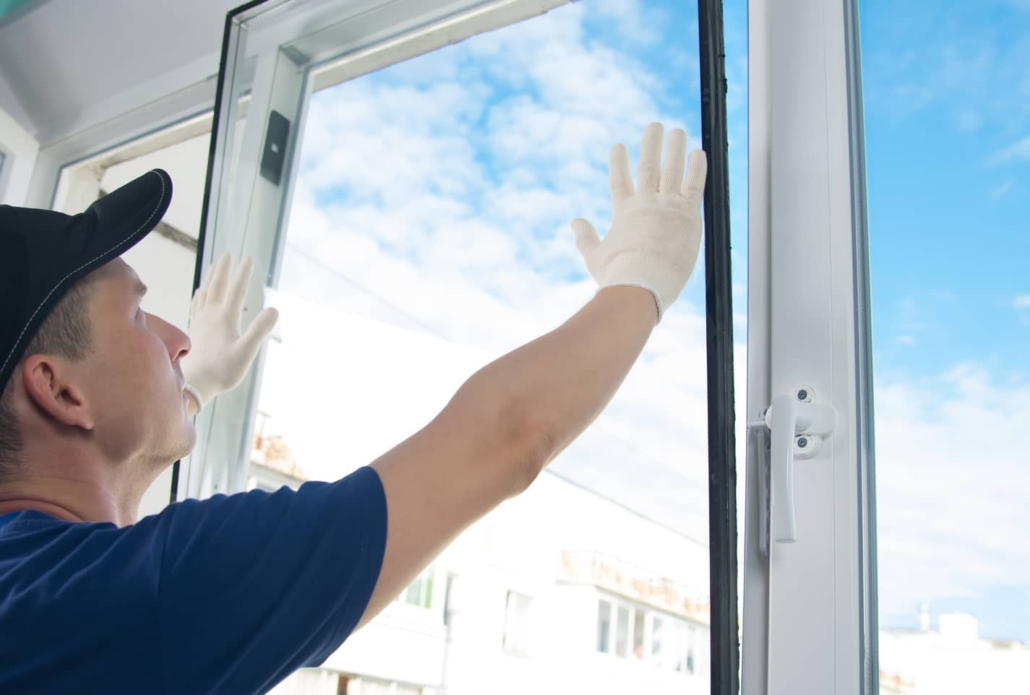
When it comes to selling a home every homeowner wants to get the most money out of their investment. In some cases, there can be a huge upside when the windows are brand new. The words “brand new” give the buyer a sense of excitement about their new home purchase. Anytime that you can provide the potential buyer with the idea that one less project is needed makes the home buyer happy. Is it worth replacing windows before selling a house? Not necessarily. It is recommended that you update the weather stripping and caulking.
Let’s look below at when and why you should replace the windows in your home.
Assess the Condition and Value of Your Current Windows
When contemplating selling a house, assessing the condition of your windows and determining if it’s worth replacing them is a pivotal step. This analysis will not only inform potential buyers of the home’s state of repair but also contribute to the overall energy efficiency and aesthetic appeal that can sway purchasing decisions.
Conduct a Thorough Window Assessment
Begin with a meticulous examination of your windows. Here’s what to look for:
Signs of Wear: Check for drafts, condensation between panes, and difficulty in operation, which all suggest poor performance.
Structural Integrity: Inspect for decay in wooden window frames, cracks in the glass, or compromised seals. Any of these could impact both insulation and security.
Aesthetic Condition: Look for peeling paint, water stains, or outdated styles that detract from your home’s appeal.
Gauge Energy Efficiency
Energy efficiency is a key selling point in today’s market. Buyers are increasingly conscious of both their carbon footprint and the long-term cost savings associated with efficient homes. Energy Star-certified windows, for instance, can be a significant draw for buyers looking to reduce their energy bills.
Understand the Market
Real estate markets vary widely, and what’s expected in one neighborhood might be less important in another. In areas prone to extreme weather, for instance, the quality of windows can be a make-or-break feature for buyers. Research local trends and consult with real estate agents to understand how much value new windows might add to your home.
Cost-Benefit Analysis
Replacing windows can be a substantial investment. To decide whether it’s worth it, compare the costs of replacement to the potential increase in property value. Remember, while new windows may not cover their costs entirely at sale, they could expedite the selling process by making your home more attractive to buyers.
To Replace or Not to Replace
The decision to replace windows before putting your house on the market is not one-size-fits-all. Several factors must be weighed to determine whether this home improvement will translate into a worthwhile return on investment when you sell. Here’s how to clarify whether window replacement is the right move for your home sale.
Evaluate the Current State
Reflect on the thorough window assessment conducted earlier. If your windows show significant signs of wear, compromise the structural integrity of your home, or have a dated appearance that detracts from your home’s overall look, these issues might negatively impact a buyer’s perception of your property.
Consider the Energy Efficiency Factor
Energy efficiency upgrades can be a strong selling point. If your existing windows are not energy-efficient and you live in an area where energy conservation is a priority for buyers, investing in new windows could be a strong selling point that adds to your home’s market value.
Balance Costs and Returns
Weigh the costs of full replacement against potential returns. If the window issues are cosmetic, a less expensive repair might suffice. However, if the windows are functionally obsolete, this could be a deterrent for buyers looking for a move-in ready home.
Market Expectations
Understand what is standard in your area. If you’re in a high-end market where buyers expect homes to be turnkey, new windows could be necessary to compete. Conversely, if you’re in a seller’s market or an area where buyers are likely to renovate post-purchase, investing in new windows may not provide a significant return.
Buyer Incentives
Consider the alternative of offering an allowance for window upgrades in the sale price, which can be an attractive option for buyers. This allows them to choose their preferred style and may be a more cost-effective solution for the seller.
Consult with Professionals
Before making a decision, consult with a local real estate agent and a window installation professional. They can provide insights into the local market and the potential increase in sale price that new windows might bring.
Ultimately, while it is generally worth it, replacing windows before selling a house should be based on a combination of practical considerations and a strategic assessment of the housing market. If new windows will significantly enhance the curb appeal, functionality, and energy efficiency of your home, thus making it more attractive to buyers and likely to sell faster and at a higher price, then replacement is a sound investment. If not, then simple repairs and a good cleaning may suffice.
Cost Considerations for Window Repair or Replacement
When deciding whether to repair or replace windows before selling your home, it’s essential to have a grasp of the potential costs involved. Here’s a breakdown of the financial aspects to consider:
Average Cost of Window Repair or Replacement
Minor repairs such as replacing weather stripping, re-caulking, or repainting window frames are generally affordable, often ranging from $100 to $300 per window. These repairs can mitigate issues like drafts and improve the overall appearance of the windows without a significant investment.
The cost of replacing windows can vary widely based on the window type, material, and installation fees. On average, homeowners might expect to spend anywhere from $300 to $1,000 per window for vinyl replacement windows, which are a cost-effective and popular choice. Wood or fiberglass windows can cost significantly more, potentially ranging from $600 to $2,000 per window.
Energy-Efficient Windows
If you opt for Energy Star-certified windows, the initial cost might be higher; however, these can offer long-term savings on energy bills and entice energy-conscious buyers. The additional investment might range from 10% to 15% more than standard windows but could be offset by energy savings over time.
Return on Investment (ROI)
While new windows can enhance your home’s value, they usually do not recoup 100% of the investment upon sale. The ROI for window replacement averages around 70%, which means for every $1,000 spent on new windows, you could expect to increase the home’s selling price by about $700. However, this figure can fluctuate based on your area’s housing market and buyer expectations.
Additional Factors
The Scale of Replacement: The cost will also depend on whether you’re replacing all windows or just a few. Quantity discounts may apply for larger jobs.
Custom Windows: Custom shapes and sizes will increase costs, so standard window sizes are more budget-friendly.
Installation Costs: Professional installation is crucial for window performance and typically accounts for a significant portion of the replacement costs. It’s worth getting multiple quotes to ensure competitive pricing.
Potential Rebates: Some energy-efficient upgrades qualify for rebates or tax credits, which can reduce the overall cost.
Ballpark Figures
For a modest-sized home, repairing windows could cost between $200 and $600 for basic fixes, while full replacement with standard, energy-efficient models could range from $3,000 to $10,000 or more, depending on the number and type of windows. It’s advisable to obtain at least three quotes from reputable contractors to get an accurate estimate for your specific situation.
Other Recommended Maintenance
Ensuring your home is presented at its best is key to achieving a successful and profitable sale. A well-maintained structure and facade are as critical as the condition of your windows. Address any exterior issues such as chipped paint, damaged siding, or missing roof tiles. A pristine exterior boosts curb appeal and indicates to potential buyers that the home is cared for inside and out.
Inside, tackle any basic repairs that could undermine the perceived value of your home. Fix leaky faucets, ensure all appliances are in working order, and oil any creaky hinges. These small adjustments contribute to the overall impression of a home that has been maintained diligently.
Servicing your home’s heating, ventilation, and air conditioning system is another crucial step. A functional and efficient HVAC system is a hidden complement to new windows, reinforcing the message of energy efficiency and comfort.
Good lighting is also paramount; it highlights your home’s best features, complements the new windows, and sets a welcoming ambiance. Replace any non-working bulbs and consider updating dated fixtures to modernize and brighten your space. Attending to these maintenance aspects shows a commitment to your home’s condition and can significantly sway a buyer’s perception, potentially making the difference between a house that lingers on the market and one that sells promptly at a desirable price.
When to Call a Professional
Deciding when to call a professional is an important step in preparing your home for sale. For window repairs or replacements, a professional should be consulted if you encounter issues beyond basic cosmetic fixes. This includes problems like foggy windows, which indicate a failed seal, windows that are difficult to open or close, or signs of rot or water damage on wooden window frames. These conditions often require specialized skills and tools to ensure the job is done correctly and safely.
For other home maintenance tasks, such as servicing your HVAC system, dealing with electrical work, or addressing significant plumbing issues, professional expertise is not just recommended, it’s essential. These systems can be complex and, if not handled properly, can lead to costly damage or pose safety risks.
Additionally, if you’re unsure about the structural integrity of your home or if you’ve discovered potential mold or pest infestations, it’s time to bring in experts. They can assess the situation accurately and provide solutions that will stand up to scrutiny during a home inspection.
In summary, for any task that goes beyond your knowledge, could affect your home’s safety, or might impact its value, enlist the services of a professional. This ensures that all work is up to code, completed efficiently, and presents your home in the best light for prospective buyers.
In a competitive real estate market, presenting your home at its finest can make all the difference. This being the case, the investment of replacing windows before selling the house is usually worth it. By carefully considering the condition of your windows and addressing other key maintenance issues, you set the stage for a successful and lucrative home sale.
Remember that while the charm is in the details, the confidence comes from the foundations. Don’t overlook the power of first impressions; ensure your windows and home maintenance speak of quality and care. When tasks exceed your expertise, calling in professionals is a smart investment in your home’s marketability. For guidance on the condition of your current windows or an inspection of any other home components, reach out to Inside and Out Property Inspections today.
https://insideandoutpropertyinspectors.com/wp-content/uploads/2024/01/windows-and-real-estate.jpeg10001500BJ Johnsonhttps://d39oyu4lp7snwz.cloudfront.net/wp-content/uploads/sites/54/2019/08/31171419/io-favicon-300x300.pngBJ Johnson2024-01-18 21:04:312024-12-24 19:40:56Is It Worth Replacing Windows Before Selling A House?
When it comes to home improvement, certain tasks challenge your skills while rewarding you with a profound sense of achievement. Removing tile from a concrete floor certainly falls into this category. Whether you’re a regular DIY enthusiast or a homeowner starting a significant renovation, understanding how to remove tile from a concrete floor is an invaluable skill to have.
In this post, we will break the process into manageable steps, get prepared, prioritize safety, and learn to recognize when experts might be necessary. So, let’s pull up our sleeves and transform your floor, one tile at a time.
Preparing for the Job
Removing tile from a concrete floor requires more than just an excited spirit—it calls for careful preparation that ensures both efficiency and safety. After all, proper preparation is the cornerstone of any successful DIY project.
Understanding the Process
First, it’s important to grasp the full scope of the task. Removing tile from a concrete floor involves a methodical process of chiseling away each tile without causing undue damage to the underlying concrete. It can be a physically demanding task that requires patience, but with the right approach, it’s certainly doable.
Gathering Your Tools
Next, you’ll need to arm yourself with the right tools. Here’s a basic list to get you started: a floor scraper or a chisel and hammer, a pry bar, safety glasses, work gloves, and a sturdy broom for cleanup.
Remember, quality tools make a world of difference in facilitating the task and ensuring your safety.
Setting Realistic Expectations
Finally, it’s crucial to set realistic expectations. Bear in mind that this project can be time-consuming, especially for larger areas. It’s not a race, and it’s perfectly acceptable to spread the work over a few days or even a weekend.
But don’t let this deter you! With each tile you remove, you’re one step closer to revealing the potential of your concrete floor. And each time you look at the finished result, you’ll be reminded of the effort you’ve put in.
Prioritizing Safety
As in any home improvement project, safety is paramount when removing tile from a concrete floor. The process involves sharp tools and shards of tile, which can pose risks if not handled with care. Here are the ways you should prioritize safety during this task.
Wear Protective Gear
As mentioned above, it’s always paramount to equip yourself with the appropriate personal protective equipment. Safety glasses are crucial to protect your eyes from flying debris. Work gloves can safeguard your hands from sharp tile shards and provide a better grip on your tools. Consider also wearing a long-sleeved shirt and durable pants to protect your skin. Lastly, don’t forget about your feet—closed-toe, slip-resistant work shoes are a must.
Maintain a Clean Workspace
A clean workspace is a safe workspace. Regularly sweep up the debris to keep your work area clean and prevent tripping hazards. Dispose of broken tiles immediately—they can be sharp and potentially dangerous.
Use Tools Correctly
Understanding and respecting your tools is a key aspect of safety. Use your tools as they’re intended to be used, and never force a tool to do a job it’s not designed for. Remember, a chisel is for chipping away, not prying up tiles—that’s a job for the pry bar.
Take Regular Breaks
Given the physically demanding nature of tile removal, ensure you take regular breaks. Overexertion can lead to fatigue, decreased alertness, and increased risk of accidents. Hydrate, rest, and only continue when you’re ready.
Be Aware of Your Surroundings
Lastly, be mindful of your surroundings. Be aware of where your tools are at all times to avoid accidental injuries. If you’re working in a confined space, ensure there’s sufficient ventilation. And remember to keep curious pets and children away from the work area.
Steps for Removing Tile From Concrete Floor
Now that we’ve prepared and prioritized safety, it’s time to get down to business. Here’s a step-by-step guide to help you remove tile from your concrete floor systematically and safely.
Step 1: Start at the Edge
Begin at the edge of the room or near a loose tile, if there is one. This will provide an ideal starting point, as the edge tiles are generally easier to remove.
Step 2: Loosen the First Tile
Using your floor scraper or hammer and chisel, start chipping away at the grout around the tile. Once the grout is sufficiently removed, angle your tool beneath the tile and apply pressure to pry it up. Be patient during this process—it might take a few tries to get the tile to budge.
Step 3: Remove the Tile
Once the tile is loose, use your pry bar to lift it away from the concrete floor. Be cautious during this step; broken tiles can be sharp.
Step 4: Continue the Process
Continue this process, working one tile at a time. Be systematic—move in a straight line or follow a specific pattern to ensure you don’t miss any tiles. Remember, patience is key here. Some tiles may be more stubborn than others.
Step 5: Clean Up
With all tiles removed, it’s time for cleanup. Use your broom to sweep up all the debris and broken tile pieces. Ensure the floor is clean and free of any remaining tile adhesive.
Step 6: Inspect the Concrete
Finally, inspect your concrete floor for any damage or remaining adhesive. If you notice any residual glue, consider using a floor grinder to smooth out the surface.
And with that, congratulations! With patience, preparation, and safety precautions, you’ve transformed your space, revealing a concrete floor full of potential.
Recommended Maintenance
Once you’ve put in the effort to remove tile from your concrete floor, maintaining the exposed surface becomes crucial. Applying a good quality sealer is an effective way to provide a protective barrier against moisture and stains, thereby extending the floor’s lifespan.
Additionally, regular cleaning with a pH-neutral cleaner helps to preserve the floor’s appearance without causing damage. In case of stubborn stains, occasional use of a mild abrasive cleaner is permitted, but harsh chemicals should always be avoided as they can degrade the concrete and dull the finish.
When to Call a Professional
If you encounter particularly stubborn tiles that resist your removal attempts or discover extensive damage to the concrete beneath the tiles, a professional’s specialized tools and expertise can be helpful. Professionals can also safely handle the presence of asbestos, which can be found in older adhesive materials and requires specific safety measures to address.
When it comes to maintaining your concrete floor, the appearance of large cracks, significant surface damage, or persistent, hard-to-remove stains might also necessitate professional intervention. A professional can assess the condition and recommend appropriate treatments or repairs to maintain the integrity and aesthetics of your floor.
Lastly, if you’re short on time or if the scale of the project is overwhelming, professional help can be a time-efficient solution.
Final Thoughts
Embracing the DIY spirit to transition from a tiled to a bare concrete floor can be a gratifying journey. It’s a pathway that demands careful preparation, patience, and a strong commitment to safety.
Every tile you remove brings you a step closer to unveiling a floor brimming with potential. Maintain it well and know when to seek professional assistance to ensure its longevity and beauty. If you have questions about the condition of your floor, or for a comprehensive home inspection, reach out to Inside & Out Property Inspectors today.
https://insideandoutpropertyinspectors.com/wp-content/uploads/2023/12/How-to-remove-tile-from-concrete.jpeg10001500BJ Johnsonhttps://d39oyu4lp7snwz.cloudfront.net/wp-content/uploads/sites/54/2019/08/31171419/io-favicon-300x300.pngBJ Johnson2023-12-06 18:56:452023-12-06 18:56:46How to Remove Tile From Concrete Floor
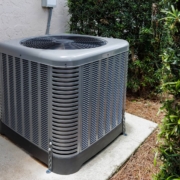
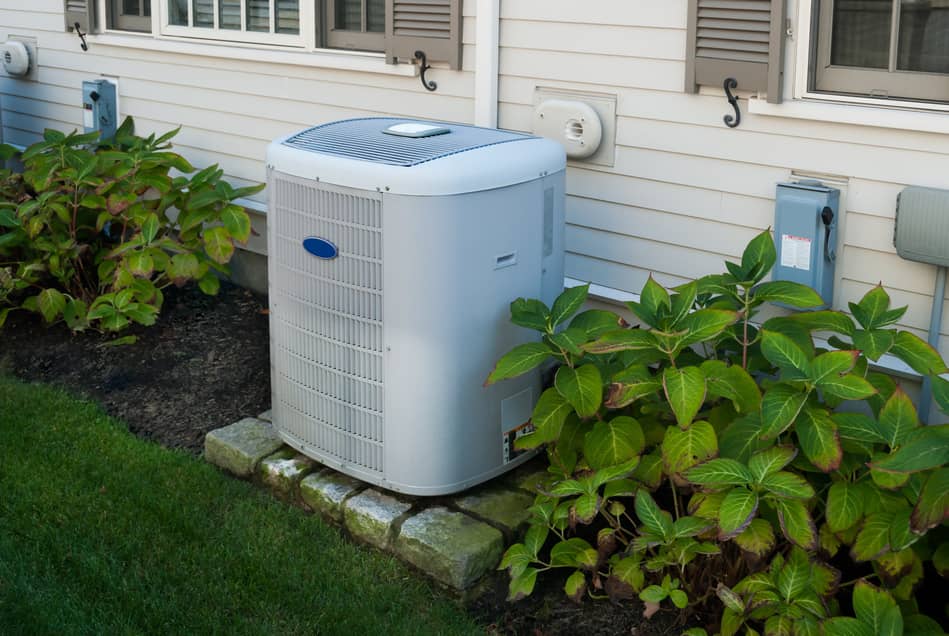
When it comes to owning a home, there are a variety of maintenance and cleaning needs. Additionally, you will want to ensure that everything in your home is working properly. Make sure that you have an understanding of how every system in your home functions. This will save you time and money as you work through your maintenance checklist. Also, ensure that the conditions in your home are conducive to keeping the home safe and free from mold. Humidity will promote mold growth, so ensure your air conditioner is working to dehumidify your home as it runs. Do air conditioners dehumidify? Yes, it will remove moisture from the air that gets sucked into the AC unit as it cools the air down.
Let’s take a look below at some more details regarding dehumidifying and cooling your home.
What Does It Mean To Dehumidify?
Dehumidifying your home means removing moisture from the air. The air conditioner will act as a dehumidifier while it runs in your home. The air conditioner will not completely remove all moisture from your home, but it will remove some. If your home shows a high moisture reading, then you will want to invest in an additional dehumidifier. Run your air conditioner at a temperature that is consistent with the outdoor air. Consequently, this allows the unit to reduce the moisture from the air as it sucks it into the unit and blows the warm air out.
How Does It Work In An Air Conditioner?
Let’s take a look at how the air conditioning system works to remove excess moisture from your home.
Liquid refrigerant – When the ac unit kicks on it will push refrigerant through the pipes within the unit. Excess heat is then removed.
Evaporator – The cold air will then be pushed through to each room by the evaporator in the system.
Liquid refrigerant – The liquid refrigerant is then converted to gas once it passes through the expansion valve.
Evaporator coils – The evaporator coils cool the refrigerant once the refrigerant is pushed through the evaporator coils.
AC fans – The internal fans in the AC unit then push the cool air from the evaporator coils through the air ducts in the home.
Liquid refrigerant – The refrigerant then absorbs the hot air from the home and converts it to a hot gas.
Compressor – Next, the refrigerant is pushed into the compressor where it becomes a high-temperature and high-pressure gas.
Condenser coils – The gas is then pushed through the condenser coils and the heat that was absorbed is released through the outside unit.
When Should I Purchase A Dehumidifier?
If you aren’t sure when you will need to purchase a dehumidifier to dehumidify the air, it should be considered under the following circumstances. Also, read up on how a dehumidifier works with your central air conditioners.
Personal preference – If the environment in your home does not feel like the humidity levels are where they need to be, you will want to purchase a dehumidifier. Consider determining the type of environment that you want the rooms that you spend your time in to feel like.
Budget – An AC unit’s cost is expensive compared to a dehumidifier. Purchasing a dehumidifier will go a long way toward reducing the humidity in the home. Dehumidifiers are portable and inexpensive.
Location – If you live near water, then the moisture levels in your home will be exponentially high. Installing a dehumidifier will help keep the moisture levels in your home from getting out of hand.
Other Recommended Maintenance
Now that you are aware of how an air conditioner dehumidifies your home, you can read up on whether or not your ceiling fans help the ac unit. Placing your ceiling fans on the correct rotation allows you to assist your ac unit with maintaining the airflow and moisture control in your home.
Next, read up on what you need to consider when you replace your HVAC unit. Homeowners should not rush into replacing their HVAC unit without researching how long the new one could last. Also, research the size of the HVAC unit to ensure that it fits your home’s needs.
Lastly, as you install your new ac unit or work to repair your current unit, keep in mind that carbon monoxide should be a non-issue. Any electrical system like an HVAC unit will not emit carbon monoxide.
L
When Do I Call A Professional?
When it comes to your HVAC unit, you will want to make sure that it is working properly. Keeping the humidity levels in your home at a stable level will allow you to keep mold and mildew from growing in your air ducts and home. Call on your local home inspection team to inspect your HVAC unit and determine that everything is working properly. Also, your home inspection team can recommend a reputable HVAC system service technician to test your system.
Conclusion
Hiring the right professional HVAC service technician is necessary to determine that your system is set to remove excess moisture from your home. Not only is the goal of the HVAC unit to provide your home with the right air temperatures, but it also wants to maintain indoor air quality. Dehumidifying your home will need assistance. The air conditioning unit will not be able to remove all of the moisture on its own. Call on your local home inspection team to determine where additional dehumidifiers could be used. Reach out to Inside and Out Property Inspectors in Jacksonville, FL, and surrounding areas to get your home inspection done today.
https://insideandoutpropertyinspectors.com/wp-content/uploads/2023/06/air_conditioner_25.jpeg11351702BJ Johnsonhttps://d39oyu4lp7snwz.cloudfront.net/wp-content/uploads/sites/54/2019/08/31171419/io-favicon-300x300.pngBJ Johnson2023-06-26 15:45:172023-06-26 15:53:01Do Air Conditioners Dehumidify?
Buying an older home can come with a lot of questions. There were building materials and building codes that are completely different in today’s home market. As a home buyer, you should be very thorough with your home inspection. Ensure that everything in the home is up to building code, and there are no harmful materials in the home. Keep in mind that materials like asbestos and lead paint could have been used many years ago. When did lead paint stop being used? Lead paint was used all the way up to 1978. After 1978 it was phased out due to its toxicity.
Let’s take a look below at some more details regarding lead paint in the home.
What Is Lead Paint?
Lead-based house paint is a highly toxic material that was created before the 1980s. Lead is a metal that can cause major health issues in young children and adults. If lead is absorbed in the body, it can break down organs such as the kidneys, brain, nerves, and your blood. This toxic metal can create some major damage to the body.
It is estimated that 29 million houses in the United States have lead-based paint in them. This leads to a contaminated home with lead paint that can create damaging lead dust. If you ever suspect that your home has lead paint in it, call for a lead paint inspection. Once you have the lead paint inspection done, you can get a risk assessment to see how hazardous the paint in your home is.
How Can I Reduce My Exposure To Lead Paint?
To protect you and your family from lead exposure and lead hazards you will want to consider the following things below to reduce your exposure to lead paint. If the home was built before 1978 it is likely to have levels of lead that could result in lead poisoning. Let’s take a look at the ways we can reduce lead paint exposure.
Check-in – Reach out to your local health department and schedule a test for lead paint in your home.
Keep it clean – Inspect the entire home for any areas of paint that are peeling from the walls or other painted structures. Keeping your child from accessing any paint chips is important.
Safely renovate – If you begin to renovate the home, sanding, cutting, replacing windows, and other activities could create lead dust in the air and reduce the air quality. Also, this can expose you and your family to significant health damage. Be sure to review the Environmental Protection Agency (EPA) guidelines for lead paint removal.
Removal – Hire a professional lead-based paint removal company to get all lead paint chips and peeling paint off their surfaces. This kind of work should be done with proper safety precautions and tools and equipment to protect all involved.
Mop regularly – It is recommended that you use a wet mop on your floors and dust the window sills and wells with a wet rag. Keeping all surfaces free from any dust is important for maintaining your health and safety.
Wash regularly – If you suspect that your home has contaminated dust or soil, you will want to wash your child’s hands on a regular basis.
Create a barrier – Use contact paper and duct tape to cover holes and walls that are contaminated. Consequently, this should be done as you await the proper removal of the contaminated areas. Also, keep children away from contaminated soils.
Keep away – Be sure to keep pregnant women and children from accessing the home during renovations. While a renovation is being done, dust is flying around and paint debris is in the area. Once the work is done and all areas are cleaned up, the pregnant women and children can re-enter the home.
Keep in mind that in the 20th century, the EPA banned the use of lead in paint and homes. Public health is the biggest concern. Lead creates health problems for property owners who purchase a home with lead-based paint.
Other Recommended Maintenance
Now that you know when lead paint was stopped being used you can read up on how to negotiate after the home inspection. If your initial inspection finds that you have lead paint in or on the surfaces of the home, you will want to negotiate the sale price as you look to remove all toxic lead materials from the home.
Next, be sure to read up on who the best home inspection companies are in your local area. It is vital that you not just hire the cheapest home inspector. Hire the most reputable home inspection team to assist with determining if the home you live in has toxic materials in or on it.
Lastly, keeping your home inspection report is important for having a point of reference during the risk assessment portion of the home. Finding out if the paint does have lead in it will be necessary for any home buyer to know before a purchase is made. The home inspection report is a great start in the process.
When Do I Call A Professional?
Dealing with lead paint is not ideal for any family. It can cause some major health issues for you and your family. Be sure to reach out to your local home inspection team. They will determine if the paint in your older home is lead-based. Protecting you and your family should be a priority before worrying about any home purchase. Additionally, your local home inspection team can recommend a local risk assessment company. They will determine how toxic the paint in your home might be.
https://insideandoutpropertyinspectors.com/wp-content/uploads/2023/06/hazard_warning_25.jpeg10041504BJ Johnsonhttps://d39oyu4lp7snwz.cloudfront.net/wp-content/uploads/sites/54/2019/08/31171419/io-favicon-300x300.pngBJ Johnson2023-06-09 17:38:462023-06-09 17:38:47When Did Lead Paint Stop Being Used?
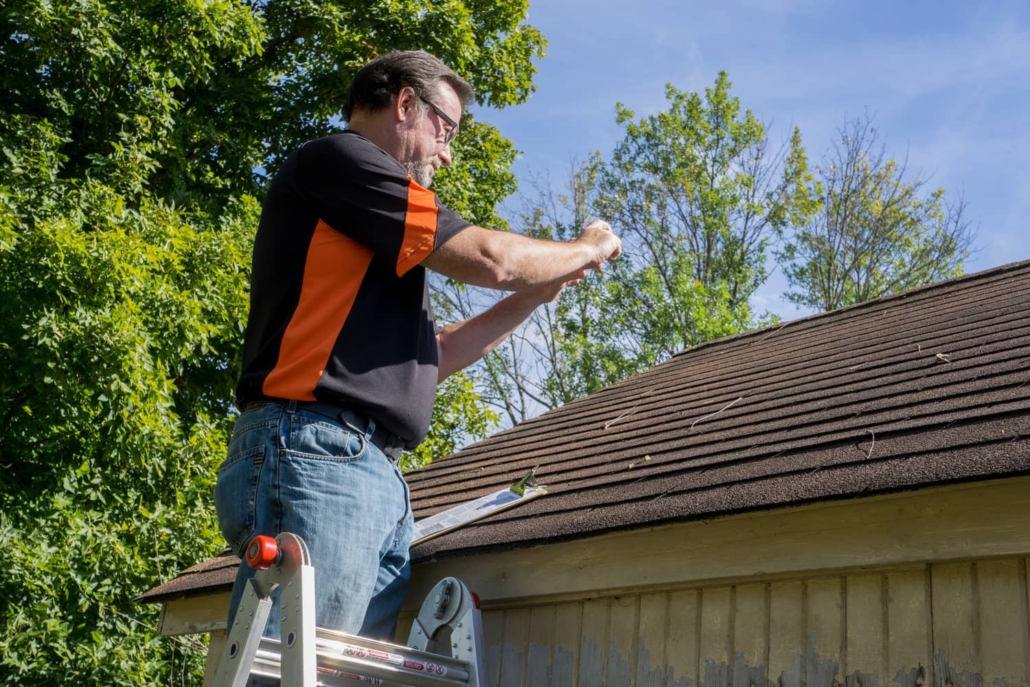
Imagine coming home from a long day at work and the skies start looking very threatening. You rush to pull your car into the garage and get inside where it is safe. As you get settled in your home you start hearing loud bangs. You look outside the window and there are large pieces of ice jumping around on your driveway. Immediately you realize it is a hail storm. Homeowners’ worst nightmares are acts of mother nature that cannot be predicted or changed. Once the storm is over you head outside to inspect the damages to your roof and the rest of the home. What does hail damage on a roof look like? Dents, dings, damaged shingles, bruising to your roof, and loose roof materials are all signs.
Let’s take a look below at some more specifics regarding hail damage on a roof.
How Does Hail Damage The Roof?
Believe it or not, hail can damage a roof in a variety of ways. Let’s take a look below at what those are.
Roof slope – Depending on how the roof is sloped on your home will determine the types of hail damage that it might incur.
Roof age – The older the roof, the less likely it will survive major damage caused by a hail storm.
Roofing materials – Hail can dent, ding, and even cause roofing materials to become loose and out of place.
Wind speed – The speed of the wind during a hail storm can cause substantial damage to the roof materials.
Wind direction – Depending on how your roof is situated and the direction in which the wind is coming from will determine how damaged the roofing materials will become.
Size of the hail – The size of the hail will also determine how bad the damage is. The larger the hail typically means the larger the damage.
Keep in mind that damage to your roof is generally cosmetic. You will want to hire a professional to take a closer look. If the hail is large, you will notice a loss of shingles, loss of granules, bruising to the shingle and even notice other structural changes.
What Does Hail Damage Look Like?
There will be some noticeable damages to your roof as a result of a hail storm. Let’s take a look below at what some of those damages look like.
Fiberglass mat exposure – The force of hail falling from the sky can loosen any shingle and make it slide away which will expose the fiberglass mat underneath.
Granule loss – As the hail dings the shingle, the granule material on the shingle will begin to disconnect and fall off the shingle.
Damage to the fiberglass mat – If the fiberglass mat is exposed you will notice damage to this protective layer. Damage to the mat could also cause damage to the roof sheathing underneath it.
Cracks in the shingle – Hail that causes cracks in the shingle is not good. Cracks and crevices in a roof allow water to get into the roof structure and attic space. This will promote mold growth and other damage to the roof.
Damage to the seal – If the hail damages the seal strip or weakens it at all, the shingles will be capable of blowing off the roof during the wind storm. Check for any loose shingles when the storm is over.
https://youtu.be/TZreBlAUU1U
Other Recommended Maintenance
Now that you understand what hail damage to a roof looks like, you can proceed with a roof inspection checklist. This allows you to look for any exposed nails, missing tiles, or flashing to name a few. If there are damaged shingles, they should be repaired or replaced immediately.
Next, check the ceilings to make sure there are no wet spots. Any wet spots are a sign that you have a roof leak. Check to see if there is damage to your shingles, flashing, or roof vent seals. You will need to call a professional to check for you.
Lastly, if you really want to know what kind of damage could occur to your roof after a hail storm, get to know what shingles are made of.
l
When Do I Call A Professional?
To get your roof inspected after a hail storm you should reach out to your local home inspection team. Also, consider hiring a local professionally licensed roofing contractor that understands the specifics regarding your roofing material. Together these professionals can come up with a solution and some reports for your insurance company. Keep in mind that your insurance company will want multiple estimates for roof repairs.
https://insideandoutpropertyinspectors.com/wp-content/uploads/2023/04/hail_damage_markings_25.jpeg10001500BJ Johnsonhttps://d39oyu4lp7snwz.cloudfront.net/wp-content/uploads/sites/54/2019/08/31171419/io-favicon-300x300.pngBJ Johnson2023-04-25 15:37:152024-12-24 19:47:06What Does Hail Damage On A Roof Look Like?
When you make the big decision of purchasing a home, you want to remind yourself that this investment requires upkeep and maintenance. Having pets that wander your carpet or spills that occur on the carpet could cause a few concerns. In most cases, homeowners do not think of the overuse of their carpets. Some homeowners will hire a carpet cleaning company once a year to clean the carpets. However, this doesn’t necessarily solve all of the issues. Luckily, if your carpet smells, a carpet cleaning company might help. Wondering how to get the smell out of carpet? There are a variety of ways to get this done, baking soda, and vinegar are always an option.
Let’s take a look below at how you can keep your carpet smelling fresh.
What Are The Steps?
Every home project requires a particular level of instructions or directions. Let’s take a look at how we can get the foul odors out of the carpet.
Sprinkle the Baking Soda – Baking soda has many uses in your home. As a natural odor absorber, it can be used in your closet, garbage, garbage disposal, or on your carpets. Spread the baking soda around your carpet.
Spread the Baking Soda – With your shoes on, walk around the carpet to spread the baking soda around the carpet. It is important to spread the baking soda around.
Let it settle in – Allow the baking soda to settle into the carpet for roughly 30 minutes. You want the baking soda to seep down to the base of the carpet. Not only will it soak up odors, but it will also grab excess moisture.
Suck it up – Grab your vacuum cleaner and vacuum up the baking soda.
Still smells – Repeat these steps until you no longer have a smell.
How Can I Keep My Home Smelling Fresh?
Luckily, if the baking soda trick doesn’t work, there are a few other tricks that you can pull off. Let’s take a look below at what those other options might be.
Essential oils – Masking the smells in your home with essential oils is a great way to naturally eliminate odors. If you don’t have an oil diffuser, just mix the correct amount of oil drops with water into a spray bottle. Then spray the mixture onto your carpet.
Fruit peels – Cut up the fruit peels for oranges, limes, or lemons, and grind them into your garbage disposal. This will create a fruity smell in your kitchen that can mask other odors in your home.
Crockpot – With the lid off and the crockpot on the “low” setting, mix baking soda and water and let the heat from the crockpot do the trick.
Vinegar and water – If you have a mildew smell coming from your carpet, mix 2 cups of warm water with 1 cup of distilled white vinegar. Gently spray the vinegar solution onto your carpet. Once the carpet dries, you will no longer smell the vinegar scent.
Keep in mind that you can also look to cleaning products such as hydrogen peroxide or carpet shampoo. You will want the area dry and if not, use a fan to air dry the carpet.
Other Recommended Maintenance
Now that you have an idea of how to get a smell out of your carpet, you can begin reading up on how to remove mold from your carpets. Mold is a likely proponent of your smelly carpet. Understanding how to remove the mold will determine if you need to replace the carpet or simply get it cleaned.
Next, while using a carpet cleaner or scrubbing away mold and stains, soap is likely to settle on the carpet. Removing the soap from the carpet is important. You will want to read up on how to clean soap out of your carpets. This will ensure that the carpet gets properly dried.
Lastly, the moment that you start cleaning your carpet, you will want to know how long it takes the carpet to dry. If you do not dry the carpet promptly, then you risk the carpet breeding mold and mildew. Consequently, if this occurs, you will be back to square one about getting smells out of your carpet.
When Do I Call A Professional?
Carpet cleaning services are fairly prevalent in most communities. If you do not have a local carpet cleaning service, it is possible that you could rent a carpet cleaning machine from your local hardware store. Once you have completed the recommended cleaning steps above, determine how effective they were. If you aren’t satisfied, reach out to your local home inspection team. They can inspect your carpet and other floors. Also, they can refer a reputable carpet cleaning company.
Conclusion
After you have attempted to get the smells out of your carpet keep a record of how many times this maintenance occurs. Consequently, this might be a situation where it is time to replace your carpet. In some cases, the padding underneath the carpet can get moldy and soggy and creates a constant smell. This would be a good time to get a home inspection. They can conduct a thorough inspection of your carpet and flooring. Reach out to Inside and Out Property Inspectors in Jacksonville, FL, and surrounding areas to get your home inspection done today.
https://insideandoutpropertyinspectors.com/wp-content/uploads/2023/03/baking_soda_and_fruit_peels_25.jpeg9601440BJ Johnsonhttps://d39oyu4lp7snwz.cloudfront.net/wp-content/uploads/sites/54/2019/08/31171419/io-favicon-300x300.pngBJ Johnson2023-03-16 15:23:382023-03-16 15:23:38How To Get Smell Out Of Carpet
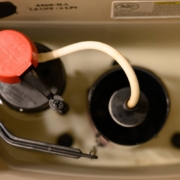
One of the few frustrating maintenance items in a home involves your toilet. When the fill valve in your toilet begins to malfunction, it could cause the water levels in your toilet to be off. Once you flush the toilet, the fill valve will work to refill the toilet tank and bowl. Unfortunately, if the fill valve is not working in unison with the amount of water needed in your toilet bowl overflowing could occur. How do I adjust the water level in the toilet? In most cases, use your screwdriver to adjust the fill valve float in your toilet tank. let’s take a look below at what this means.
What Type Of Fill Valve Do I Have?
Before you decide how to adjust the water level in your toilet, you need to know the type of fill valve that you have. Take the lid off your toilet tank and look at the type of fill valve. Let’s take a look below at what type of fill valves could be in your toilet tank.
Cylinder style float – This style of fill valve looks like a plastic cylinder that has an opening going through the middle of the cylinder.
Ball and Arm float – This style of fill valve has a metal arm with a ball attached at the end of it.
How Do I Adjust Each Fill Valve?
Adjusting the water level in your toilet tank and toilet bowl should occur with the fill valve. Each type of fill valve can be adjusted so that your water levels can shift to meet your needs. Let’s take a look below at the steps to adjust each type of fill valve.
Ball and Arm Float
Remove the toilet tank lid.
Check the current water level in the tank so that you know how to adjust the float.
Check the height of the floating ball that is connected to a metal rod. You will see a plastic ball that is floating at the water level.
Turn off the water. Twist the water line feed into the off position. There is an oblong handle that you can turn clockwise until the handle is tight.
Flush the toilet to empty the water from the toilet tank.
Now, adjust the water level by turning the screw that is connected to the ball and arm float with a screwdriver.
Turning the screw clockwise will raise the water level.
Turning the plastic screw counterclockwise will decrease the water level.
Flush the toilet to test the water levels and determine if you need to make any other adjustments.
Cylinder style Float
Remove the toilet tank lid.
Check the current water level so that you know how to adjust it.
Find the cylinder float on the shaft of the fill valve.
Turn off the water. Twist the water line feed into the off position. There is an oblong handle that you can turn clockwise until the handle is tight.
Flush the toilet to empty the water from the toilet tank.
Look for the release clip that is connected to the change stem. Also, this connects the float to the stem.
Gently pinch the release clip to raise or lower the float.
If that doesn’t work, get your screwdriver and gently twist the plastic screw located on the cylinder arm.
Turn the plastic screw clockwise to lower the cylinder float.
Turn the plastic screw counterclockwise to raise the cylinder float.
Check your desired water level by flushing the toilet and testing out the level each time you twist the screw.
Make adjustments based on the water level.
Other Recommended Maintenance
Now that you learned about adjusting the water level in the toilet, let’s take a look at other areas of maintenance.
One of those areas is the toilet leaking. If you see water outside of the toilet on the floor near the base, you want to stop using it. This is because the water has bacteria in it and will ruin the floor. You will want to make sure the t-bolt is in place and check the wax ring.
The next area is a gurgling bathroom sink. If you have a gurgling bathroom sink, this can be due to a vent pipe clogged, a bathroom drain clogged, a clogged garbage disposal, a P-trap that is busted, or a clogged drain.
Lastly, if you see that you have low water pressure in the sink, it can be due to a few things. It can be the aerator, a blockage in the faucet, or pipes. Once you figure out what it is, you can also flush the water heater to increase the water pressure.
When Do I Call A Professional?
Dealing with the maintenance of your toilet bowl and toilet tank can be rather frustrating. In most cases, it is best to hire a local master plumber. Not only can they update the fill valve in your toilet tank, but they can also check for leaks. If you aren’t sure who to call, reach out to your local home inspection team. Consequently, they can inspect your entire plumbing system and recommend any plumbing repairs. Also, they can refer a reputable local master plumber to complete the project.
Conclusion
Having to mess with a plumbing project can be rather frustrating. Most homeowners don’t have the tools to loosen or disconnect parts involved with a toilet. Additionally, having the strength to disconnect the various parts could be troubling. Luckily, you can reach out to your local reputable master plumber. Before you do that, go ahead and reach out to your local home inspection team. They can inspect and assess your entire plumbing system. Contact Inside and Out Property Inspectors in Jacksonville, FL, and surrounding areas to get your sewer scope inspection done today.
https://insideandoutpropertyinspectors.com/wp-content/uploads/2023/01/toilet_fill_valve_25.jpeg10061512BJ Johnsonhttps://d39oyu4lp7snwz.cloudfront.net/wp-content/uploads/sites/54/2019/08/31171419/io-favicon-300x300.pngBJ Johnson2023-01-09 18:56:142024-04-05 14:00:29Adjust the Water Level in Your Toilet